The Photographer's Guide to Luminar 4

The Photographer's Guide to Luminar 4
Автор книги: id книги: 1618832     Оценка: 0.0     Голосов: 0     Отзывы, комментарии: 0 2158,06 руб.     (19,98$) Читать книгу Купить и скачать книгу Купить бумажную книгу Электронная книга Жанр: Программы Правообладатель и/или издательство: Ingram Дата добавления в каталог КнигаЛит: ISBN: 9781681984063 Скачать фрагмент в формате   fb2   fb2.zip Возрастное ограничение: 0+ Оглавление Отрывок из книги

Реклама. ООО «ЛитРес», ИНН: 7719571260.

Описание книги

Skylum’s Luminar 4 is a great solution for both professional and amateur photographers who want to quickly create stunning photos. Luminar’s advanced AI-based tools eliminate hours of traditional editing tasks, whether you’re applying automatic tone and color adjustments, replacing dreary skies with more dynamic ones, or retouching portraits to smooth skin, remove blemishes, and accentuate flattering facial features. For those who want to dig into editing, powerful tools give you full control over your RAW and JPEG images, including advanced features such as layers, masks, blend modes, and lens correction. Luminar also works as a plug-in for other applications, such as Adobe Photoshop, Lightroom Classic, and Apple Photos, allowing round-trip editing and seamless integration with workflows you may already have in place.<p/>
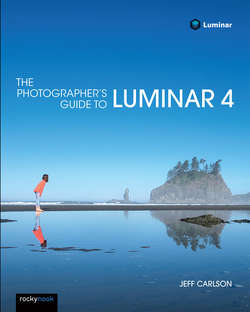
Luminar 4 is deceptively deep, and in <i>The Photographer’s Guide to Luminar 4</i>, photographer Jeff Carlson helps you discover Luminar 4’s best features to take full advantage of the program for all your photography needs. From importing your images to editing, managing, and exporting your files, Jeff showcases the power, precision, and control of Luminar while teaching you to work quickly and efficiently. In this book, he walks you through real-world landscape and portrait edits, and covers every tool and feature with the goal of helping you understand how to make Luminar improve your images. <p/>
In this book you’ll learn all about:<p/>
<ul>• <b>AI editing:</b> Luminar 4’s many AI-based tools eliminate hours of traditional editing tasks. Improve overall tone and color using just one slider, and enhance a sky using another without building masks or layers. Realistically replace the entire sky in one step, even when objects like buildings or trees intrude. Luminar identifies faces in photos, allowing you to smooth skin, sharpen eyes, brighten faces, and perform other portrait retouching tasks in minutes.</ul>
<ul>• <b>Expert editing:</b> Take advantage of Luminar’s many professional tools to bring out the best versions of your photos. Enhance the look using tone controls and curves, dodging and burning, and tools built for specific types of images, such as Landscape Enhancer, Adjustable Gradient, and B & W Conversion. The Erase and Clone & Stamp tools make it easy to remove unexpected objects and glitches such as lens dust spots. Luminar’s RAW editing engine includes real-time noise reduction and advanced color processing and sharpening tools, all completely non-destructive and with the ability to step back through the history of edits.</ul>
<ul>• <b>Advanced editing:</b> Use layers, masks, blend modes, and lens corrections to combine edits and effects.</ul>
<ul>• <b>Creativity: </b>Open your imagination with Luminar’s creative tools, which range from adding glow, texture, and dramatic looks to incorporating sunrays and objects into augmented skies.</ul>
<ul>• <b>Presets and LUTs (Lookup Tables):</b> Learn how to use Luminar Looks presets and LUTs to bring the look of simulated film stocks and creative color grades to your work.</ul>
<ul>• <b>Luminar Library:</b> Organize and manage your photos in a central library where your source images can reside where you want them, whether that’s on your hard disk, a network volume, or in local cloud services folders such as Dropbox or Google Drive for remote backup.</ul>
<ul>• <b>Luminar plug-ins:</b> If you already use other applications to organize your library or for photo editing, such as Adobe Photoshop or Lightroom Classic, Luminar 4 also works as a plug-in that allows round-trip editing and seamless integration with the workflows you may already have in place.</ul>
<ul>• <b>Sharing images:</b> Whether you’re printing your images or sharing them online, learn how to make your photos look their best no matter what output solution you need.</ul>
Bonus Content: Includes an exclusive offer and free download from Skylum for creative add-ons.
Оглавление

Jeff Carlson. The Photographer's Guide to Luminar 4

The Photographer's Guide to Luminar 4

About the Author

Table of Contents

Introduction

How to Read This Book

1 The Luminar Studio

The Sidebar

Edit Tools

The Histogram

Compare and Quick Preview

Hide/Show All Panels and Full Screen Preview

The Looks Panel

Zoom

The Canvas Panel

History

The Library

View Photos in the Library

The Info Panel

Change the Background Color

2 The Paths to Luminar

Edit a Single Image

Remove a Single Image Edit from Luminar

Add a Single Image Edit to Your Library

Edit a Photo from Another Application

Install Luminar plug-ins

Edit a Photo from Lightroom Classic

Transfer to Luminar 4

Edit in Luminar 4

Copy File Options

Edit from Photoshop or Photoshop Elements

Edit from Photos for macOS

Edit a Photo in the Luminar Library

Add Source Folders

Add Subfolders

Remove a Source Folder

Handle Offline Volumes

Locate Missing Edited Files

Work with Raw+JPEG Pairs

Add New Photos to the Library

3 Landscape Walkthrough

Evaluate the Photo

Get Luminar’s Opinion

Adjust Exposure

Adjust White Balance

Punch Up the Foliage

Draw Attention Away from the Rocks

Adjust the Waterfalls

Add Effects and Final Touches

Enhance Details

Remove the Person

Before and After

4 Portrait Walkthrough

Evaluate the First Photo

Edit Tone and Color

Enhance the Skin

Enhance the Face

Apply Spot Touch-Ups

First Photo Before and After

Evaluate the Second Photo

Let Luminar Do (Much of) the Work

Enhance the Skin and Face

Brighten the Subject

Correct Skin Tones

Fix the Eye Reflection and Apply Touch-ups

Second Photo Before and After

5 Editing Tools

Editing Tool Fundamentals

Tool Controls

Edit Tools, Layers, and Blend Modes

Understand the Histogram

How to Read the Histogram

Essentials Tools

Light

White Balance

Exposure

Smart Contrast

Highlights

Shadows

Whites (Advanced Settings)

Blacks (Advanced Settings)

Curves (Advanced Settings)

Profile (Advanced Settings)

AI Enhance

AI Accent

AI Sky Enhancer

AI Structure

Color

Saturation

Vibrance

Remove Color Cast

Hue, Saturation, and Luminance (Advanced Settings)

Hue Shift (Advanced Settings)

B&W Conversion

Luminance

Saturation

Details Enhancer

Details (Small, Medium, and Large)

Details Protection (Advanced Settings)

Details Masking (Advanced Settings)

Sharpen

Sharpening Radius (Advanced Settings)

Sharpening Masking (Advanced Settings)

Denoise

Luminosity Denoise

Color Denoise

Boost (Advanced Settings)

Landscape Enhancer

Dehaze

Golden Hour

Foliage Enhancer

Foliage Hue (Advanced Settings)

Vignette

Amount

Size

Choose Subject

Mode (Advanced Settings)

Roundness (Advanced Settings)

Feather (Advanced Settings)

Inner Light (Advanced Settings)

Creative Tools

AI Sky Replacement

Sky Selection

Horizon Blending

Horizon Position

Relight Scene

Sky Global

Close Gaps (Advanced Settings)

Sky Local (Advanced Settings)

Sky Defocus (Advanced Settings)

Flip Sky (Advanced Settings)

Atmospheric Haze

Sky Temperature and Sky Exposure (Advanced Settings)

AI Augmented Sky

Object Selection

Place Object

Warmth and Relight

Mask Refinement (Advanced Settings)

Defocus (Advanced Settings)

Sunrays

Place Sun Center

Amount

Overall Look

Sunrays Length

Penetration

Number of Sunrays (Advanced Settings)

Sun Radius, Sun Glow Radius, Sun Glow Amount (Advanced Settings)

Sun Warmth, Sunrays Warmth (Advanced Settings)

Randomize (Advanced Settings)

Dramatic

Local Contrast

Brightness and Saturation (Advanced Settings)

Matte Look

Fade

Contrast

Saturation (Advanced Settings)

Color Toning (Advanced Settings)

Vividness (Advanced Settings)

Mystical

Shadows

Smoothness (Advanced Settings)

Saturation and Warmth (Advanced Settings)

Color Styles (LUT)

Texture Overlay

Load Texture

Blend Mode

Opacity and Zoom

Brightness, Contrast, Saturation, Hue (Advanced Settings)

Glow

Type

Brightness

Smoothness (Advanced Settings)

Warmth (Advanced Settings)

Film Grain

Amount

Size (Advanced Settings)

Roughness (Advanced Settings)

Fog

Portrait Tools

AI Skin Enhancer

Shine Removal

AI Skin Defects Removal

Portrait Enhancer

Face Light

Red Eye Removal, Eye Whitening, Eye Enhancer, Dark Circles Removal

Slim Face

Enlarge Eyes

Eyebrow Improve

Lips Saturation, Lips Redness, Lips Darkening

Teeth Whitening

High Key

Standard High Key, Dynamic High Key

Blacks

Glow (Advanced Settings)

Contrast (Advanced Settings)

Saturation (Advanced Settings)

Orton Effect

Type

Softness (Advanced Settings)

Brightness, Contrast, Saturation (Advanced Settings)

Professional Tools

Advanced Contrast

Highlights Contrast, Midtones Contrast, and Shadows Contrast

Highlights Balance, Midtones Balance, and Shadows Balance

Adjustable Gradient

Tones, Warmth, and Vibrance

Set Orientation

Dodge & Burn

Color Enhancer

Brilliance/Warmth

Color Contrast

Split Color Warmth

Color Balance (Advanced Settings)

Photo Filter

Split Toning

Deprecated Tools

Bi-Color Toning

Channel Mixer

Cross Processing

Polarizing Filter

6 Canvas Tools

Crop & Rotate

Rotate

Rotate Left (macOS Only)

Crop

Flip Horizontal and Flip Vertical (macOS Only)

Reset

Erase

Clone & Stamp

Lens & Geometry

Transform Controls

7 Luminar Looks

Apply Looks

Favorite Looks

Overlay Looks

Create Your Own Looks

Export and Import Looks

8 Layers

Layers Fundamentals

Layer Types

Work with Layers

Blend Modes

How Blend Modes Work

Choose a Blend Mode

Darken

Multiply

Color Burn

Lighten

Screen

Overlay

Soft Light

Hard Light

Difference

Subtract

Hue

Color

Luminosity

Layer Transform

Blend Modes and Layer Transform: Add a Watermark

9 Advanced Editing

Masking

Masking Fundamentals

Brush Mask

Radial Mask

Gradient Mask

Luminosity Mask

Editing a Portrait Using a Luminosity Mask

Layer Compositing

Sync Adjustments

Deal with Sky Reflections in AI Sky Replacement

Automating with Photoshop Actions

Strategies for Speeding Up Luminar

10 Luminar Library

Use Library Shortcuts

Rate and Flag Photos

Star Ratings

Flagged/Rejected

Color Labels

Sort Photos

Filter Photos

Work with Albums

Remove Photos from Albums

Add an Album to Shortcuts

Remove Photos from the Library

Locate Missing Folders and Edits

Back Up and Restore the Catalog

Work with Multiple Catalogs

11 Sharing Photos

Export to Image

Location

File Name

Format

Sharpen

Resize

Color Space

Quality

Compression

Depth

Resolution

Share to Services

Open in Other Applications (macOS)

Batch Process Multiple Photos

Отрывок из книги

Jeff Carlson

Web: jeffcarlson.com

.....

Professional Tools

Deprecated Tools

.....

Добавление нового отзыва

Комментарий Поле, отмеченное звёздочкой  — обязательно к заполнению

Отзывы и комментарии читателей

Нет рецензий. Будьте первым, кто напишет рецензию на книгу The Photographer's Guide to Luminar 4
Подняться наверх