Оглавление
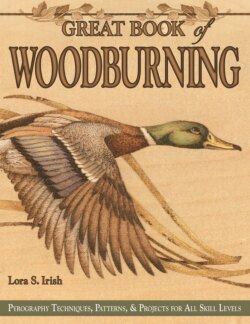
Lora S. Irish. Great Book of Woodburning
What is Pyrography?
Dedication
Acknowledgments
Contents
About the Author
Introduction
What is Pyrography?
Gallery
Part 1
Woodburning Basics
Woodburning Tools and Equipment
Woodburners/pyrographic machines
One-Temperature Tool with Interchangeable Solid Brass Tips
Variable-Temperature Tool with Interchangeable and Fixed Wire Tips
Other tools
What you’ll need
Keeping your tool tips clean
Selecting Wood for Woodburning
Features to consider
Hard Wood or Soft Wood?
Fine Grain or Coarse Grain?
Plain Grain or End Grain?
High Sap Contents or Low Sap Contents?
Light Wood or Dark Wood?
Untreated or Pretreated?
Wood species
Basswood
Basswood, End Grain
Birch
Birch, Heartwood Grain
White Pine and Sugar Pine
White Pine, Sapwood
Butternut
Preparing the Surface
Preparing a wood surface for burning
Tracing the pattern
Resizing the pattern
Transferring the pattern to the wood
Finishing Steps for Woodburning
Sanding and erasing the finished burning
Adding color to your project
Colored Pencils
Watercolors
Oil Paints
Sealing the wood project
Part 2
Practice
Using Shading and Texture
Creating light and dark tones
Temperature of the Tip
Conducting Burn Tests
Burning Time
Layers of Strokes
Type of Tip
One-Temperature Tool Techniques
Style of Stroke
Creating texture strokes
Physical, or Actual, Texture
Variable-Temperature Tool Techniques
Creating a Practice Board
Tonal value, or sepia scale value, textures
Dash Stroke
Linear Circles
Wide-Spaced Crosshatch
Tight-Spaced Crosshatch
Random Curls
Scrubby Lines
Repeating pattern textures
Check Marks and Zigzags
Wavy Lines and Sea Shell Circles
Letters and Numbers
Mountain Peaks
Quilting
Scales
Herringbones
Ripples
Straight-Line Variations
Hearts and Circles
Tightly Packed Spots and Long Scale Strokes
Other texturing and shading patterns
Long and Short Curved Lines
Sun Rays or Grass Strokes
Practice designs
Close-Up Tree Branches and Leaves
Wood Grain Texture
Tall Grass and Grass Clumps
Small Crosshatched Elements
Background Trees
Building Construction and Wall Construction
Patterns for Practice
Light and Dark Exercise One: Temperature of the Tip
Light and Dark Exercise Two: Burning Time
Light and Dark Exercise Three: Layers of Strokes
Light and Dark Exercise Four: Texture Pattern
Light and Dark Exercise Five: Putting It All Together
Texture Exercise One: Putting Textures Together
Composition of a Good Woodburning
Understanding tonal values
What Exactly Are Tonal Values?
Finding the Tonal Values in a Photo or Drawing
Value #1—Black (darkest value)
Value #2—Dark chocolate (dark value)
Value #3—Milk chocolate (medium-dark value)
Value #4—Coffee with cream (medium value)
Value #5—Tanned leather (light-medium value)
Value #6—Caramel (light value)
Value #7—Linen (palest value)
Value #0—Unburned areas
Transferring the Values
Focusing attention
Adding texture
Creating shadows
Using multiple techniques
Outlining your design
Not every element must be burned
Protecting Areas from Woodburning
Shape versus coloring in a pattern
Tonal Value Project: The Pocket Watch
Step 1: Tracing and Outlining
Step 2: Very Dark Tones
Step 3: Dark Tones
Step 4: Medium Tones
Step 5: Light Tones
Step 6: Finishing Steps
Creating a Real Wall Clock
Part 3
Projects & Patterns
Beginning Projects
Creating the Dragonette Step-by-Step
Step 1–6: Transferring the pattern
Step 7–10: Shading one side of the body
Step 11–12: Shading the remaining body
Step 13–15: Belly-fold shading
Step 16–18: Belly shading for the remaining side
Step 19–20: Adding wing shadows to the body
Step 21–33: Detailing the face
Step 34–35: Long wing feathers
Step 36: Adding a second layer to the back wing
Step 37: Outlining the shoulder feathers
Step 38–41: Burning the shoulder feathers and tail
Step 42–43: Shading the body of the shield
Step 44–46: Adding extra layering to the shield
Step 47–52: Finishing
Dragonette Chessboard
Dragonette Chessboard with Coloring
Dragonette Chessboard Color Chart
Intermediate Projects
Creating the Mallard Drake Step-by-Step
Step 1–6: Transferring the pattern, pale outlining
Step 7–8: The back wing
Step 9–10: Russet breast and tail underside
Step 11–16: Underbelly & undersides of tail feathers
Step 17–19: Forward section of the back
Step 20–21: Upper tail section
Step 22–23: Shading the head
Step 24–26: Mid-tone shading for the face
Step 27–31: The eye
Step 32–35: Shading the bill
Step 36–38: Upper front wing feathers
Step 39–42: Outer grouping of front wing feathers
Step 43–44: Flight feather details
Step 45–46: Coloring wing feathers
Step 47: Dark half circles on colored feathers
Step 48: Short flight feathers
Step 49: Upper colored feathers
Step 50–54: Wing shoulder
Step 55–58: Cattail leaves
Step 59–61: Cattail heads
Step 62–68: Finishing
Step 69–74: Colored pencil work
Advanced Projects
Creating The Country Church Step-by-Step
Step 1–6: Transferring the pattern
Step 7–13: Large background pines and oak trees
Step 14–18: Small background pines and oak forest line
Step 19–27: Church roofs and cross
Step 28–30: Adding shadow lines and guidelines
Step 31–32: Detailing the siding boards
Step 33–36: Roof overhang shadows
Step 37–38: Shading the front walls
Step 39–43: Detailing the doors, windows, and walls
Step 44–45: Adding door and entry shadows
Step 46–50: Stone foundation
Step 51–53: Large shrubs
Step 54–55: Stepping stone path
Step 56–57: Foreground grass
Step 58–60: Large foreground grass clump
Step 61–66: Finishing
Glossary
About the Author:
