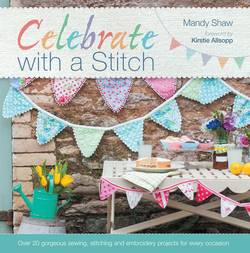
Celebrate with a Stitch

Реклама. ООО «ЛитРес», ИНН: 7719571260.
Оглавление
Mandy Shaw. Celebrate with a Stitch
Contents. Foreword by Kirstie Allsopp. Introduction. Get Ready to Stitch. Bunting. New Baby
Wedding
Birthdays
Christmas
Celebration Quilt
Foreword
Introduction
Get Ready to Stitch
Fabrics and Threads
Fabrics
Felt
Vintage
Tip
Embroidery threads
Coton à broder
Stranded cotton (floss)
Maderia Lana
Sewing notions
Working the Appliqué
Working with fusible webbing
Tip
Types of fusible webbing
Tips for Hand appliqué
Tips for machine appliqué
Tip
Working the Stitches
Transferring the embroidery designs
Starting and finishing stitching
SATIN STITCH
Right-handers (black dot indicates start point)
Left-handers (black dot indicates start point)
RUNNING STITCH
Right-handers (black dot indicates start point)
Left-handers (black dot indicates start point)
Tip
WHIPPED RUNNING STITCH
Right-handers (black dots indicates start points)
Left-handers (black dots indicates start points)
BACKSTITCH
Right-handers (black dot indicates start point)
Left-handers (black dot indicates start point)
Tip
BLANKET STITCH
Right-handers (black dot indicates start point)
Tip
Left-handers (black dot indicates start point)
CHAIN STITCH
Tip
Right-handers (black dot indicates start point)
Left-handers (black dot indicates start point)
LAZY DAISY
Right-handers (black dot indicates start point)
Left-handers (black dot indicates start point)
Tip
HERRINGBONE STITCH
Tip
Right-handers (black dot indicates start point)
Left-handers (black dot indicates start point)
FRENCH KNOT
Right-handers (black dot indicates start point)
Left-handers (black dot indicates start point)
Tip
CROSS STITCH
Right-handers (black dot indicates start point)
Left-handers (black dot indicates start point)
Tip
STEM STITCH
Right-handers (black dot indicates start point)
Left-handers (black dot indicates start point)
Tip
Bunting
You will need for a length of standard bunting
To make standard bunting
Tip
To make vintage bunting
To make baby bunting
New Baby
Baby Sampler
You will need…
Tip
Tip
First Blanket
You will need..
Tip
Dribble Bibs
You will need..
Tip
Snuggle Rabbit
You will need..
First Shoes
You will need..
Baby Gift Bag
You will need..
Wedding
Wedding Bunting
You will need
Tip
Hanging Heart
You will need
Tip
Vintage Posies
You will need
Tip
Bridesmaids’ Gifts
You will need… For the button brooch
For the button bracelet
To make the button brooch
Tip
To make the button bracelet
Tip
Ring Cushion
You will need
Top Table Lampshades
You will need
Tip
Tip
Birthdays
Birthday Cakes
You will need for one cake
To make the bottom layer
To make the top layer
To make the candles
Tip
Tip
Birthday Badges
You will need
Tip
Birthday Party Stitchery
You will need
Tip
Embroider the design. Brown (DMC 0375)
Red (DMC 0047)
Blue (DMC 0142)
Light blue (DMC 0140)
Green (DMC 0242)
Dark pink (DMC 0039)
Flesh (DMC 0276)
Yellow (DMC 0301)
Tip
Crowns and Tiaras
You will need… For the tiara
For the crown
To make the tiara
To make the crown
Seven More Sleeps
You will need
Prepare the fabrics
Make and assemble the bed rows
Tip
Appliqué the birthday party scene and complete the assembly
Tip
Make the name and date holders
Quilt the wall hanging
Make the doors
Embellish and quilt the party scene
Attach the doors
Tip
Add the final embellishments
Make Bertie the bear
Make the hanging loops
Christmas
Christmas Lampshades
You will need… For the embroidered lampshade
For the robin appliqué lampshade
To make the embroidered lampshade
To make the robin appliqué lampshade
Mini Tree Bunting
You will need
Tip
Tip
Tip
Christmas Pennant
You will need
Robin Decorations
You will need for one robin
Celebration Quilt
Friendship Quilt
You will need
Pennants
Standard Pennant. You will need
Tip
Techniques. Binding
Making a double-bound edge
Using ready-made binding
Utility stitches
Ladder stitch
Slip stitch
Making bar tacks
Spray basting
Making a quilt sandwich
Edging with medium/wide ric-rac braid
About the Author
Acknowledgments
Suppliers. UK
USA
Отрывок из книги
Baby Sampler
First Blanket
.....
For a whipped chain stitch sew over the stitches again with the blunt end of the threaded needle.
Work from right to left. Bring the needle and thread up at the start point. Holding the thread to the left, put the needle back in where it first came out and bring the needle tip out again a little way beyond this point. Make sure the thread is under the needle and gently pull through.
.....