Читать книгу Urban Farm Projects - Kelly Wood - Страница 9
На сайте Литреса книга снята с продажи.
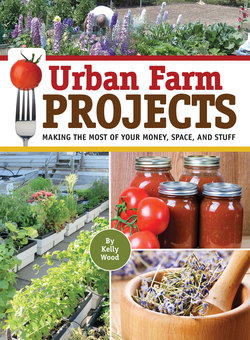
ОглавлениеProject 4: Condiments and Seasonings
Why would you want to do this? If you like to cook, these are quick and easy products to experiment with.
Why wouldn’t you want to do this? You don’t want to clean out your blender (that was my excuse for a while!).
How is this different from the store-bought version? The textures can be a little different; for example, homemade mayonnaise is oilier, and homemade ketchup separates a bit. You may also notice a taste difference. I like the challenge of trying to figure out which flavors are missing from my versions and seeing how close I can get to the mass-produced stuff, but often some of the tastes come from preservatives or chemicals, which you don’t have in the homemade products.
Cost comparison: Each of these recipes results in a lower cost per ounce than store-bought varieties; the biggest savings is with the vanilla extract.
Skills needed: Basic cooking skills. Store-bought condiments and flavorings are good examples of how we spend more money for the convenience of having something made and packaged for us. Flavors and simplicity aside, the price difference of making these products yourself is enough to encourage you to try it.
We quickly and routinely deplete condiments in our house. Inevitably, a scant spoonful is all that the kids leave in the container. My eldest sister taught me years ago how easy condiments are to make, and the homemade versions are much healthier because they don’t contain high-fructose corn syrup and many of the preservatives needed to keep mass-produced products fresh on grocery-store shelves.
Homemade condiments will spoil faster than store-bought versions, but they are easy to make in smaller quantities. I can honestly say that making your own can save you both money and time—I once raced my husband and made a batch of mayonnaise before he could get to the nearest store and back.
I don’t think that the homemade versions taste too different from store-bought. I refill the brand-name jars, and our teenage son hasn’t noticed (yet). And emulsification is fun to watch: it’s chemistry in action.
Materials for Each Project:
•Food processor or blender
•Measuring spoons and cups
•Rubber scrapers
•Storage containers and lids
Ketchup
You can make ketchup from cooked, pureed fresh tomatoes (remove seeds, as they impart a bitter flavor) or from canned tomato puree. This recipe yields about 5 cups.
Ingredients:
•4 cups fresh tomato puree (or a 28-ounce can)
•1 medium yellow onion, peeled and chopped
•1 clove garlic, peeled and crushed
•2 Tbsp brown sugar (dark gives a richer flavor)
•½ cup apple cider vinegar
•1 cup water
•Pinch or more of seach of following, according to your taste: ground allspice, finely ground black pepper, cayenne pepper, celery salt, ground cinnamon, ground cloves, dry mustard, ground ginger, koher salt
Step 1: Put ingredients into a blender or food processor.
Step 2: Puree until completely smooth.
Store in the refrigerator in a squeeze bottle. If the mixture separates, shake well before squeezing out.
Homemade ketchup is a fresh take on a condiment that‘s a staple in many homes. To can your ketchup in jars, as shown here, refer to the Canning and Pickling project (Project 10) in this section.
Mayonnaise
When I called my mother for her mayonnaise recipe, she was able to recite it right off the top of her head. I have vivid recollections of watching her make mayonnaise in her food processor and being fascinated. I marveled at the thin stream of oil slowly emulsifying the egg, completely transforming both ingredients. The recipe that follows yields approximately 1 cup.
Ingredients:
•1 egg
•1 cup oil
•1 tsp dry mustard powder
•½ tsp salt
•¼ tsp white pepper (you can use black pepper, but it makes specks in the mayo)
•1½ tsp white vinegar
•1–2 Tbsp lemon juice
Step 1: Crack the egg into the blender or food processor and then add the mustard powder, salt, and pepper.
Step 2: Start the blender or food processor. As it runs, slowly drizzle in the oil in a thin, steady stream (a blending device usually has a trough in the lid with a small hole for this purpose).
Step 3: When all of the oil has been added and the mixture is emulsified, stir in the vinegar and lemon juice—you may need to do this by hand—until everything is completely combined.
Store the mayonnaise in a jar in the refrigerator; it keeps for up to two weeks.
In a variation on the method presented in the recipe, you can use a hand mixer while slowly adding the oil.
Mustard
This recipe is simple yet full of possibilities for getting creative. You can vary the color of the mustard seeds to impart different tastes, and you can vary the grind to create different textures. You can change the proportion of vinegar to water and add different seasonings for a wide variety of flavors. This basic version has an initial spicy bite.
Ingredients/Additional Materials:
•1/3 cup mustard seeds (brown or yellow)
•¼ cup white vinegar
•2 Tbsp water
•¾ Tbsp sugar
•¼ tsp salt
•Spice grinder or coffee grinder
Step 1: Prepare your seeds according to the finished texture you want. For smoother mustard, grind the raw seeds in a spice grinder (for a rough grind) or coffee grinder (for a fine powder). Raw seeds are chewy, so toast them before grinding to make them more brittle and easier to grind. For coarser mustard, keep the seeds intact but soften them by soaking them overnight in vinegar and water.
Step 2: Combine the prepared seeds with the remaining ingredients in a bowl or a food processor. Refrigerate for twenty-four hours, stirring occasionally (the mixture will thicken).
Store the mustard in a jar or a small lidded crock in the refrigerator. It will keep for at least two weeks.
Once you’ve tried the basic recipe, experiment with flavor by using different types of mustard seeds.
Vanilla Extract
We’ve made our own vanilla extract for so long that I’d forgotten how tiny and expensive the store-bought bottles are. Whole vanilla beans are pricey—individual beans can cost more than a dollar each, and you’ll use six to ten beans for a pint of liquor. Let’s figure on $1 per bean for ten beans and around $10 for the bourbon, so a pint of homemade vanilla extract is going to cost you about $20. Because most recipes that call for vanilla extract require only a small amount, a pint will last you for a long time, and it’s still much cheaper per ounce than store-bought vanilla. We just keep topping our jar off with bourbon.
Ingredients/Additional Materials:
•10 whole vanilla beans
•1 pint bourbon (choose an inexpensive brand, but not rotgut)
•Optional: Pint jar
Step 1: Slice down the length of each bean, through just one side, leaving the ends intact and opening it up to expose the seeds.
Step 2: Stand the beans up in a jar or bottle that will hold a pint of liquid. Cover the beans with the bourbon. You can simply put the beans into the bourbon bottle if you pour out a little bit to compensate for the beans’ volume.
Step 3: Cap the bottle and shake it gently.
Step 4: Store the bottle in a dark place for five to six months, shaking gently once a week or so to blend and infuse.
Use the extract directly from the bottle; no filtering is necessary.
It’s normal for your homemade vanilla to appear a bit cloudy.
Spices
Because so many spices are exotic, they can be expensive, especially if you buy them prepackaged in little bottles or jars. Even buying in bulk, by the ounce or pound, can add up if you use a lot of a particular spice or spices. If this is the case, consider buying the seeds or nuts of your favorite spices and grinding them yourself. You’ll get more ground spice for your money. Grind only a little at a time; the flavor starts to deteriorate once the whole spice is ground. Unless otherwise noted, use a coffee grinder:
•Coriander (the very prolific seed of cilantro)
•Cloves
•Allspice
•Nutmeg (special grinders store whole nutmegs inside)
•Mace (the “web” of veining from the outside of a nutmeg)
•Cayenne pepper
•Ginger (peel, store in freezer, and grate frozen root as needed)
•Cumin
•Mustard
Ground (left) and dried (right) cayenne pepper.