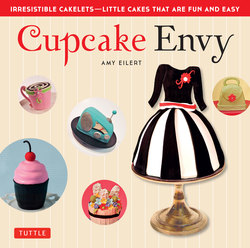
Читать книгу Cupcake Envy - Amy Eilert - Страница 10
На сайте Литреса книга снята с продажи.
Оглавление| In the Bag | Level Easy/IntermediateBatter yields enough cake for 1 cakeletFondant quantity listed is suitable to complete 1 cakelet |
The purse cakelet is always a big hit in my classes because it offers endless decorating possibilities. You can make it dainty, sophisticated, trendy, or whimsical. You can add flowers, polka dots, or even recreate a famous designer’s insignia. It’s so easy to customize for the lucky recipient. Just consider her favorite colors and sense of style, then let your imagination go.
Tools
9 x 6-in (23 x 15-cm) metal brownie pan
The Necessities (pages 11–12)
Purse template (see Templates, page 115)
Flower cutter set
Texture sheet
Ingredients
One 16-oz (455-g) box cake mix (any flavor) prepared, or batter for one 9-in (23-cm) cake
1 recipe Vanilla Frosting (page 17) or 1 container store-bought frosting
12 oz (340 g) white fondant (see Resources, page 114)
Red gel food coloring (or other accent color)
Yellow gel food coloring (or other base color)
Prepare the handle (two days prior to decorating)
1 Tint 11 oz (310 g) of the fondant with the yellow gel food coloring (or other base color of your choice).
2 Roll out 1 oz (28 g) of the base-color fondant into a curved, rounded strip to create the purse handle. Place on a piece of parchment paper and set aside to dry for at least two days at room temperature out of direct sunlight (to keep the color from fading). Wrap the remaining base-color fondant in plastic wrap until ready to use.
Bake the cake
1 Preheat oven to 350°F (180°C). Prepare the cake batter. Spray the brownie pan with non-stick spray.
2 Pour the batter into the pan, filling it three-quarters full. Smooth the top and bake for 20–30 minutes, or until the top springs back when lightly pressed and a toothpick inserted into the center comes out clean.
3 Place the pan on a wire rack to cool for about 10 minutes. If the cake rose above the pan, use a serrated knife to cut away the top of the cake to make it level (set the knife across the top of the pan so you can use it as a guide). Run a knife around the edge to loosen the sides. Invert the cake out of the pan onto a wire rack and allow it to finish cooling. When completely cool, wrap in plastic wrap and freeze for at least two hours until cold and firm.
Prepare to decorate
1 Remove the cake from the freezer and unwrap it atop a piece of parchment paper. Cut the cake in half. Apply a layer of Vanilla Frosting to one half and stack the other half on top.
2 Place the Purse template against the cake and use a sharp knife to cut out the cake, using the template as a guide. Use the knife to clean up any rough edges of the cakelet.
3 Using a tapered angled spatula, crumb coat the cakelet with Vanilla Frosting, starting around the sides of the cake and finishing on the top. Use enough frosting so that the spatula doesn’t come into direct contact with the cake. This will keep you from dislodging too many crumbs.
Cover the cakelet
1 Dust a clean, dry work surface with cornstarch. Roll out 6 oz (170 g) of base-color fondant into a ¼ in (6 mm) thick circle.
2 Slide your hands underneath the fondant using open palms so as not to poke a hole in it. Pick it up and lay it over the cakelet. Smooth the top first, using an open palm. Then smooth the fondant down over the sides. Use the pastry wheel to cut away excess fondant around the bottom of the cakelet.
3 Roll out the remaining base-color fondant into a ¼ in (6 mm) thick sheet. Use the Purse template to cut out a flap. Re-roll the fondant scraps and cut out a ¾ in (1.8 cm) wide by 12 in (30.5 cm) long strip for the bottom border of the purse.
Finishing touches
Set the texture sheet you prefer onto the fondant flap and border and press it in to make the indented pattern. Use a paintbrush to dab a little water where you want to adhere the border and gently press it into place. Repeat with the flap.
Embellishments: Tint the remaining white fondant into a contrasting color (or several colors) to use for embellishments. Consider making a flower, bow or a plaque with a monogram for the front of the flap. Use a paintbrush and water to adhere them.
Handle: Gently press the dry handle into the top of the purse to make a mark where you want it to go. Use a ball tool to push down into the marked areas to make holes, which will make it easier to insert the handle. (If you don’t do this step and simply push your handle in, you risk breaking it.)
| Breakfast at Tiffany’s | Level Easy/IntermediateBatter yields enough cake for 1 cakeletFondant quantity listed is suitable to complete 1 cakelet |
Who doesn’t love a little retail therapy? Anyone who lives for hitting the malls or who is always decked out in the latest styles will love this cakelet. The design is simple to create and you can customize the bag with your favorite store names, or the monogram of the recipient. Don’t be afraid to get creative and have fun with it!
Tools
The Necessities (pages 11–12)
9 x 6-in (23 x 15-cm) metal brownie pan
Small and medium flower cutters (see Resources, page 114)
Ingredients
One 16-oz (455-g) box cake mix (any flavor) prepared, or batter for one 9-in (23-cm) cake
1 recipe Vanilla Frosting (page 17) or 1 container store-bought frosting
1½ lbs (680 g) white fondant (see Resources, page 114)
Blue gel food coloring
Make the handles (two days prior to decorating)
1 Dust a clean, dry work surface with cornstarch. Using a fondant smoother, roll out two 4-oz (115-g) pieces of white fondant into two logs 6 in (15 cm) long and ¼ in (6 mm) thick. Bend each log into the shape of a “U.”
2 Place handles on a piece of parchment paper and set them aside to dry out for at least two days at room temperature out of direct sunlight (to keep the color from fading).
Bake the cake
1 Preheat oven to 350°F (180°C). Prepare the cake batter. Spray the brownie pan with non-stick spray.
2 Pour the batter into the pan, filling it three-quarters full. Smooth the top and bake for 20 to 30 minutes, or until the top springs back when lightly pressed and a toothpick inserted into the center comes out clean.
3 Place the pan on a wire rack to cool for about 10 minutes. If the cake rose above the pan, use a serrated knife to cut away the top of the cake to make it level (set the knife across the top of the pan so you can use it as a guide). Run a knife around the edge to loosen the sides. Invert the cake out of the pan onto a wire rack and allow it to finish cooling. When completely cool, wrap in plastic wrap and freeze for at least two hours until cold and firm.
Prepare to decorate
1 Remove cake from the freezer and unwrap. Use a serrated knife to cut out a 4½ x 3¼-in (11.25 x 8.1-cm) rectangle. Place upright on a piece of parchment.
2 Using a tapered angled spatula, crumb coat the four sides of the cakelet (but not the top or bottom) with the Vanilla Frosting. Use enough frosting so that the spatula doesn’t come into direct contact with the cake. This will keep you from dislodging too many crumbs.
Cover the cakelet
1 Tint ¾ lb (340 g) of the fondant with the blue gel food color. Dust a clean, dry work surface with cornstarch. Roll out the fondant into a sheet ¼ in (6 mm) thick and about 10 in (25.5 cm) long and 5 in (12.5 cm) wide.
2 Set the iced cake onto the fondant, allowing for an extra fondant lip at the top. (You want the fondant to be a little higher than the cake to give the impression of a bag and so you can add the fondant tissue paper effect coming out of the top.) Gently wrap the fondant around the cake and cut away any excess. Your fondant seam should be in the back corners of the cake. Smooth with palms or a fondant smoother.
3 Once the cake is completely wrapped, stand the cake upright onto a piece of parchment.
4 To make the bag creases, use the scoring tool to score a triangle at the bottom of each side of the bag. Starting at the top of the triangle, score a straight line up to the top of the bag.
Assemble
1 Use the blue gel food coloring to tint approximately 4 oz (115 g) of fondant a lighter or darker shade of blue to complement the bag. (You can divide the fondant in half and tint it two different shades, or chose a different color altogether—or opt to use none at all; I went with white in the example to the right). Roll the fondant out into a thin sheet. Use a pastry wheel to cut randomly-shaped pieces from it. This will be your “tissue paper.”
2 Apply frosting onto the top inside edge of the bag and use it to adhere the pieces of “tissue.” For a more realistic look, fold some pieces over the top of the bag.
3 Very gently press the dried handles into the “tissue” to make a mark where you want the handles to go. Use a ball tool to push down into the marked areas to make a hole, which will make it easier to insert the handles. (If you don’t do this step and simply push your handles into the tissue, you will risk breaking the handles…trust me!)
Finishing touches
Roll out the remaining white fondant into a sheet ⅛ in (3 mm) thick. Cut out several 4 in (10 cm) long strips that are ¾ in wide (1.8 cm). Use a little water to adhere the white fondant stripes vertically around the entire shopping bag.
Decorating ideas
Roll out fondant and use cutters or pattern tools to create embellishments for decorating the bag. Some ideas include: flowers, paisley motifs, store names, monograms, and patterns or stripes.
| Flower Party | Level EasyBatter yields enough cake for 4 mini cakeletsFondant quantity listed is suitable to complete 1 mini cakelet |
Sometimes even a cakelet is bigger than you need. When just a bite or two will do, this mini-cakelet is the perfect solution. It’s decorated with delicate flowers—a simple, versatile, customizable design that works for almost any situation, from tea parties to wedding favors.
Tools
9 x 13-in (23 x 33-cm) cake pan
The Necessities (pages 11–12)
3-in (7.5-cm) circle cutter
Medium blossom cutter
Toothpick
Ingredients
One 16-oz (455-g) box cake mix (any flavor) prepared, or batter for one 9-in (23-cm) cake
1 recipe Vanilla Frosting (page 17) or 1 container store-bought frosting
1 lb (455 g) white fondant (see Resources, page 114)
Red gel food coloring
Pink gel food coloring
Bake the cake
1 Preheat oven to 350°F (180°C). Prepare the cake batter. Spray the cake pan with non-stick spray.
2 Pour the batter into the pan, filling it three-quarters full. Smooth the top and bake for 25 minutes, or until the top springs back when lightly pressed and a toothpick inserted into the center comes out clean.
3 Place the pan on a wire rack to cool for about 10 minutes. If the cake rose above the pan, use a serrated knife to cut away the top of the cake to make it level (set the knife across the top of the pan so you can use it as a guide). Run a knife around the edge to loosen the sides. Invert the cake out of the pan onto a wire rack and allow it to finish cooling. When completely cool, wrap in plastic wrap and freeze for at least two hours until cold and firm.
Prepare to decorate
1 Use the pink food coloring to tint 4 oz (115 g) of the fondant the desired shade of light pink. Use the red food coloring to tint 5 oz (140 g) of the fondant the desired shade of dark pink. Wrap in plastic wrap until ready to use.
2 Remove the cake from the freezer and unwrap. Use the 3-in (7.5-cm) circle cutter to cut the cake into up to eight round mini cakes (you will need two mini cakes for one cakelet).
3 Coat the top of a mini cake with Vanilla Frosting. Stack another cake on top of it to create a layered mini cakelet about 3 in (7.5 cm) high.
4 Place the cakelet on a piece of parchment. Using a tapered angled spatula, crumb coat the cakelet with Vanilla Frosting, starting at the sides and finishing at the top. Use enough frosting so that the spatula doesn’t come into direct contact with the cake. This will keep you from dislodging too many crumbs.
Cover the mini cakelet
1 Dust a clean, dry work surface with cornstarch. Roll out 6 oz (170 g) of the white fondant into a circle ¼ in (6 mm) thick and 9 in (23 cm) in diameter.
2 Slide your hands under the fondant, lift up and lay it on top of the mini cakelet.
3 Use two fondant smoothers to smooth the top and sides of the cake. Cut away excess fondant around the base with a pastry wheel.
4 Place in the refrigerator to chill for 30 minutes.
Finishing touches
1 Dust a clean, dry work surface with cornstarch. Roll out 1 oz (28 g) of the white fondant into a 2-in (5-cm) ball. Flatten the bottom of the ball and use a little water to adhere it to the top of the mini-cakelet.
2 Roll out 4 oz (115 g) of the light-shaded pink fondant into a sheet ⅛ in (3 mm) thick. Use the medium blossom cutter to cut out approximately thirty blossoms.
3 Roll out 3 oz (85 g) of the darker shaded pink fondant into a sheet ⅛ in (3 mm) thick. Use the medium blossom cutter to cut out approximately twenty blossoms.
4 Use the ball tool to thin the edges of the petals. Loosely fold the flower in half, and then in half again. Spread the petals out a bit.
5 Brush the entire white ball with water. Use a veining tool to insert blossoms into it. You want the entire ball to be covered and appear lush, which is why it requires a lot of blossoms. Be sure to have a nice mixture of light shaded and dark shaded blossoms on the mini-cakelet.
6 Roll out 2 oz (55 g) of the darker shade of pink fondant into a strip approximately ⅛ in (3 mm) thick, 9 in (23 cm) long, and ¾ in (1.8 cm) wide.
7 Adhere the pink fondant strip around the base of the mini-cakelet using water and a paintbrush.
| Playing Dress-Up | Level Easy/IntermediateBatter yields enough cake for 4 cakeletsFondant quantity listed is suitable to complete 1 cakelet |
Is there anything more fabulous than a beautiful dress custom-made just for you? How about one you don’t have to worry about fitting into? This is one of the first cakelet designs I created for my business, Cupcake Envy. It started out pretty simple, but over the years I’ve had a lot of fun changing the style, pattern, and adding sweet and stylish accents. It’s so easy to mix things up that it’s hard to know when to stop. Now, there are so many dress designs in my repertoire I can practically create my own fashion label. Just watch; once you make your first dress you won’t be able to resist playing dress-up, too.
Tools
4-cavity mini dome baking pan
The Necessities (pages 11–12)
Templates for Dress Top, Skirt Panel, and optional Hanger (see Templates, page 115)
Small and medium flower cutters
Flower veiner tool
Piping bag with #2 cake decorating tip
Paring knife
Ingredients
One 16-oz (455-g) box cake mix (any flavor) prepared, or batter for one 9-in (23-cm) cake
1 recipe Vanilla Frosting (page 17) or 1 container store-bought frosting
1 lb (455 g) white fondant (see Resources, page 114)
1 recipe Royal Icing (page 17)
Three shades of gel food coloring (a base color, a complementary color, and an accent color)
Prepare to decorate
Color 6½ oz (185 g) of fondant using the gel food coloring for the desired base color of the dress. (See tinting instructions on page 16). Color 7½ oz (210 g) of fondant with a contrasting but complementary color for the skirt, waistline, and optional neckline. Color 1 oz (28 g) of fondant a strong accent color for the center of the waistline and the corsage. Wrap each color separately in plastic wrap or a zip top bag until ready to use.
Make the dress top (two days prior to decorating)
1 Dust a clean, dry work surface with cornstarch. Roll out 2½ oz (70 g) of the base color fondant to ⅛ in (3 mm) thick. If you want to embellish the dress top by pressing it with a texture sheet, do it now.
2 Place the Dress Top template on the fondant. Use an X-Acto knife to cut out the form using the template as a guide. Place the dress top on a piece of parchment paper and set aside to dry for 2–3 days at room temperature out of direct sunlight (to keep the color from fading).
Make the hangers (optional)
1 Attach a #2 cake decorating tip to a piping bag. Fill the bag with white royal icing.
2 Use the Hanger template to trace 3–10 hanger shapes onto a piece of parchment paper (the extras are in case of breakage). Flip the paper (you should still be able to see the lines you drew) and pipe the icing along the lines. Allow to dry for 24 hours. Keep your extra hangers for future dress projects in a Tupperware container for up to six months.
Bake the cake
1 Preheat oven to 350°F (180°C). Spray each of the mini dome pan cavities to be used with non-stick spray (you will need one mini dome cake for one cakelet). Fill each cavity being used three-quarters full with batter. Bake for 15 to 20 minutes, or until the top springs back when lightly pressed and a toothpick inserted into the center comes out clean.
2 Allow cake to cool for a few minutes in the pan. If the cake rose above the pan, use a serrated knife to cut away the top to make it level (set the knife across the top of the pan so you can use it as a guide). Run a knife around the edge to loosen the sides. Invert the cake out of the pan and place it on a wire rack to finish cooling. When completely cool, wrap in plastic wrap and freeze for at least two hours until cold and firm.
Prepare the skirt
1 Place the mini dome cake on a square piece of parchment paper. Using a tapered angled spatula, apply a smooth crumb coat of Vanilla Frosting over the cake. Use enough frosting so that the spatula doesn’t come into direct contact with the cake. This will keep you from dislodging too many crumbs.
2 Dust your work surface with cornstarch. Roll out 5½ oz (160 g) of complementary-color fondant (I used white on the dress shown on the page 26) to an 8-in (20.5-cm) circle that’s ¼ in (6 mm) thick.
3 Slide your hands underneath the fondant using open palms so as not to poke a hole in it. Pick the fondant up and gently lay it over the mini cake and smooth it down. Alternatively, you could allow the folds to naturally drape, which gives the impression of draped fabric. Use your pastry wheel to cut away excess fondant around the bottom of the dress.
Assemble
1 Using the dried dress top, gently press an indentation into the top of the fondant-covered cake to give yourself a guideline for cutting.
2 Using a paring knife, cut through the fondant along the indention. Insert the dress top.
3 Dust your work surface with cornstarch. Roll out 4 oz (115 g) of base-color fondant into a sheet ⅛ in (3 mm) thick. Place the Skirt Panel template on the fondant. Use an X-Acto knife to cut out eight triangular panels, using the template as a guide. Brush the panels with a little water and press lightly to apply the triangles at regular intervals around the skirt.
4 Dust a work surface with cornstarch. Roll out 2 oz (55 g) of the complementary-color fondant until it is ¼ in (6 mm) thick. Cut out a strip that is 4 in (10 cm) long and ½ in (1.25 cm) wide to make a waistband, and a strip that is 2 in (5 cm) long and ½ in (1.25 cm) wide to make a neckline (optional).
5 Roll out 1 oz (28 g) of accent color fondant until ¼ in (6 mm) thick. Cut out a strip that is 4 in (10 cm) long and ¼ in (6 mm) wide to complete the waistband. Cut out another strip that is 2 in (5 cm) long and ¼ in (6 mm) wide to complete the neckline, if using.
6 Brush the contrasting-colored fondant strips with a little water. Center the corresponding accent-color fondant strips on top, pressing lightly to adhere.
7 Using the paint brush, apply a little water around the base of the dress top. Wrap the waistband around the base of the dress top with the seam in the back. Repeat with the optional neckline strip.
Finishing touches
1 Dust a work surface with cornstarch. Roll out the remaining accent color fondant until it is ⅛ in (3 mm) thick. Use the medium flower cutter to cut out one flower per dress (for the corsage). Optionally, cut an additional 15–20 flowers per dress with the small flower cutter to form a floral hem.
2 If creating a hem, brush the bottom of edge of the skirt with a little water. Arrange a row of small flowers along the bottom of the skirt. Using the veining tool (pages 11), poke the tip of the veiner into each flower, pressing the flower into the bottom of the dress. This will result in a seamless flower border around the bottom of the dress.
3 To add a flower corsage, dab the dress top with a little water where you want to place the corsage. Press a medium flower onto the area with your fingers. Dab the flower with a little water and place a center a small flower on top.
4 Use the piping bag filled with royal icing tinted to match the accent color and fitted with a #2 tip to pipe flourishes around each flower. Optionally, pipe several decorative dots on the waist band.
5 To adhere the optional hanger to the dress, apply a dot of royal icing on the back of each shoulder on the back of the dress. Press the bottom of the hanger to it and hold for a few seconds. See pages 113 for an example of a dress with the optional floral hem and hanger in place.
| Favorite T-Shirt | Level EasyBatter yields enough cake for 4 cakeletsFondant quantity listed is suitable to complete 1 cakelet |