Читать книгу Origami Bonsai - Benjamin John Coleman - Страница 9
На сайте Литреса книга снята с продажи.
ОглавлениеThe Tools of the Trade
Your life is about to change. You are about to enter a world where flowers with dramatic color distract with jaw-dropping intensity, and gardens cause drivers to jump out of their cars, cameras in hand, to photo-document the scene. After completing only a few projects, the way you view the world will change. You will start asking questions of Mother Nature. How did she combine those colors? Why does that species of bush create such twisting branches? A new sense of peace will develop in you, as the meditative aspects of this art form calm you. You will learn that there is nothing more relaxing after a busy day than to start a new Origami Bonsai project.
The potential of this art form is limitless. Every Origami Bonsai is unique because every twig is unique, but that’s just the beginning. Origami Bonsai can be combined to create indoor gardens; they can be hung on the wall, placed over pictures and frames, combined with vases, furniture and other art. One of the most dramatic uses of Origami Bonsai is to combine them with lighting. When lit from below they create long, dramatic shadows. From across a room you can increase a piece’s depth. Once you have assembled a few trees, and combined them with your existing décor, you will feel a new relationship develop between you and your living space. Like plants, Origami Bonsai make us feel more at home, more alive, but unlike plants, we feel a special affinity for them because they are our creations.
All that is required to complete the first project is one piece of 8½ by 11 paper, a pair of scissors and glue. You can find interesting paper at any stationery store, but for the best results you should use inexpensive, 20-pound white paper. I find that inkjet paper works best. It absorbs paint more evenly than photocopier or laser printer paper, and it “takes” folds with little damage.
Creating Origami Bonsai can become a team effort. Among partners, typically one will become a paint and color expert (type B personality) while the other becomes a folding fanatic (type A). These projects are cooperation-intensive, team-building, and uniting.
Tools of Professional Origami Bonsai
Let me be clear here, you don’t need any of this stuff. And you shouldn’t go on a shopping spree for your new hobby until you have assembled at least one Bonsai. Upon completion of a tree, you will feel a sense of satisfaction, a pounding in your chest, and a little rush of adrenalin. Once you have experienced these sensations, then by all means, go nuts, because the total here should come to well below $100.
Tip: Discount stores sell 24 water color or acrylic paints for around $5 and a set of five good brushes for around $4.
From the Office Supply Store:
Paper —Buy a ream of 20 lb bond ink-jet paper.
Paper Cutter —Purchase a small rotary paper cutter from an office supply store.
From the Hardware Store:
Cutting Board —Purchase a new large cutting board made from wood. Make sure it has at least one flat side (many have grooves cut into them to drain juices).
Wall Paper Seam Roller —Purchase a wallpaper seam roller that has a wooden roller, and preferably a wooden handle as well. Do not purchase a seam roller that has a metal roller, as you will damage your cutting board.
Adjustable Clamp —You’ll need a clamp to hold your work temporarily. I like the new-fangled type, which has a lever grip, like a calking gun, to adjust.
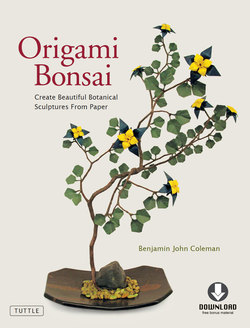
Origami Bonsai sculptures add a bit of color and beauty to any part of the home.
From the Craft Store:
Glue Gun —Get a high temperature or dual temperature glue gun. Leave the dual temperature glue gun set to “high.”
Glue Sticks —Buy a bag of high temperature glue sticks. They’re hard to find, but they are less “stringy” than the low temperature ones.
Glue Dipping Bowl —This is a circular bowl that heats up and melts the glue. It allows you to dip leaf stems into the bowl rather than juggling a hot glue gun and a bunch of leaves.
From the Drug Store:
Magnification Glasses —Get the greatest magnification you are comfortable with, even if your eyesight is good. These glasses will help you attain professional results when cutting paper, working with tiny flowers, etc.
From the Art Store:
Paintbrushes —Purchase a set of paintbrushes for watercolors. They should have medium-soft bristles.
Watercolor Paint —You need a set of watercolors. You can use sets designed for children for experimenting, but as soon as you attempt a real project, purchase watercolors that come in “toothpaste tubes.”
Artists’ Medium —Get a tub of Artists’ Medium. This seems only to be sold at art stores, so you may need to make a special trip or search the Internet. I use “matte” Artists’ Medium.
Acrylic Paint —I use very limited amounts of acrylic paint for special effects. I don’t like acrylics because they never seem to dry completely and leave paper feeling like shower curtain material. They also smell horrible. Make sure you pick up Gold and Silver, as we’ll use these for the “silk-technique” (page 38).
From the Market:
Paint Cups —There’s no need to buy paint cups as many products you purchase come packaged in them. Asian food comes with plastic dishes of sauce. These dishes work well. Granola that comes with yogurt is packaged in one of the best painting cups I’ve ever found. And some drink mixes come with individually packed cups.
Chopsticks —Chopsticks are useful for holding paper down while you paint. I rely on them, especially for working with smaller flowers.
The Project Folding Symbols
Writing an origami book presents many challenges, but there is one challenge that surpasses them all: books are two-dimensional, and Origami Bonsai is three-dimensional. In other words, the paper you are reading right now has essentially two dimensions, length and width. The flower you want to make has three dimensions, length, width, and height. How do I convey a three-dimensional subject when I only have two dimensions to work with?
I need ways to convey the third dimension when necessary. You will see the folding symbols presented in this chapter repeatedly throughout this book. On more complex subjects, you will not only see these symbols, but pictures with symbols as well. I have tried to diligently create folding diagrams that are easy to read, and ensure your success.
You may not fold the perfect flower the first time. You might even get stuck. But be patient, and approach Origami Bonsai as if it were a puzzle to be solved. The solution is here on the pages, but sometimes it’s a good idea to put down the book and pick it up again in the morning.
You’d be surprised how many Origami models I’ve had to ponder overnight only to discover a simple resolution the following morning.
This beautiful Origami Bonsai Columbine has multiple leaf and flower sizes for heightened realism.
The symbol in the middle means “flip.” The green side facing down now faces up after the flip symbol.
The double-ended arrow is my fold, and then unfold symbol. In this case it means you should fold the square diagonally, forming a triangle, and then unfold it.
Notice how the fold has become a thinner line in the square on the right. Also notice that the edges of paper are always a thick line.
Remember, previous folds are a thin line and paper edges are a thick line.
This means fold the bottom left corner to the upper right corner and leave it there.
This means fold the bottom left corner to the upper right corner while watching the alignment on the right carefully, and leave it there.
This means fold the square diagonally, from lower left to upper right, forming a triangle, and then unfold it, and then fold the square diagonally from lower right to upper left and unfold it.
This means cut the thin line with scissors. In this case the paper will be cut in half forming two rectangles.
A Three-Dimensional Collapse
So far I’ve only presented folding symbols in two dimensions. Yellow folding symbols indicate movement in the third dimension. This is how we “collapse” a square into a more complex square one quarter its original size.
Each yellow dot will follow a yellow arrow to the center of the piece of paper.
Notice that the tips of the longer diagonal folds are migrating upward and toward the center, while the shorter horizontal and vertical folds are migrating to form the sides.
Now, all four corners (marked by yellow dots) are in the center of the square. The collapse is complete.
This is what the original folding diagram for a collapse will look like. Whenever you see a yellow arrow it means you lift its associated point up.
Reversing the Direction of a Fold
Whenever you see a red line, it means to reverse the direction of the existing fold under that line. Sharp, clearly-defined folds are easy to reverse. Dull, obscure folds are virtually impossible to reverse. You need a tool to sharpen your folds. If you do not have a wallpaper roller, you can use your fingernail to sharpen folds, but a better alternative is to use a wooden paint-mixing stick, a plastic putty knife, or a plastic spatula. Do not use metal tools, as you could rip your paper. Use of anything other than a wallpaper roller may damage your paper’s painted surface.
Performing a Book Fold
A book fold is almost always required at some point following a collapse. A book fold mimics turning the pages of a book.