Читать книгу The Handmade Quilt - Carolyn Forster - Страница 7
ОглавлениеGetting Started
Equipment for Hand Piecing Patchwork
Hand piecing patchwork requires very little basic equipment to get started. Pins, needles, thread, scissors, maybe a thimble or two, is basically all you need once the pieces have been cut.
Not everyone will stitch the same or use the same equipment. If you are happy with the results using the things you have, that’s great! But it’s always worth trying something new or different rather than always using what you have. Remember,
“If you do what you always do, you will get what you always get”.
Scissors
Choose a pair of scissors that you are happy to hold! I like scissors with a serrated edge because they seem to grip the fabric as they cut. Regardless of what you choose, make sure the blades are sharp.
Dedicate a pair of scissors that you will use only to cut batting and template plastic or card stock. It will ensure that your fabric scissors stay sharp.
Use a small pair of scissors or thread snips for the sole purpose of cutting thread. They are easier to handle and very portable. Many small scissors have a sheath to protect the blades while adding a safety factor when reaching for them in your sewing bag.
Needles
Sew with a needle that you are comfortable with, one that will hold the thread without coming out of the eye, and will pull through the fabric easily with no tugging needed. A good, all-purpose needle for most people is Sharps. They are medium length with a round eye and a sharp point.
I like to use size 10 quilting needles or size 9 piecing needles. You can buy piecing needles for patchwork that are longer but they need a different sewing action because of their length. Sharps are a good general needle that work well for most people.
Two of my favorite needle makers are John James and Tulip. They are easy to find and offer a variety of specialty needles including ones with round or long eyes for easy threading.
Pins
It is worth investing in quality pins that are sharp because it will help with accuracy when you are pinning pieces together. I like to use either long and fine pins with glass heads, or short and neat pins like applique pins. Most often, I use Clover short applique pins or Clover Patchwork pins.
Thread
Believe it or not, an uninspiring thread set of basic “shadow” colors is all you need for most hand stitching. Colors like the ones shown here, creams, grays, tans, black, and a muddy gray green, will merge with most fabrics.
Since I am constantly sewing, I buy thread in the most economical way I can. I buy large spools of limited colors, which makes the most sense for my needs. If I need my work to be portable, I’ll buy smaller spools or wind thread around one of my extra machine bobbins or and empty spool.
Aurifil 28 weight (small spools, upper left) is my favorite thread for hand sewing. It’s a bit thicker than 40 or 50 weight. Try the 40 or 50 weight if you prefer something closer to the thread you use for machine stitching. Different brands of thread will handle differently so you may need to experiment until you find your favorite.
Needle Threaders
If I’m threading a needle by hand, I find it easier to put the needle over the thread rather than trying to push the thread through the eye (see here). But there are many devices to make needle threading a breeze. From the simple ones that sometimes are included with a pack of needles to the more sophisticated, they are time saving tools to get you started stitching.
Thimbles
Thimbles are often the most controversial subject of sewing. I didn’t always use a thimble; I braved sore fingers and chipped nails until I had had enough! I went through finger protectors, tape, wraps, and leather sheaths. By experimenting, it got me used to stitching with something on the end of my fingers.
They all worked but I eventually realized I could sew with a ridged, flat top thimble on my index finger underneath my work and one a dimpled metal thimble on my middle finger on top of my work. This works best for me but once again, trial and error may be the best path when determining your favorite thimble and how to use it.
Fabric Markers
Mechanical fabric pencils with a fine tip will always give a clear, fine line. And mechanical pencils don’t need sharpening! They will often come in colors which makes it easier to see on fabric. A standard pencil with hard lead will always work, too.
Fabric Choice and Quantities
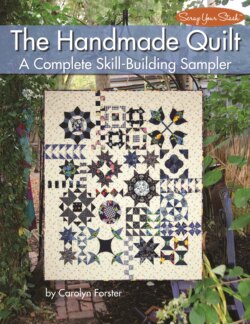
For the quilt in this book, I chose to use navy and creams for the blocks and binding. Your color choice can be whatever you want but take the time to decide what kind of fabric will work well for hand stitching.
I find it easier to stitch with 100 percent cotton fabrics that are dress or craft weight. I like to prewash all of my fabric to minimize color bleed and shrinkage. While it isn’t necessary only you can decide what is best for you and your quilt.
To add some body to lighter weight fabrics, try spritzing with a spray starch product. Besides adding body, it will stabilize the fabric when you are tracing on it but still stay easy to stitch.
I used a scrappy combination of fabrics for the quilt in the book. I suggest you start off with four or five fat quarters that you like together. I would allow one fat quarter (18" x 22") for each block. Some may use all of it and some less. As you make your way through the blocks you can use up the scraps or introduce more fabrics as you work.
See here for complete fabric requirements for the quilt.