Читать книгу Learn to Draw Realistic Animals with Pen & Marker - Dwayne Gosnell - Страница 6
На сайте Литреса книга снята с продажи.
ОглавлениеBefore You Carve
Basic Carving Instructions
All you really need in order to carve is a space to complete your project, a comfy chair, some wood, and the carving tools of your choice. I’ve never met a carver who wasn’t also a tool collector. If you have it, use it. If I use a certain tool in the instructions, but you can accomplish the same thing with a different tool, do it. Here are some points to remember:
• Make sure that your tools are as sharp as they can be. You shouldn’t force dull tools into the wood.
• Carve as much as you can every day. Don’t be afraid to challenge yourself.
• Don’t carve while tired, as this can lead to miscuts—either in the wood or your hand.
• Always use protective gear, such as gloves and finger guards.
• Remember that everyone makes mistakes—it’s only a block of wood! Don’t expect to create a perfect carving right away; the fun is in the journey.
Getting Started
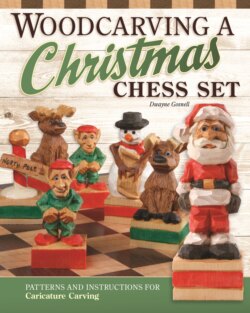
Just like in chess, you need to plan and think ahead when carving a chess set. Luckily, I have taken some of the planning out of it by providing a list to get you started (see here). All of the pieces are cut from 2" (5.1cm) square basswood stock. You will need a bandsaw or access to one due to the number of carvings. You can cut the pieces out with a coping saw, but with thirty-two pieces per chess set, it could take a while.
For expediency, I cut out all of the pieces in the set prior to carving.
Always protect your hands while carving. To keep your knife blade sharp, apply stropping compound to a piece of leather. Then, with the bevel facing away from you, pull the knife toward you across the stropping compound in a reverse shaving-type motion—you don’t want the blade to dig into the leather.
Cutting Out the Blanks
1 Place the front and side patterns on the basswood blank. You can draw around the pattern (like I have done), attach the pattern with repositionable spray adhesive, or use graphite paper and a pencil to transfer the pattern onto the wood.
2 Cut the front view. Tape the waste wood back in place; this will provide stability and a reference point when cutting the adjacent view.
3 Cut the adjacent side.
4 Remove the blank from the waste wood. Note: Take your time! Speed is not your friend in these steps. I used a 1/4" (6mm)–wide blade with six TPI (teeth per inch); however, you could use a smaller blade if desired.
