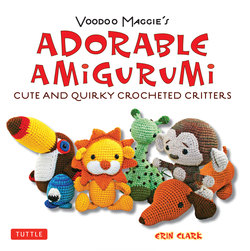
Читать книгу Adorable Amigurumi - Cute and Quirky Crocheted Critters - Erin Clark - Страница 8
На сайте Литреса книга снята с продажи.
ОглавлениеBasic Stitches
These instructions assume a knowledge of how begin a chain and offers all the stitches you will need to finish the patterns in this book.
Single Crochet (SC)
Insert your hook into stitch or chain yarn over and pull through work. Yarn over again and pull through both loops on hook. Continue on in this manner for as many stitches as indicated in the pattern.
Half Double Crochet (HDC)
Yarn over and insert your hook into stitch, yarn over and pull through work. Yarn over and pull through all three loops on hook.
Double Crochet (DC)
Yarn over and insert hook into stitch, yarn and pull through work. Yarn over and pull through two loops on hook. Yarn over and pull through remaining two loops.
Tips and Tricks
Joining with a single crochet: Secure your yarn to your hook insert into stitch yarn over and pull through work. Yarn over and pull through both loops. If your pattern calls for you to join with a double crochet, yarn over before you insert your hook into the stitch and work like you would a regular double crochet.
When I finish a piece that is going to be sewn to the body of a plush, I like to leave a tail long enough to sew it with. Using the tail eliminates a few extra ends to weave and makes the piece a little more secure.
If you’re sewing on a piece that needs to be symmetrical, it is very helpful to pin the piece in place with straight pins. But keep an eye out not to snag your yarn.
When sewing your pieces together don’t sew straight up and down, it will leave a very noticeable seam. Instead sew on a diagonal across the stitch to make the seam invisible.
If you forget to place your safety eyes before you finished the piece (I do this often), you can remedy the problem by using fabric glue and gluing the eyes onto the piece.
(Note: Do not do this if you are making the toy for a child, instead securely sew on buttons.)
To work the crab stitch, you simply single crochet from left to right instead of from right to left.
Decreasing
Standard decreasing is best for flat pieces that will be visible from both sides.
To decrease, you insert your hook into the first of the stitches to be decreased, yarn over and pull through. Repeat for the remaining stitches to be decreased.
Yarn over and pull through all loops on hook.
Invisible decreasing is best for working in the round when the back of the piece will not be visible.
To work the invisible decrease you insert your hook decreased, do not yarn over, insert the hook into the next front loop.
Yarn over and pull through all front loops. Yarn over and pull through the two loops on hook.
Increasing
Increasing is a simple technique where you crochet multiple stitches into one stitch space.
The photos below are examples of 2SC and 3SC.
Changing Colors and Joining New Yarn
There are three main reasons to join new yarn to your project:
The first: A color change at the end of a row. When you reach the end of your row, yarn over with the new yarn and pull through the loop on hook. Continue on with your pattern.
The second: A color change in the middle of your project. Yarn over with the new yarn and pull through loop on hook. Pull the first color tight and continue on with the new color.
The third: Running out of yarn mid project. Insert your hook into next stitch, yarn over with new yarn and pull through. Yarn over and pull through both loops on hook. Continue on with your pattern.
Crocheting in the Round
Crocheting in the round (which is what makes it amigurumi) is very easy once you learn the ropes. There are several ways to start your circle, but for this book I’m going to show you the one I use.
Begin by chaining 2, single crochet 6 (or eight depending on pattern) into the first chain you made. Do not finish or slip stitch, simply start the next round in the first stitch of previous row. You’ll double your stitches on the next row by crocheting two into each stitch.
For subsequent rows you’ll add one single crochet between the 2SC stitches. The photos below show examples of ever increasing rows.
Stuffing Your Pieces
It is very important to keep the shape of the finished piece in mind when stuffing. You can’t just cram your pieces full of stuffing and expect them to turn out correctly.
Take the photos above for example. The one on the left is what the finished piece should look like. The one on the right is what happens when you stuff the piece to full capacity without regard to the shape. That is why there are reference photos for each individual piece of the patterns, so you can replicate the finished plushies as closely as possible.
It is also very important not to over stuff, crochet will stretch and leave gaps between the stitches and the stuffing will show.
How to SC All Together
To finish off your pieces without sewing them closed: Insert your hook into first stitch, yarn over and pull through. Repeat for each stitch of row. If there are many stitches you will need two hooks.
I recommend not putting more than four or five stitches on each hook. When you reach the end, yarn over and pull through all the loops on your first hook, transfer working loop and pull through remaining stitches. Now is when I stuff the piece. Work a chain to secure the piece and then finish it off.