Читать книгу Beautiful Beaded Jewelry for Beginners - Группа авторов - Страница 10
На сайте Литреса книга снята с продажи.
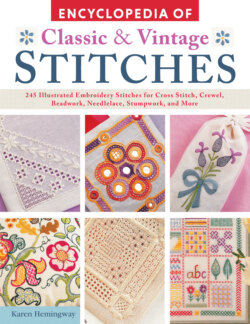
ОглавлениеBlackwork
A distinctive form of counted thread embroidery, blackwork was probably of Moorish origin and became popular in England during Tudor times due to the influence of Katharine of Aragon, Henry VIII’s Spanish wife. As its name suggests, it is traditionally worked in black thread and can be embellished with touches of metallic thread. Geometric patterns are built up by repeating stitch sequences within a defined area. The tonal contrasts you can create with blackwork give it great dramatic impact.
Patsy North
FABRICS
Evenweave linen or cotton fabrics are used for blackwork. The finer the weave of the fabric, the finer the finished embroidery will be, but take care not to choose a fabric that is so fine that the threads are too difficult to count. Plain white fabric provides the strongest contrast with the black thread and sets the stitch patterns off to good advantage, giving the technique its striking graphic quality. However, there is no reason why you shouldn’t try off-white, beige or pastel shades of fabric.
THREADS
The type of thread you choose should match the weight of the fabric threads. For a crisp finish, it is best to use a single strand of thread. Pearl cotton, stranded embroidery floss, coton à broder and sewing thread are all suitable. As well as the classic black, other strong colors, such as red, can give an interesting effect. Fine synthetic metallic threads add richness to a design.
NEEDLES
Use a blunt-ended tapestry needle that won’t split the fabric threads as you work.
USES
A sampler is an ideal showcase for the many fascinating stitch patterns you can create with blackwork. Set the stitch patterns inside geometric shapes or stylized floral forms for a traditional look. For a more experimental approach, try working a blackwork picture. Any design with large areas to be filled is appropriate, such as a house portrait, map, simple landscape of hills and fields, or city skyline with skyscrapers. Other items that are suitable for blackwork decoration include table linen, cushions and clothing.
PREPARING THE FABRIC
Cut a piece of your chosen evenweave fabric, allowing at least 2 in (5 cm) extra all around. Bind or overcast the edges of the fabric to prevent them from fraying (page). Find the horizontal and vertical centers of the fabric and mark them both with a line of running stitches in a brightly colored sewing thread (page). Find the center of your chart and mark this too with a pen.
Mount the fabric in an embroidery hoop ready to start stitching at the marked center point (page).
STARTING AND FINISHING
To start an area of stitching, bring the needle up to the right side, leaving a short end on the wrong side of the work. Secure the end by working the first few stitches over it.
To finish, pass the needle back through a few stitches on the wrong side. Snip off all loose ends as you work to prevent them from becoming caught up in subsequent stitches.
How to make blackwork stitches and fillings
Holbein Stitch (also known as Double Running Stitch)
This stitch is used to build up a wide variety of blackwork stitch patterns and looks the same on both the right and the wrong side of the fabric. It is worked in two stages. First work running stitch over the counted threads of the fabric, following the line of the pattern. Complete the stitch by working back along the same line, filling in the spaces with another row of running stitch.
Back Stitch
Back stitch produces a similar linear effect to Holbein stitch and can be useful for certain blackwork patterns. However, Holbein stitch gives a smoother line and is less prone to distorting the fabric weave.
Flower Filling
Work each flower in Holbein stitch with an upright cross in the center. Build up the pattern row by row with flower shapes to fill the desired area. Then work the small squares that link the flowers together. Finally, if you wish, add a border with a line of Holbein stitch.
Pineapple Filling
Using Holbein stitch, start stitching the first row of the outline diamond pattern along the bottom of the area to be filled. Then work back along the row filling in the stitches to complete the diamonds and add the groups of three straight stitches inside each diamond. Continue building up the diamond pattern row by row.
Honeycomb Filling
Using Holbein stitch, begin by working the lower part of the first row of octagons. On the return journey, complete the lower part of the octagons, adding the small linking squares. Continue in this way until the area is filled. Finish by working a small cross in the center of each octagon and a short diagonal in each linking square.
Basketweave Filling
Work the first row by stitching groups of three vertical stitches followed by groups of three horizontal stitches, with each group occupying the same amount of space and a regular amount of space between each group. On the return row, reverse the order of the vertical and horizontal stitches. Repeat as necessary. To complete the basketweave, add cross stitches to link the vertical and horizontal stitches.
Greek Key Filling
Use Holbein stitch to work the Greek key pattern row by row. The rows are separated by one fabric thread.
Square Grid Filling
Work rows of small squares in Holbein stitch to fill the desired area, leaving two fabric threads between each square. Then add cross stitches to link the squares together. Complete the pattern by filling the spaces between the squares with long straight stitches.
How to Stitch the Blackwork Sampler
A pretty picture which demonstrates the different effects of six filling patterns within a geometric border.
You will need
12½ x 14 in (32 x 36 cm) 25-count white evenweave linen
Pins
Colored basting thread
Embroidery hoop
DMC pearl cotton No. 8, 1 reel in black
Tapestry needle
7 x 8¾ in (17.5 x 22 cm) stiff white cardboard (or to fit your frame)
Picture frame (optional) or two curtain rings
The following embroidery may also be used with blackwork:
• Beadwork
• Cross stitch
• Coral stitch
• Chain stitch
Key
All stitches worked in DMC pearl cotton in black
Preparing the fabric
1 Bind the edges and find the center of the fabric (page).
2 Using pins and then basting thread, mark out six 1½ in (4 cm) squares, each 40 x 40 fabric threads, in two rows of three with six fabric threads between each square.
Stitching the sampler
1 Mount the fabric in an embroidery hoop.
2 Following the chart below, fill each square with the appropriate filling pattern. Take care not to pass long lengths of thread across the back of the work, as they will show through on the front.
3 To work the border, count 16 fabric threads out from the outer edges of the patterned squares to give the inner edges of the border. Mark this line with basting stitches.
4 Start at the center of one side, one thread up from the horizontal center line of basting, with a row of running stitch, working the corners with two stitches at right angles as shown in the border pattern diagram. Build up the border with three more rows of running stitch spaced two threads apart. Join the two center rows with straight stitches to make little squares. Join the remaining pairs of rows with cross stitches, working a three-quarter cross stitch at each corner of the border to give it an angled line.
Mounting the sampler
1 Remove all the basting threads. Press the embroidery with the right side down on a padded surface.
2 Place the sampler right side down and place the cardboard centrally on top of it. Lace the fabric over the edges of the cardboard (page).
3 Place the mounted embroidery in a picture frame if you wish or sew two curtain rings to the back for hanging.
For a printable PDF of the patterns used in this book, please contact Fox Chapel Publishing at customerservice@foxchapelpublishing.com, quoting the ISBN and title of this book, as well as the pattern or patterns required.
Border Pattern
Blackwork sampler chart. Enlarge on a photocopier for ease of working.
Corner detail of the border pattern for the sampler.