Читать книгу The Duct Tape Book - Jolie Dobson - Страница 1
Оглавление25 PROJECTS TO MAKE
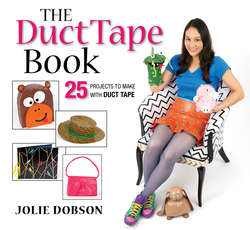
WITH DUCT TAPE
THE
Duct
Tape
Book
25 PROJECTS TO MAKE
WITH DUCT TAPE
Jolie Dobson
Published by Firefly Books Ltd. 2012
Copyright © 2012 Firefly Books Ltd.
Text and photographs copyright © Jolie Dobson 2012
All rights reserved. No part of this publication may be reproduced, stored in a retrieval system, or transmitted in any form or by any means, electronic, mechanical, photocopying, recording or otherwise, without the prior written permission of the Publisher.
Publisher Cataloging-in-Publication Data (U.S.)
Library and Archives Canada Cataloguing in Publication Dobson, Jolie.
Dobson, Jolie, 1981-
The duct tape book : 25 projects to make
The duct tape book : 25 projects to make with duct tape with duct tape / Jolie Dobson.
/ Jolie Dobson.
[144] p. : col. photos. ; cm.
ISBN 978-1-77085-098-9
ISBN-13: 978-1-77085-098-9 (pbk.)
1. Handicraft. 2. Duct tape. I. Title. II. Title: Twenty-five 978-1-77088-076-4 (ePub)
projects to make with duct tape.
978-1-77088-077-1 (Web PDF)
TT880.D52 2012 745.5 C2012-902990-4
1. Duct tape. 2. Handicraft. I. Title.
745.5 dc23 TT880.D6376 2012
Published in the United States by
Published in Canada by
Firefly Books (U.S.) Inc.
Firefly Books Ltd.
P.O. Box 1338, Ellicott Station
66 Leek Crescent
Buffalo, New York 14205
Richmond Hill, Ontario L4B 1H1
Cover and interior design: Jacqueline Hope Raynor.
Cover model: Jolie Dobson. Interior model: Allison Worek.
The publisher gratefully acknowledges the financial support for our publishing program by the Government of Canada through the Canada Book Fund as administered by the Department of Canadian Heritage.
Contents
Introduction
Duct tape history 5 • Getting started 6 • Choosing tape 7
Credits for duct tape used in book 7 • Colors and customizing
projects 8 • Stencils and decorating 8 • How to make duct tape
sheets 8 • How to make duct tape straps 10 • Taping flat surfaces 11
Taping right-angle flat surfaces 11 • Taping curved edges 12
Taping curved surfaces 13
Projects
Bike buddy 15 • Funky frame bag 21 • Fab frames 25 • Hot pink
handbag 29 • Smart phone holder 35 • Games on Board 39
Out-to-lunch bag 43 • The spill master 49 • Kleenex crib 53
Bag tag 59 • Wild wild vest 65 • Cheeky chaps 71 • Sassy skirt 77
Backpack 83 • Small-scale monster 91 • This little piggy bank 97
IYU box 103 • Yuletide tree topper 109 • Bodacious bows 115
Mad hatters 119 • Duct bunny 125 • Basket case 129
Analog photo album 135 • The cover up 139 • Passport pal 141
3
Introduction
Duct tape was called “the handyman’s secret weapon” by Red Green. It’s been stowed on board every space flight since the Gemini missions in the mid-1960s.
And dollars to donuts it’s holding something together right now in your house, car or garage. But the biggest secret about the magic fix-all tape is that it is the ultimate craft material too! Its tensile strength lends itself well to sturdy construction, its resistance to water means it’s suitable for outdoor use and now that it comes in colors other than silver it offers a vivid palette for artists, fashion designers and craftspeople in their creations and projects.
In fact, duct tape DIY has become a cultural phenomenon — the Internet has exploded with duct tape art sites, forums and blogs. Indeed, the 25 projects that follow in these pages are a testament to the tape’s versatility and style and are shown in step-by-step fashion so you too, armed with a few rolls, tools and some basic rip and fold moves, can master the sticky stuff and become a duct tape sensei!
Duct Tape History
Duct tape was invented for the U.S. military by the cool-sounding Revolite Corporation (then a division of Johnson & Johnson) in 1942. Originally designed to seal ammunition cases, the tape was tough, durable and fantastically water-resistant and was promptly enlisted to repair anything that was broken, including jeeps, firearms and aircraft.
Because the adhesive tape had a canvas (or duck cloth) backing and repelled water like certain feathered fowl, it was quickly dubbed “duck” tape by WWII soldiers. Somewhere along the way (where exactly is a hotly debated topic amongst duct tape historians) there was a gloss from “duck” to “duct” tape. This is odd as the tape is rarely used on ducts — in fact many building codes forbid it for this use!
Now Duck®Tape is a brand of duct tape.
The utilitarian effectiveness of duct tape meant the humble gun-metal silver roll would find its way into toolkits in practically every profession and home around the world, and today it is known as “gaffer tape,” “racer tape,” “riggers’
tape” or “100-mph tape” (it was used to balance helicopter blades in the Vietnam War), and is regularly used where something absolutely positively needs to be taped down for good.
5
Duct tape was famously used to repair the CO2 scrubbers on the lunar module of Apollo 13, providing much-needed oxygen to that mission’s marooned astronauts, and more recently, a few carefully placed silver slivers proved to be a low-tech but very effective fix for the Apple iPhone 4’s flaky antenna.
Duct tape’s explosive popularity grows as people explore its creative possibilities for fun instead of just its practical uses. Everything from prom dresses to artistic shoe repair can be made by this magic tape. In this book, learn to craft everything from a handy bike pannier to bodacious bow ties, from a decorated smartphone case to a customizable purse! Join the fun and master the sticky stuff to be a part of one of the most exciting and creative trends of the decade!
Getting Started
Tools you will need:
• Craft knife
• Scissors
• Ruler
• Large cutting board
• Sewing tape measure
• Compass
Useful material for your duct tape projects:
Snaps: Snaps are a sturdy way of holding things together and can give your project a polished look. They can, however, be difficult to position and attach.
Velcro: Hook-and-loop fasteners such as Velcro can be used where clasps are required, such as clothing or a lunch bag. While easy to apply if using the self-adhesive variety, they do not hold as well as snaps. You might want to consider sewing pieces of Velcro onto some projects for added security.
Zippers: Depending on the shape of your project, attaching zippers can be fairly easy, though figuring out the measurements can be a bit tricky. Zippers can hold with just duct tape, but to be safe it’s best to sew the zipper on as well, then cover the stitches with tape.
Twist ties: Used for decorations, such as the tail on a piggy bank (see page 97).
6
Shredded newspaper and plastic produce bags: Used to create round shapes for animal projects such as a rabbit (see page 125).
Coat hangers: Used for support in projects such as a basket (see page 129).
Choosing Tape
Because it is not trademarked, there are many varieties of duct tape on the market, so buyer beware — not all brands are the real thing! Always look for cloth-backed adhesive tape. Accept no substitutes.
Thinner duct tape is better suited to making clothing or other projects that require flexibility. Thicker duct tape (sometimes called “professional grade” or
“industrial grade”) has more cloth fibers for increased strength and tends to be more expensive, but is better for projects that require more rigidity.
Of course, standard-issue silver or gray duct tape is cheaper than the colored stuff and comes in bigger rolls. If you can’t find colored duct tape at your local craft or hardware stores, you can certainly order them online.
Credits for duct tape used in book
The patterns of duct tape running along the sides of the projects in this book are from the following companies, and can be purchased through their websites.
Duck® Tape appears on the sides of the following pages: 14-37, 42-51, 70-75, 114-123, 128-133, 138-144. Duck®, and Duck® Tape are registered trademarks of ShurTech Brands, LLC, used with permission. Visit www.duckbrand.com to view all of the available patterns and browse the online store.
Platypus® Designer Duct Tape™ appears on sides of the following pages: 3-13, 38-41, 52-69, 76-113, 102-113, 124-127, 134-137. Visit www.designerducttape.com to view new and current patterns and to buy online.
7
Colors and Customizing Projects
With a rainbow of duct tape colors now available, try casting your project in a new color: chrome, electric blue, neon pink or prints like tie-dye, polka dot, zebra skin or camouflage! Use your imagination. Put rolls of different colored duct tape side by side to see if you like them together. Choosing complementary colors on the color wheel (say, blue and orange) for contrast can create vibrant results. Change up a project by switching colors and decorations. Create a zoo of animals from a single project by picking different colors and altering facial features like ears, nose and eyes. Remember, there are no wrong colors!
Stencils and Decorating
You can decorate your projects with any shape or design, simple or intricate. But remember, the more detailed the design, the more precision and patience you will need! Stencils can make tracing out your design easier.
First, draw your design onto a piece of poster board or card stock and cut it out.
Place a piece of tape sticky-side down on your cutting board. (For bigger designs, line up and stick together a few pieces of tape to form a sheet sticky-side down.) Tape your stencil onto the piece of tape or sheet using smaller loops of tape.
Carefully trace around your stencil with a craft knife, making sure you cut through the fibers in the tape so that it peels off the cutting board perfectly when you are finished.
And last, don’t throw out your cut-offs! Save these little scraps of tape from the garbage and use them to add tassels, fringe, hair or other decorations and details to your projects. You’ll never know when they’ll come in handy.
What are you waiting for? Reach for the roll and start taping!
How to Make Duct Tape Sheets
The basic building block of many of a duct tape project, these sheets are built up from strips of folded, overlapping tape. It’s a good idea to make your strips of tape longer than the width you need (by at least 1"), and trim your sheet down to size afterwards. This will give you clean edges and square right angles. You also won’t have to measure each piece of tape — just measure the first piece and use that as your guide for the rest. You may want to seal cut edges of the sheet with a folded over piece of tape to get a finished, non-sticky edge.
8
A
1 On a cutting board, cut a piece of duct tape to the width you need and place it sticky side up (A).
Cut a second piece of tape (B) the same length as
B
2 the first and place it sticky side down, halfway down piece A.
Fold the sticky half of piece A down on the non-sticky 3 side of piece B. This is your first sealed edge.
A
B
Flip the pieces of tape over and
4place a third piece of tape (C)
over the sticky part of piece B.
C
After adding your last piece of tape, fold
6over the last exposed sticky side to seal
the final edge.
Flip again and repeat as necessary
5 for the length of sheet you need.
9
How to Make Duct Tape Straps
Straps are used for belts, loops, handles and other means of securing your projects.
Whether it’s for a knapsack, lunch bag or bike pannier, straps can be made thicker for greater rigidity. Depending on the strength required, you may need to use snaps or Velcro to fasten your straps.
A
1 Take a piece of duct tape the length you
need and fold it in half horizontally. This
will give you about a 1" strap. If you need a
1"
wider strap, fold the top and bottom edges
of the tape in towards the center, leaving an
exposed sticky strip in the middle of the tape.
Alternate method for wider strap widths
This is piece A.
Take a second piece of tape (B) the same length
2
A
B
as the first and place it sticky side up. Place piece A in the center of piece B. If you made your strap
wider than 1" and have an exposed sticky strip across the middle of piece A, place the sticky side down on piece B.
Fold the sticky edges of piece B over piece A.
3
You should now have one clean, smooth side
4on your strap, which will be the front face.
Attach snaps or Velcro if needed, following
5 the directions provided with them.
10
Taping Flat Surfaces
Taping flat surfaces will be a common step in many duct tape projects. This method is also great for making large sheets. Having trouble controlling and lining up long pieces of tape for those super-sized sheets? No problem! Just tape smaller sheets of duct tape together to create a bigger one. If you accidentally cut your duct tape sheet too small, you can extend the sheet by this method too.
1 Align sheets and tape
along the seam.
Flip over and repeat for
2 the other side.
Taping Right-Angle Flat Surfaces
For sheets that meet at a right angle, it’s best to tape the seam when the two sheets are lying flat (see “Taping Flat Surfaces” above) then fold into a right angle.
If this is not possible (for example the final corner of a box), tape the inside seam first, where you won’t see the tape. With the corner secured, you can then tape the outside corner, and get a cleaner result.
1 When taping an inside right-angled seam,
make sure you push the piece of tape as
far into the corner as possible.
On an outside right-angled corner, place
2 and smooth out the piece of tape on one side of the corner first and then fold over.
11
Taping Curved Edges
To tape curved edges you can use a series of different sizes and shapes of tape: rectangles, squares, triangles or diamonds. Different shapes and sizes make it easier to tape around a curve without getting ripples in the tape or edges that stick up.
1 Cut out the small pieces of tape in
a shape that works best with your
project.
Overlap the pieces as you tape around the curve. If the edge 2 sticks up at the fold of the tape you can cut it and stick it flat.
Make sure to overlap your next piece of tape on top of the cut to hide it and make it secure.
12
Taping Curved Surfaces
There are two ways to tape a curved surface with duct tape: 1 Cover the surface with overlapping
ellipse- or almond-shaped pieces of
tape like a beach ball. While much
neater, this method requires more
precise measurements. Cap the top
and bottom where all points meet
with a circular piece of tape.
Apply a patchwork of tape around
2 the curved surface. You can use
square, rectangular, or circular pieces
of tape. Overlap the pieces and place
them in a way to avoid wrinkling.
If wrinkling occurs, carefully use a
craft knife to slice the wrinkle in the
middle and overlap another piece of
tape on top. While easier than the
first method, the results do not look
as neat.
13
bike
buddy
a riff on the old-fashioned canvas or leather saddle-bag slung in pairs over a horse, J.B. Wood’s 1884 bicycle pannier (U.S. Patent No. 299609) is used today to ferry around all manner of modern things, such as work
clothes, courier packages, bike locks, laptops, camping gear and groceries (the term does come from the Old
French for “bread,” after all). This smart, two-tone duct tape version is custom-fit to your bike rack, and because it’s made of the tape, it will stand up to the elements and keep your cargo dry. Sling this over your beast of burden and pedal in style.
15
What You’ll Need
14"
14"
4"
10"
10"
Sheet (Front)
Sheet (Sides)
Sheet (Front Flap)
14"
14"
4"
Velcro
(¾" x 1 ½")
Sheet (Bottom)
20"
24"
1"
Button Snaps
Strap
Make the sheets for the pannier (see “How to Make
Back
Duct Tape Sheets” on page 8). Measure your bike rack first to ensure it fits and adjust the measurements as needed. Use contrasting colors of tape for the front flap and back sheets for a snazzier look.
16
1 Place one of the front sheets in the middle and tape two side sheets and a bottom sheet
to it along the three edges as shown, taping
the seams on both sides (see “Taping Flat
Surfaces” on page 11).
2 Fold up the bottom and side sheets and tape the two corners where the sides and bottom meet,
creating a three-sided box. Tape the seams inside
and out (see “Taping Right-Angle Flat Surfaces”
on page 11). Repeat Steps 1 and 2 to make a
second three-sided box for the other side of the
pannier.
Take the large back sheet and mark the
3 middle of the two longest sides. You will
need to cut two 1" slots in the middle of
the back sheet, but the design and style
of your bike rack will determine where
you need to cut the slots. These slots will
3"
be used to feed the strap through to hold
your pannier onto your bike rack. (In this
example, the bike rack has cross bars 3"
from each end of the rack.) Cut a 1" wide
3"
strap to the required length and add snaps
to each end of the strap, following the
instructions provided with the snaps.
17
Take the first three-sided box from Step 2 and place it at one end of 4the back sheet, with the open end of the box facing the middle. Secure the bottom and sides of the box to the back sheet, taping seams both inside and out (see “Taping Right-Angle Flat Surfaces” on page 11).
Repeat with the other three-sided box.
Take one of the front flap sheets and tape it to the back sheet, aligning 5 it with the top opening of the box and taping the seams on both sides.
Rotate and repeat with the other front flap.
Repeat on other side
Make four tabs by folding 2" x 3" pieces of 6 tape in half so they measure 2" x 1 ½".
×4
* Note vertical cuts on tape
18
Tape the tabs 2 ½" in from either side on the back of the front 7 flaps, leaving ½" overhang. Run a piece of tape along the bottom of the front flap on the outside, completely
covering the tabs and about ¼" of the front
flap. Carefully cut this piece of tape down
the sides of each tab and fold it over onto
the back of the front flap. Repeat for the
other side of the pannier.
Add self-adhesive Velcro to the
8underside of the tabs and
the front of the pannier.
To secure the pannier to your bike
9rack, feed the strap through one
of the slots, under and around the
rack and up through the other slot.
Snap the strap closed.
19