Читать книгу Country Cottage Quilting - Lynette Anderson - Страница 7
На сайте Литреса книга снята с продажи.
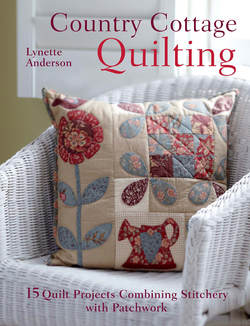
ОглавлениеHollyhock Cottage Bag
This useful bag is so easy to make you’ll want to create lots for family and friends. The threads and stitches used for the little stitchery that adorns the bag are described at the end of the project.
You will need…
• Two pieces of dark brown print each 51⁄2in × 10in (14cm × 25.4cm)
• Two pieces of brown floral each 81⁄2in × 10in (21.5cm × 25.4cm)
• Two pieces of brown check for lining each 10in × 14in (25.4cm × 35.5cm)
• Two pieces of blue print for casing each 2in × 9in (5cm × 23cm)
• Cream textured fabric for stitchery background 6in (15cm) square
• Tiny blue check for house appliqué 2in (5cm) square
• Scrap of blue print for door appliqué
• Ginger wool for roof 2in × 21⁄2in (5cm × 6.5cm)
• Stranded embroidery cotton (floss): ginger, salmon pink, dirty mauve, black, aged red, moss green, grey and petrol blue (I used Cosmo threads but DMC equivalents are suggested in the instructions)
• Fusible stabilizer (optional)
• Fine-tipped fabric marking pen in brown
• Cream cord drawstring 13⁄4yd (1.5m)
• Template plastic
• Light box (optional)
• Tacking (basting) glue (optional)
Finished size:
91⁄2in × 131⁄2in (24.1cm × 34.3cm)
Working the Appliqué
1 Use the relevant templates given in Templates at the back of the book. Using your favourite method of appliqué, prepare the appropriate pieces (see Working appliqué in the Techniques section). If using needle-turn appliqué, add a seam allowance around the shapes. If using fusible web appliqué, reverse the template shapes before using. I used needle-turn appliqué for this project and made the templates for the appliqué shapes from paper. Once the edges are turned under and tacked (basted), press the shapes, first on the wrong side and then on the right side.
2 Using the photograph as a guide, position the appliqué shapes. I used a light box, placing the pattern sheet on to the light box and positioning the background fabric on top. If you don’t have a light box use a bright window. Once you are happy with the positioning glue tack (baste) or pin the appliqué shapes in place.
Tip
I use a tacking (basting) glue to fix the shapes in position on the background as I don’t like the way thread gets caught around the pins when I’m sewing the shapes into place. Roxanne’s Glue Baste It™ has a small tube through which tiny drops of glue emerge, allowing for fine placement of the glue.
3 Stitch the appliqué shapes in position using a blind hem stitch and thread to match the background fabric so it doesn’t show.
4 Using a fine-tipped fabric marking pen either freehand draw or trace the embroidery lines from the template. Work the stitchery following the instructions at the end of this project.
Making the bag
5 To make up the bag cut the following pieces.
Two pieces 51⁄2in × 10in (14cm × 25.4cm) from dark brown print for the bottom of the bag.
Two pieces 81⁄2in × 10in (21.6cm × 25.4cm) from brown floral for the top of the bag.
Two pieces 10in × 14in (25.4cm × 35.5cm) from brown check for the bag lining.
Two pieces 2in × 9in (5cm × 23cm) from blue floral for the drawstring casing.
6 Take one top bag piece and one bottom bag piece and join together, pressing the seam open. This is the bag front. Repeat with other two pieces for the back of the bag.
7 Using the template provided, make a template from template plastic for the large circle. With the wrong side of fabric facing up, centre the circle template over the stitchery. With a fabric marking pen or pencil draw around the template. Cut out on the line (a seam allowance has been included in the template). Turn under about 1⁄4in (6mm) all around the circle, tack (baste) and then press.
8 Place the bag front piece right side up on a flat surface and using the picture on the previous page as a guide position the stitchery circle. Once you are happy with the position glue or pin in place and then stitch using a blind hem stitch.
9 Take the two pieces for the drawstring casing and press 1⁄4in (6mm) under on all four sides of both pieces. On a flat surface and with the right side of the bag front and back pieces facing up, centre the drawstring casing about 11⁄4in (3.2cm) down from the top edge of both pieces (see Fig 1). Stitch the casing in place with hand blanket stitch down the two long sides using two strands of aged red.
10 Take the bag outer and with right sides together and using a 1⁄4in (6mm) seam allowance stitch around three sides leaving the top open (Fig 2). Take the brown check bag lining pieces cut earlier and with right sides together and a 1⁄4in (6mm) seam allowance, stitch around three sides leaving about 3in (7.6cm) open in one of the sides.
11 With right sides together place the bag inside the lining and stitch along the top edges to join them together making sure you match side seams. Turn the bag through the gap so the right side is now facing outwards and slipstitch the opening closed. Press the bag lightly. Because the lining was cut longer than the outer bag it will fall to the outside, giving a nice contrasting band at the top edge of the bag.
12 Cut the cord in half and starting from the left side of the bag, thread one piece of cord through the front casing and then the back casing. Repeat with the other piece of cord but start from the right side (Fig 3). Finish by tying a knot in the end of each pair of cords so they cannot pull out of the casing when the bag is in use.
Tip
Using a large safety pin will help you thread the cord through the casing easily. Place the safety pin into the end of the cord and feed the safety pin into and along the casing. Remove the pin and repeat for the other length of cord.
Working the stitchery
Use the information in the panel below to work the stitcheries on the bag, needle case and scissor keeper. Transfer the stitchery designs on to the right side of the fabric you have chosen for the stitchery background, ensuring that there is plenty of space between each of the designs to cut apart once the stitching has been completed. Once all embroidery is complete press carefully.
I used Cosmo threads but DMC equivalent codes have been suggested below. Two strands of thread were used, unless otherwise stated. See Embroidery Stitches in the Techniques section for how to work the stitches. The stitches used were (abbreviations in brackets): backstitch (BS), blanket stitch (BKS), French knot (FK), lazy daisy (LD), running stitch (RS) and satin stitch (SS). If you want to add names or wording of your own use backstitch. An alphabet template is provided in the Template section.
Stitchery Threads
• Ginger (DMC 3031)
Outline wheelbarrow (BS)
Hollyhock stems (BS)
Line under house (BS)
Window frames (BS)
Date (BS)
• Salmon pink (DMC 224)
Hollyhocks, left side (BKS)
Dots on flowers on hill (FK)
Centre dots in right-hand hollyhock (FK)
• Dirty mauve (DMC 317)
Dots and name on scissor holder (FK & BS)
Name on needle case (BS)
Dashed lines on outer borders (RS)
• Black (DMC 310)
Line above wheelbarrow (BS)
Bird legs and beaks (BS)
Bird eyes (FK)
Line above bird on scissor holder (BS)
Scrolls below heart on watering can (BS)
Dashed line under wheelbarrow (RS)
• Aged red (DMC 221)
Birds (BS)
All hearts (SS)
Hollyhock closest to house (BKS)
Dots either side of name (FK)
Centre dots on left-hand hollyhock (FK)
Dashed line under top line of garden (RS)
• Moss green (DMC 730)
Watering can (BS)
Hollyhock leaves (BS & RS)
Leaves on hill (LD)
Daisy stems (BS)
Daisy leaves (LD)
Grey (DMC 646)
Daisy centres (FK)
Smoke (BS)
Alphabet, single strand (BS)
• Petrol blue (DMC 924)
Daisies (LD)
Chimney (BS)