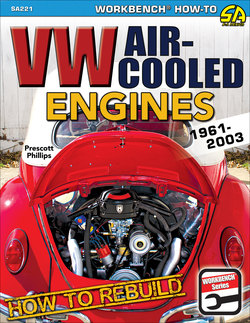
Читать книгу How to Rebuild VW Air-Cooled Engines: 1961-2003 - Prescott Phillips - Страница 8
На сайте Литреса книга снята с продажи.
ОглавлениеCHAPTER 1
BEFORE YOU BEGIN
The iconic air-cooled VW engine is shown here in its long-block form.
The early Volkswagen power-plants were a marvel of engineering, which is why they have endured for more than 80 years. Developed by Ferdinand Porsche and his team in the late 1930s, the final design was rolled out in 1938. The engine was a 25-hp air-cooled engine that had a top speed of 100 km per hour (62 mph) and was capable of 32 mpg while traveling with two adults and three children.
A Brief History of the VW Flat 4
Very few Volkswagens were produced during World War II. Most of the assembly plants were in shambles, and none of the Allies wanted to take over producing the Beetle. They said they didn’t see a market for such an ugly little car. The English decided they would take on the task of producing the car in Germany to give the German economy a boost.
Though not a hit when first introduced to the United States in 1949, Volkswagen knew it could sell the car to the automobile-thirsty American public. When Volkswagen started to gain popularity, a setback almost spelled disaster for the manufacturer. Early imports had mechanical issues, mainly with crankshafts and connecting rods breaking. Germany wasn’t about to let some bad publicity about the reliability of their little car stop them, so in typical German fashion, the engineers overengineered the components in question. Throughout their production, components were continuously refined and upgraded.
Horsepower numbers continuously increased over the years. In 1954, the displacement was 1,192 cc and produced 36 hp. In 1961, the horsepower increased to 40 hp. Five years later, the horsepower jumped from 40 to 50 with the introduction of a new cylinder head design and displacement of 1,300 cc. In 1967, the displacement grew to 1,500 cc.
In 1968, Volkswagen had its best annual US sales year ever when it sold nearly 400,000 units at a base price of $1,699. In 1970, the final displacement increased from 1,500 to 1,600 cc, which increased horsepower to 57. The dual-port head was introduced in the Type 1 in 1971, and the horsepower topped out at 60. Finally, electronic fuel injection was introduced in 1975. After that, the engine remained relatively unchanged until the final VW Beetle was imported into the United States in 1979. There were more than 21 million air-cooled Volkswagens total built as late as 2003.
Engine or Motor? The Great Debate
You may have seen discussions on the internet regarding what people like to call the device that motivates their vehicle. Notice how I avoided saying “motor vehicle”?
According to Merriam-Webster:
engine: a machine for converting any of various forms of energy into mechanical force and motion; also : a mechanism or object that serves as an energy source.
motor: one that imparts motion; specifically : prime mover
2: any of various power units that develop energy or impart motion: as
a: a small compact engine
b: internal combustion engine; especially : a gasoline engine
Many people get caught up in the notion that engines use a fuel of some sort to convert energy into movement and that motors are generally reserved for electric-powered devices. That theory has a lot of holes in it when major manufacturers, such as General Motors, Ford Motor Company, BMW, and Harley-Davidson Motor Company, have the word motor right in their names.
When I change the oil in my vehicle, I use “motor” oil. It says so right on the bottle. And what about motorcycles; it wouldn’t sound right calling them enginecycles. According to the definition, a motor is a type of engine, so I guess it really doesn’t matter.
For the sake of continuity in this book, a Volkswagen engine will always be called an engine and never a motor. Even though, personally, I enjoy calling them motors. It just rolls off the tongue better. ■
Engines
This publication covers the most-popular powerplant Volkswagen produced. These engines were installed in Type 1 Beetles, Karmann Ghias, Type 2 Buses (up to July 1971), Type 3 Squareback and Fastback, and the Type 181 Thing. Generally, every vehicle Volkswagen produced starting with the 1961 model year that used a Type 1–based engine will be covered within these pages.
Not only will this book cover the engines produced by Volkswagen but also the Type 1–based aftermarket engines. Did you know you can build a 100-percent brand-new air-cooled VW engine from aftermarket parts? This book will guide you with building those as well. With good rebuildable core engines becoming hard to find, this may be an option for you.
Type 1
In 1961, Volkswagen completely redesigned the Type 1 engine. Starting with a clean slate, very few components could be interchanged between the earlier 36-hp engine and the new 40-hp engine. Besides getting 4 hp more out of the same displacement (1,200 cc), many design elements were improved for ease of manufacturing and increased reliability.
For example, the fuel pump was relocated to the right of the distributor. The generator stand was separated from the engine case. The cam follower and pushrod became two separate components; they previously had a cumbersome one-piece design. The valves were angled in the cylinder heads, increasing flow. A spiral groove was cut in the backside of the crank pulley to return oil back to the crankcase during operation. These improvements were only slightly refined for the entire run of this design.
During the four years the 40-hp engine was available in the United States, Volkswagen produced more than 3.5 million vehicles worldwide. The US Type 1 VW market ended with the 1979 Beetle convertible, but this engine was produced by VW worldwide until 2003. It’s no wonder many of these engines are still around today.
Displacement and Horsepower Changes
In 1966, the United States was just at the beginning of what is known today as the muscle car era. Nearly every automobile manufacturer was caught up in the frenzy, including Volkswagen. The Type 1 engine got a whopping 25-percent increase in horsepower for 1966, growing from 40 to 50 hp!
The increase was due to many factors. The displacement was increased from 1,200 to 1,300 cc and was noted by a “1300” badge on the decklid. This was one of the few times Volkswagen ever bragged about engine size. The “1300” only lasted one year. The cylinder head was redesigned into what is known today as the single-port head.
Pre-1961 Engines and Practicality
Owners of earlier models with 25- and 36-hp engines might find this book useful, but those engines are not its main focus. These earlier engines have so little in common with the versions that are 40-hp and newer that it would be confusing to interject those differences within the context of building this more-popular version.
Parts are scarce for 25- and 36-hp engines and thus expensive for any pre-1961 VW engine. For this reason, it’s very common to swap the more powerful and less expensive engines from newer cars into these earlier models. A 40-hp engine is a direct bolt-in conversion for these earlier models. Unless the owner is a purist and is looking for a historically correct restoration, this is the route generally taken. ■
Engine Codes
This book will cover most versions of VW Type 1 engines after 1961 with the introduction of the 40 hp all the way through the fuel-injected 1,600-cc engines introduced in 1975. The following table provides the engine codes to identify a VW engine. ■
By 1967, automobiles were becoming faster and more refined every year. Manufacturers tried to outdo each other in order to sell more vehicles than the previous year. Volkswagen was no different, and the horsepower increased again. Displacement increased from 1,300 to 1,500 cc, netting a 3-hp gain, and the clutch diameter increased from 180 to 200 mm to handle the increased power. The charging system finally joined the rest of the industry by becoming 12 volts instead of 6 volts.
The single-port head had its final run in 1970, aided by an increase in displacement from 1,500 to 1,600 cc. The 1,600-cc single-port engine became the favorite for many years for its mixture of old-world simplicity with more power.
A key year in the development of VW’s engine program was 1971. This was the year the 1,600-cc dual-port engine was introduced. It produced a neck-snapping 60 hp! That’s 50-percent-more horsepower than the same basic design made 10 years prior. This version of the Type 1 engine remained relatively unchanged for the next three years. There were changes made to the charging system, replacing the generator with an alternator, adding a quieter muffler, and using different ignition timing that reduced the horsepower to 58 in 1973.
Beginning in 1975, all US Beetles and Super Beetles were fuel injected. They remained that way for the duration of their production. The Bosch L-Jetronic fuel injection reduced emissions enough to satisfy the US government while getting only slightly better fuel mileage. The horsepower numbers suffered in the balance, making only 50 hp.
Engine Identification
Identifying a Volkswagen engine is relatively easy. Along with the first letter or letters of the serial number, each engine provides clues to its pedigree with other factors. Knowing a few of these clues will come in handy when you are trying to decipher what you are looking at online or at a swap meet.
Maybe you are looking into purchasing a VW and you want to determine if it has the original engine. Spoiler alert! It probably doesn’t! A little knowledge can save a bunch of time determining exactly what engine you are looking at.
Intake Manifold
A seasoned professional can easily ballpark the VW engine version by looking at the intake manifold. There are only three basic intake manifolds for the carbureted Type 1 engine: Type 1 Beetles with 40-hp from 1961–1965, single-port 1966–1970, and dual-port 1971–1974.
The three different carbureted intake manifolds covered in this manual are: 40-hp 1961–1965 (left); 1,300–1,600 single-port head 1966–1970 (center); and 1,600 dual-port head 1971–1974 (right).
The easiest one to pick out is the dual-port manifold installed on 1,600-cc engines in 1971-and-newer engines. It has a three-piece design with a center section and aluminum castings that bolt to the heads. A dual-port manifold will always have a 1,600-cc engine. Remember that Volkswagen did make a 1,600-cc single-port engine; so if someone says it’s a 1,600, don’t assume it’s a dual-port engine.
If the engine has a three-piece intake manifold, it is a 1,600-cc engine. Volkswagen made a 1,600-cc single-port manifold in 1970, and it can be hard to distinguish this from a 1,300-cc (1966) or a 1,500-cc (1967–1969) just by looking at it. The serial number on the case of a 1,600-cc single-port will start with the letter B.
Single-port engines look very similar to the earlier 40-hp to the untrained eye. The intake manifolds look similar but aren’t the same. The easiest way to tell them apart is to look at where the manifold bolts to the head. The 40-hp and single-port share the same size hardware (6-mm studs) where they bolt to the head, but the studs on the 40-hp point straight down. The single-port manifold studs are at an angle.
Also early 40-hp cases did not have cam bearings. The cam rode directly in the case much like a cam in a motorcycle. Late-1965 40-hp cases started to get cam bearings, but there is no guarantee what cases got the bearings because the factory was already changing over to the new 1,300 engine.
The single-port engines are almost impossible to tell apart without looking at the beginning of the serial number. They came in three different displacements: 1,300, 1,500, and 1,600 cc. The 1,300-cc engines were the oddest of them all because they only came in the 1966 Beetle in the United States. A mixture of old and new parts, they really aren’t the most desirable engine to have unless you are restoring a 1966 Beetle to absolute 100-percent stock condition. Then you might be able to justify the more expensive parts it will take to rebuild it due to the rarity of the parts on a one-year-only build.
If you have a single-port-engine vehicle (1966–1970) and want to keep it looking period correct but have a little more horsepower, building a 1,600-cc single-port is the way to go. Starting with a 1,300-cc will not be cost effective due to the amount of machine work that will be needed to the engine case and cylinder heads for the installation of the larger pistons and cylinders. But the 1,500 cc available from 1967 through 1969 can easily be converted to 1,600 cc by simply changing out the pistons and cylinders. No machine work is necessary due to the outer dimensions of the cylinders being the same. You will get the benefit of more displacement and horsepower with minimal work and expense.
Serial Number
The only way to be sure of what you are looking at is to read the serial number stamped into the engine case. On all Type 1–based engine cases, the serial number is located just beneath the generator stand and just above the dipstick. In the United States, the serial numbers on early 40-hp engines didn’t begin with a letter; instead, the numbers started with a 5, 6, 7, 8, or 9. Worldwide the letter D designated the 40-hp engine cases, so the case may or may not have a letter D stamped near the serial number.
In 1966, Volkswagen started designating engine models by adding a prefix of letter or letters to the serial number. All of the single-port engines have just one letter, starting with the letter E for the first 1,300-cc single-port engines.
Here is an example of the serial number of a factory manufactured engine case. The previous serial number was machined off with the exception of the A that designated it as a dual oil pressure relief case. The VW re-manufacturing symbol was stamped in and then the letters AK. The area next to that might have the serial number that was being replaced stamped in, but it rarely does.
With the introduction of the 1,600-cc dual-port engine in 1971 came a new numbering system. All of the 1,600 Type 1–based engines had two letters to start the serial stamped on the case. The first letter is always an A. It’s super easy to remember: no letters means a 40 hp, one letter is single-port, two letters that start with A is a 1,600-cc dual-port.
Other Indicators
There are additional pointers that are helpful when trying to determine what vintage engine is in your car. The fuel-injected versions introduced in 1975 are easily identified by the lack of any mechanical fuel pump machining done to the case just left of the alternator stand.
Say the engine is not installed in a vehicle and you can’t find the serial number in the usual spot under the generator stand area. It could be out of a Type 3 (fastback or squareback). The absence of a dipstick will be your first clue.
Type 3 engines will have the serial number on top of the case right behind the fuel pump. Right along where the two engine case halves come together. No numbers there either? More than likely it’s a factory replacement case or even an aftermarket replacement case.
Years ago, a replacement case could be purchased directly from a VW dealer. Today, aftermarket manufacturers have stepped up and now produce OEM-quality replacement engine cases. To keep costs down, these cases are universal, meaning they are made to fit almost every configuration of Type 1, Type 2, and Type 3 engine. The only downside is they are only available in the 1,600-cc bore size: 85.5 mm.
Is This Engine Worth Rebuilding?
Many factors will determine if it is cost effective to rebuild a certain engine. Every engine could be restored but not every engine should be restored unless it holds special sentimental value or is super rare. Your engine may be beyond repair and may only be good for a few usable parts.
Let’s start with a visual inspection. Does it have a giant hole in the top of the case? If so, more than likely, it threw a rod and the entire lower end is beyond repair.
Has it been left outside in the elements uncovered? Is it lying directly on the dirt floor? Mother Nature is the number one killer of stored vehicles and their components.
Read the dipstick. Does it have any oil? What does it look like? Black is actually okay. What you absolutely do not want to see is water. If the oil is milky like coffee with a lot of cream or even chocolate milk or has any presence of water at all, it might not be a good candidate for a rebuild. What happens is the water, being thinner than oil, settles down at the bottom of the sump. Water and magnesium do not play well together. Corrosion happens very quickly and will destroy the engine case from the inside out. Corroded magnesium is impossible to weld cleanly, and corrosion around the sump plate can render an engine case unusable.
If the engine is installed in a car and it runs, more than likely it will be rebuildable. Even if it runs poorly; is missing, chugging, or knocking; is running on three (or fewer) cylinders; is leaking oil from every corner; etc., it more than likely will be just fine once rebuilt.
If it doesn’t run, the first step is to determine if the engine is locked up. Grab the fan belt with both hands and try to rotate the engine one way or the other. No fan belt? Try turning the pulley or even the flywheel. If it rotates easily, it’s good. If it’s difficult to move but it does move some, it’s likely still rebuildable.
If the movement stops abruptly in either direction, more than likely the lower rotating assembly is unserviceable and the engine would not be a good candidate for a rebuild. If it rotates slightly but binds up at any point and doesn’t spin completely around, then it’s usually just the piston rings dragging on rust in the cylinder bores. If this is the case, the engine is more than likely serviceable but it may take some work to get apart.
The worst-case scenario is that the engine is locked up tight and doesn’t move in either direction. Try pushing and pulling on the lower pulley. Do you have a little movement? That’s the glimmer of hope you are looking for. It’s going to be a bear to get apart, but it may be savable. The value of this condition engine is very low, like almost free. Take this into account. You may want to look into another prospect.
Planning
Starting any project always requires three things: knowledge, money, and time. With this book will come knowledge. Rebuilding the engine yourself will save money. The last thing is time. How long is this going to take? A big factor with time is your mechanical ability, but some factors will be out of your control. For example, the machine shop might have a backlog or your parts might not arrive in a timely manner. Preplanning will speed things up and keep you on track.
Plan for engine teardown to take 8 to 10 hours. An entire weekend should be enough time to get the engine completely apart with the parts sorted. Organize the parts into three piles: parts to clean up, parts to throw away, and parts to take to the machine shop. While parts are at the machine shop, the rest can be cleaned, inspected, prepped, and painted.
The machine shop will determine what bearings you need and if anything is beyond servicing. Once you get that information, you can place an order for the parts you need. Don’t be surprised if you find things later that should be replaced as well. This process may take a few weeks, depending on the machine shop time and how long it takes to get all your parts.
Tech Tip
To take apart a serviceable engine, remove the spark plugs and spray penetrating oil or WD-40 down the holes. You will save yourself a lot of frustration by doing this well before you start the disassembly process. ■
Assembling a long-block will take about 10 to 12 hours, which is slightly longer than the tear-down process. It will take another 4 to 6 hours to get the engine to the point it can be started. This includes installing the cooling tin, fan shroud, charging system, ignition, and intake and exhaust systems.
A realistic time frame is three to four weeks total, which really isn’t too bad. In fact, that’s quicker than some shops that have a waiting list for complete engines.
Work Area
Most professional shops are divided into two areas: one to tear down engines and another for assembling engines. The reason for that is to keep the mess separate from the clean parts. This can be achieved by the home builder by doing the teardown in a different area from where the assembly is going to occur. The driveway or garage stall works just fine.
Disassembly can be quite messy and can occur just about anywhere, but a clean, dedicated area to assemble your engine is a must for a successful build. Most home workshops are small, but as long as the previous mess is cleaned up and you start fresh with a clear workbench and all the tools put away, you’re off on the right foot. An extra table close by helps as well to lay out parts and stay organized.
Lighting will also play a key role in how well your build turns out. There’s a reason the operating rooms are the best lit rooms in the hospital.
Your build may get put on hold for any amount of reasons. Be sure this area won’t be disturbed if that happens.
Cleaning Area
Cleaning parts is not the most popular aspect of engine building, but it is a very important one. Mineral spirits can be used as a solvent as well as some water-based parts cleaning solutions available at most tractor supply stores.
If you don’t have a parts washer but have access to one, by all means use that favor and clean your parts. If that’s not an option, a small bench top or floor model can be purchased for less than $100. Remember to place the cleaning tank in a well-ventilated area and add an exhaust fan if necessary. As an additional safety measure, keep a dry-chemical fire extinguisher handy.
To save some time and get a more thorough cleaning job, have the machine shop clean your engine components. For a fee, they will run your parts through an industrial parts washer or hot tank. Just be careful and keep track of what you bring there so you are certain to get it all back. Take a photo if necessary.
Tools
Volkswagen designed its engines early on with the idea that the average mechanic should be able to do most of the routine maintenance and even some of the more involved repairs right in his or her own garage. With this in mind, it limited the fastener sizes to just a few. VW mechanics joke they can take apart an entire Beetle with five wrenches: 8, 10, 13, 17, and 19 mm.
The internal components of the engine will add a couple more sizes to the mix, but if you own a decent set of metric tools you will be fine. You will also need combination wrenches; 1/4-, 3/8-, and 1/2-inch drive sockets; and ratchets to get the majority of the work done.
The majority of the fasteners that need to be torqued can be handled with a 3/8-inch drive torque wrench. Don’t rely on the cheap beam-type torque wrench lying in the bottom drawer of the toolbox. If you need to buy one, don’t get a cheap one. Buy a name-brand wrench that has a micrometer type adjustment and clicks when the set torque is reached. The latest electronic ones have LED lights that tell you when you are getting close to the correct torque then beep when the set torque is reached.
To torque the flywheel to the crankshaft, you will need a serious torque wrench that can measure at least 253 ft-lbs. The casual mechanic will find it hard to justify buying a torque wrench that can handle that much torque just to tighten one fastener. A 3/4-inch drive torque wrench can easily cost hundreds of dollars but can be rented inexpensively, and some major auto parts retailers will even lend you one for free with a deposit.
An air compressor or access to compressed air will be a must to clean components and blow out passages as well as operate air tools if you own some. Tearing down an engine will go much quicker with air tools or cordless impact tools if you have access to those.
Here is a list of tools you will need other than your basic hand tools.
• 3/8-inch drive torque wrench—10–75 ft-lbs range
• 3/4-inch drive torque wrench—50–300 ft-lbs range
You will need two torque wrenches to rebuild an entire VW engine. Most fasteners only require a 3/8-inch drive, such as the one shown. The “clicker” type is recommended over the beam type due to their increased accuracy. You will also need a larger one that can torque the flywheel to 253 ft-lbs.
A professional piston ring compressor is well worth the money. This ring compressor by K-D tools is made in the United States and built to last. The pliers (model 850H) and ring (model 850-BC) have a 3 ⅜ to 3 ⅝ -inch range.
In order to set and check the crankshaft end play, a dial indicator and magnetic base are a must. This Starrett indicator and Cullen magnetic base are examples of what you need but are, by no means, the caliber of tools necessary. An indicator and magnetic base from Harbor Freight Tools for around $29 will get the job done just the same.
• Piston ring compressor
• Dial indicator with magnetic base
• Digital calipers
• Professional lock ring pliers
• 1 ⁷⁄₁₆ -inch (36 mm) 3/4-inch drive socket
• 3/4-inch drive breaker bar
Removing the clip that holds the crankshaft gears on can be challenging, to say the least. A good pair of lock ring pliers are about the only way that clip is coming off. The Craftsman models (47386 and 46948) shown here work quite well. Wilde Tool lock ring pliers (model G409.B) are made in the United States and only cost $20.
If you have one of these, you already know what a joy it is when this fine device is in your hand. This particular Craftsman model (41588) is perfect for prying things apart or making sure that things you were thinking about replacing are now on the “need to replace” list.
In order to heat up the crankshaft gears to slide them onto the crank, you will need a source of heat. A single burner hot plate can be purchased for less than $20 and works quite well. It sure beats getting the kitchen all smoky heating up gears on the stove and taking heat from your better half.
• Screwdriver
• Hot plate or quick access to a stove
• Parts washer or access to one
• Air compressor and blow gun
Specialty Tools
As you can imagine, there will be some specialty tools needed to get the job done. These tools will make difficult jobs easy. In some cases, they will be the only way you can assemble an engine correctly. All of these tools are VW specific.
This basic engine stand is one you may already have or can easily buy online or at Harbor Freight Tools. It’s rated at 1,000 pounds and costs $60. The engine stand yoke is specifically designed for a VW engine from Vintage World Tools ($91). The drip pan is actually a restaurant 19-gauge aluminum sheet pan measuring 18x26 inches (Thunder Group ALSP1826) and costs less than $7.
A VW air-cooled-specific engine stand is a must to rebuild an air-cooled VW engine. A bench-mounted one (EMPI 5001) is most economical and works if your bench can hold the weight. (Photo Courtesy EMPI Inc.)
A floor model engine stand (EMPI 5007) is more mobile and can be disassembled and stored for a less permanent solution. (Photo Courtesy EMPI Inc.)
A flywheel lock holds the flywheel to the case so the gland nut can be removed and installed. This lock (EMPI 5003) fits both 6V and 12V flywheels. (Photo Courtesy EMPI Inc.)
A clutch pilot tool can be purchased rather inexpensively, but those are usually made of plastic and aren’t very precise. Shown are two inexpensive alternatives. The top one is made of aluminum and was turned up on a small lathe. The smallest diameter must slip into the gland nut pilot bearing and the next step must be a slip fit into the clutch disc. The lower one is the input shaft from any VW Type 1 transmission. Most local VW shops will gladly sell you one inexpensively.
• Engine stand
• Flywheel lock
• Clutch pilot tool
• Crank gear puller
• Lifter holders
DIY Tools
Sometimes the simplest things can make life so much easier. Planning ahead and making sure you have the right equipment can make all the difference. These tools are ones you can make yourself to help with the engine rebuild.
If your buddy or the local machine shop doesn’t have a VW-specific crankshaft gear puller, your only other option is to buy one. Most shops charge $15 to $20 to remove the gears. This puller (EMPI 5714) costs $80 to $90. (Photo Courtesy EMPI Inc.)
These lifter holders are clips made to hold the lifters into the 3-4 side of the case while you set it down on the other half. Most people use grease or assembly lube to hold them in, but lifters may slide out of their bores and down into the other half. If you run into issues causing you to start over, it takes longer than it should. (Photo Courtesy EMPI Inc.)
An easy solution to holding the crankshaft safely is this vise mount made from an old flywheel gland nut and a short piece of angle iron. Cut the angle iron the width of your vise jaw and weld the nut to it. By screwing the holder into the crank and then clamping it into the vise, you have easy access to all the components attached to the crankshaft.
• Crankshaft vise mount
• Flywheel holder “Helping Hand”
• Crankshaft hand crank
This flywheel holder is made of four items and is a surefire way of removing a flywheel gland nut. Gather a 1 ⁷⁄₁₆-inch (36-mm) 3/4-inch drive socket, a 3/4-inch drive breaker bar, a length of pipe that will fit over the breaker bar, and a length of heavy angle iron with a couple holes drilled in it to fasten it to the flywheel. Drill one 3/8-inch hole near the end and another 7 ⁷⁄₁₆-inch from there. Length is unimportant but remember leverage is your friend.
It may not seem like a valuable tool, but you’ll feel like a professional cranking over your fresh rebuild with your very own hand crank. To make your own, bend a length of 3/8-inch rod and weld it to a crank pulley bolt. You can use an old 10-mm head stud if that’s what you have handy.
• Oil pressure relief plug tool
• Bent 13-mm box wrench
Shop Supplies
These items may seem obvious, but a list is a good way to make sure you are prepared.
The pressure relief screws can seem impossible to remove. That’s where this handmade tool will come in handy. You’ll need a 3/4-inch bolt that is 4 to 5 inches long. Grind the end until it fits snugly in the screw. It has a slight radius along the blade, as that is how it is in the screw head. Give this tool a couple sharp blows with a hammer to shock the relief plug loose.
A curved 13-mm wrench can be a time-saver when removing and installing a VW carburetor. You can pay for a fancy Snap-On version or make your own out of a generic 13-mm wrench and a propane torch.
Red Line makes a great engine assembly lube that works well for cam lobes, lifters, and lifter bores. All the direct, metal-to-metal components can benefit from this product.
General assembly lube that is easily applied can be made by mixing equal parts STP oil treatment and 20W50 motor oil. Sometimes it’s a little hard to get pumping out of the oil can, but it can be applied with one hand and without getting your hands all sticky.
Permatex aviation sealant has been around forever and is about the closest product available that mimics the original sealant used by the factory. It is primarily used to seal two machined surfaces without gaskets, such as the two engine case halves. It also works well for tacking gaskets in place during assembly.
• Assembly lube
• Permatex aviation sealer
• STP oil treatment
• Castrol GTX 20W50 motor oil
• Silicone gasket maker
RTV or silicone gasket sealer should be used very sparingly on a VW air-cooled build. Never use it to seal the two case halves together. Common uses are valve cover gaskets and pushrod tube seals. This Permatex product has great oil resistance and seals off those areas well.
Before you get too far into the process, make sure you have an ample supply of brake cleaner and paper towels. A box of lint-free shop towels is a good alternative paper towel for wiping off critical components, such as bearing journals, prior to assembly.
• Brake cleaner
• Paper towels
• Various containers
Our Engine
The focus in this book will be on the most popular and most desirable air-cooled flat 4-cylinder engine that Volkswagen ever produced. It is no coincidence that the most popular engine is also the most powerful stock 1,600-cc air-cooled engine that Volkswagen ever produced for the American public. With its 60-hp engine and upgraded cooling and oiling systems, the engine installed in 1971–1972 Beetles, Super Beetles, and Ghias will be the engine we will use for the detailed disassembly and reconstruction.
Simple and inexpensive items work great for organizing parts. Muffin tins are great for sorting hardware, and cake and bread tins help with larger items. All of these items can be found at your local thrift store, at a rummage sale, or possibly in your own kitchen. Maybe your wife would like new stuff and your anniversary is coming up. Problem solved.
Volkswagen produced more than 700,000 units with this powerplant during those two model years. The serial number designation is AE. It has a 1,600-cc engine with dual-port heads, a doghouse-style oil cooler, a dual oil pressure relief case, a wider engine cooling fan, and a generator charging system.
Our particular engine was previously installed in a 1970 Beetle that was converted to a Baja Bug. As in most cases where the engine isn’t original to the car, the mileage is unknown. We didn’t even try to start it because we knew it was hard to turn over by putting a wrench on the crank pulley bolt. Even with the spark plugs removed and oil squirted into the cylinders, it was difficult to turn over. Since there weren’t any obvious signs of complete destruction, we decided this would be a good candidate for a rebuild. Fingers crossed.
This engine was plucked from a 1970 Beetle that was converted into a Baja Bug. Much of the engine tin was already missing due to the fact that it was installed in an open air–type vehicle. The distributor had been changed out for the more popular Bosch “009” mechanical advance distributor.
Here you can see the improved cooling system that was introduced in 1971. Commonly known as the doghouse cooling system, it was a huge improvement. The oil cooler moved from inside the fan shroud to its own housing behind the fan shroud. The oil cooler increased in size and was now made of aluminum.
This is the serial number for our engine. Notice the location is right under the generator stand and above the dipstick. The number AE699256 designates it as a 1971 1,600-cc dual-port engine.