Читать книгу Sweet & Simple Needle Felted Animals - Sachiko Susa - Страница 9
На сайте Литреса книга снята с продажи.
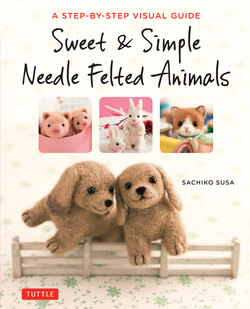
ОглавлениеMiniature Dachshunds
Of all the animals, the miniature dachshund is one of the easiest to make. Their “look” is achievable even for beginners. Learn the basic construction method for the other animals by making the miniature dachshund.
Step-by-step Lesson 1
Making a Miniature Dachshund
MATERIALS ※for one dog
Roving
Light brown 16g; small amount of black
If making the “tilted head” version of the dachshund add a small amount of brown for the ears and tail.
Solid eyes
4.5mm x 1 pair
Actual sizes of the finished miniature dachshunds
Step-by-step instructions
1 Match felt pieces to full-size parts images to create individual parts – page 14
2 Attach legs to body – page 20
3 Attach head to body – page 21
4 Attach muzzle to head – page 22
5 Create face – page 23
6 Attach ears – page 24
7 Punch in claws – page 24
8 Attach tail – page 25
1 Match your felt pieces to the full-size body part photos in this section
Actual sizes of the dachshund parts
Dividing the felt
Dividing a length of wool
1 When dividing felt into the required amount for a given part, hold it with the fibers running horizontally between your hands, with hands placed about 4 in (10cm) apart.
2 Pull slowly without force and the fibers will separate.
SOS!
Hey, why won’t it tear?
NOTE: if you pull with your hands close together, it won’t tear!
Splitting a length of wool
Hold with fibers running vertically between your hands and slowly peel off a section by inserting fingers between the fibers.
Taking a small amount
Pinch the edge of the wool and pull slowly.
TIP!
When dividing wool, don’t force it. It’s fine to cut it with scissors too.
TIP!
Weighing the wool (for 40g/1.4oz)
The amount of wool needed for making one animal is about 15g in total. The weight for each section is given in detail (head: 2g; body: 5g etc). For a 40g (1.4oz) bag of felt, think of it as ¼ is 10g, half of that is 5g, 1/5 of that is 1g—if you don’t have a scale, it’s possible to do approximate calculations in this way. If you have a scale that operates in one-gram increments, it’s best to use it to weigh the wool properly to learn the relationship between the amount of wool required and the firmness of the finished item, but it’s also useful to remember this other method of “weighing”. If working in ounces, use the conversion chart on page 9.
The Body
Create the core for the body
TIP!
When punching in felt for the body, it’s a lot quicker to use a two-pronged needle.
1Prepare ¼ of the amount of wool required for the core (split vertically).
2 Leaving about one body length free, fold wool to the length of the full-size part and punch with the needle.
3 Create a thin cylinder, rolling occasionally to ensure felting is forming an even cylindrical shape.
4 Once the shape has been firmly felted, layer the remaining wool over the top and punch in. Roll shape and punch from the side, layering the remaining section over it until it is as thick as the full-size part pictured on the right.
Complete the body
Wind the remaining wool a little at a time around the core, punching in after each layer. Repeat this process several times.
These photos show the dachshund’s core and body at actual size.
The finished core. Is yours the same size? Hold it against this picture to check. If your item is not wide enough, add more wool by winding around horizontally.