Читать книгу Patchwork Quilted Bags - Reiko Washizawa - Страница 8
На сайте Литреса книга снята с продажи.
ОглавлениеChapter 1
Basic Bags
Bags & Pouches
My thinking is that if I’m going to make a bag, I want it to be cute, practical and durable! With that in mind, I’d like to introduce you to my go-to bag design. You may be slightly intimidated by the zipper and gusset, but don’t worry. The detailed step-by-step instructions and helpful photos will gently guide you all the way through.
Make this versatile bag out of some of your favorite printed fabrics.
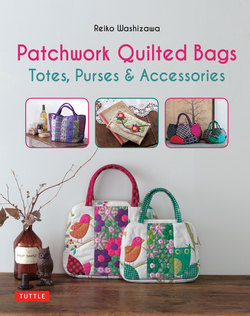
The Little Bird Bag
This bag was inspired by the idea of a playful birds frolicking in a garden abloom with flowers made from hexagon pieces (pattern sheet A). The roomy interior of the bigger bag holds file sizes up to A4. (a little larger than 8½ x 11 in / 21.6x28cm). For the bird motif, select hardy materials such as curtain fabric. The two-way zipper makes this bag extra convenient.
Production: Big Bag / Mayumi Honma Small Bag / Toshiko Ikeda
Process Assistance: Ritsuko Ariki, Mituko Furukawa, Yasuko Oya, Mieko Nishioka, Naoko Masuda, Emiko Matoba, Emiko Mori
Pattern Sheet A
1 By quilting along the owl’s outline, the motif looks charmingly fluffed.
2 Sew together small hexagons measuring 5/8 in (1.5cm) on each side for the flower pattern.
3 The back pattern pieces are joined together to create a single fabric piece (not including the corners). Change up the look by featuring varying parts of the fabric or by using different fabric for the handles.
4 The accommodating handles can be worn on the shoulder or carried by hand. The gusset provides enough room for a pouch.
5 Inserting yarn in the batting within the handles strengthens them and ups the comfort level.
Fabric and Materials Preparation
① Recommended foundation fabric: mid-weight cotton.
② Recommended patchwork fabric: 100% cotton flat weave.
③ Quilt batting: to be sandwiched between the outer and backing fabrics. Batting comes in assorted substrates, but the samples in the book are constructed with a ¼ in (5mm)-thick, 100% polyester fusible batting.
④ Quilt backing: lightweight white fabric.
⑤ Lining fabric.
⑥ Fabric for handles and corners.
⑦ Yarn: preferably a standard weight acrylic blend. Select yarn that will not shrink in the wash.
⑧ Zipper: two-way.
The exterior is an ironing board, and the interior has two panels: one side is a marking tool that holds fabric pieces in place, and the other side is a cutting board. Measuring at 11½ in (29cm) high and 9½ in (24cm) wide, it’s a portable as well as useful tool.
① Patchwork board: a multifunction apparatus that can be used as an ironing board as well as a marking tool for patchwork pieces.
② Iron: for pressing seam allowances and for fusible quilt batting.
③ Ruler: for drafting and marking.
④ Pencil with HB or B lead: for drafting and marking.
⑤ Marking pen: preferably a water-soluble type.
⑥ Ring Thimble A: useful for protecting fingers when basting or gathering fabric pieces together. Place between the first and second joints of the middle finger. Simple Thimble B: Slip on tip of thumb while quilting.
⑦ Long needles for basting.
⑧ Quilting Needles: these needles are thinner and shorter than regular hand sewing needles. Use for piecework or quilting.
⑨ Pins: to hold fabric pieces together temporarily.
⑩ Yarn needle: needle with a large eye for sewing with yarn.
⑪ A Basting Thread: to temporarily secure fabric pieces together. B Quilting Thread: for quilting. C Regular Thread: for piecing fabrics together.
⑫ Scissors (3 pairs): A Scissors for cutting paper. B Fabric shears. C Small scissors for cutting thread.
⑬ Thicker tracing paper: for creating pattern pieces.
Pattern Drafting and Construction steps
Using plain or grid paper, trace the foundation pieces, patchwork pieces, gussets, and handles. Based on the number and size of the pattern pieces, assess how much fabric you will need. Before you start sewing, review all the steps of the process; this way the construction for the actual bag will go much more smoothly.
MATERIALS (REFER TO IMAGE ON P.12)
① Foundation fabric…29½ x 215/8 in (75×55cm)
② Patchwork Fabric (6 pieces) …8 x 7 in (20×18cm) each
③ Fusible Quilt Batting…433/8 x 195/8 in (110×50cm)
④ Backing Fabric…31½ x 13¾ in ( 80×35cm)
⑤ Lining Fabric…31½ x 33½ in (80×85cm)
⑥ Handle and corner fabric…195/8 x 10 in (50×25cm)
⑦ Yarn…As needed
⑧ Two-way zipper…195/8 in (50cm) long
NUMBER OF PIECES REQUIRED
CONSTRUCTION STEPS
1 Draft pattern pieces and cut out fabric.
2 Create flower patchwork.
3 Construct main body of bag and attach handles.
1 Draft Pattern Pieces, Cut out Fabric
Although you could measure the dimensions directly onto the fabric, it is likely that the fabric will shift along the way. Drafting paper pattern pieces will help ensure accuracy. For this project though, you can trace your pattern pieces from the pattern sheet provided with this book. To keep pattern pieces and fabric steady, work on a non-slippery surface.
Place thicker tracing paper on top of the pattern sheet and trace each pattern piece. Select a type of tracing paper that is transparent enough to let you see the fabric prints but will not tear easily. Lines made using pencils with softer lead (HB or B) will show up more clearly on the paper.
Markings are meant to indicate how pattern pieces should fit together to be sewn properly, such as the corner curve position, the center of the bottom piece, and the gusset pieces attachment position.
① Cut foundation fabric for front and back.
Trace pattern piece A’ for the front panels on your foundation fabric, keeping in mind how you would like the fabric design to appear on the panels. Make sure to transfer markings. Add a 3/8 in (1cm) seam allowance and cut out. For the back piece, place pattern pieces A+B+A’ side-by-side on the foundation fabric and trace around all three pattern pieces. Place pattern piece C on the fabric for corners, trace and cut out.
② Cut out hexagon pieces.
On the wrong side of fabric (a), trace pattern piece D. Leave a space of 5/8 in (1.4cm) around each hexagon. Using the patchwork board will hold the fabric in place and make the process smoother.
● If you’re not concerned with fabric design placement.
Place pattern piece D on fabric (c), add ¼ in (7mm) for the seam allowance and cut out. In this case, we positioned the pattern piece so that a flower would be in the center.
● If you want a particular fabric design placement.
2 Assemble Patchwork (Flowers)
Sew together the hexagon pieces to create the beloved Rosette flower design. This involves the simple repetitive step of basting each piece together with a running stitch—easy! Focus on creating even stitches rather than tiny stitches.
① Arrange the cut pieces into the flower shape.
The hexagon piece with the floral design (fabric c) will be in the center, and the polka dotted pieces (fabric a) will form the petals.
② Add the stitching line to the wrong side of each hexagon and sew.
Pin two pieces of fabric (a) hexagons with right sides together. Knot the end of the thread and sew from one end of a drawn line to the other. Use a running stitch and backstitch at the beginning and end of the line. Tie off the thread with a knot. Make three sets.
③ Take one set from step 2 and pin to the center hexagon from fabric (c).
Open up one of the sewn pairs from step 2 and pin to (c). Be careful to line up the pieces evenly as you pin.
④ Starting at one end of the sewn line from step 3, connect the center hexagon.