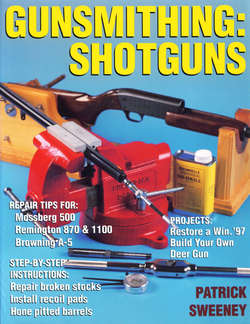
Читать книгу Gunsmithing: Shotguns - Patrick Sweeney - Страница 12
На сайте Литреса книга снята с продажи.
ОглавлениеCHAPTER 4 Shotgun Types and Their Maintenance
Once it has been manufactured, every shotgun seems to spend the rest of its existence as a magnet for dirt, dust, rust, powder residue and clumsy relatives. Even sitting quietly in a locked cabinet or safe, a shotgun will collect dust. Handling your shotgun, you place water and oils from your hands and face onto the stock, forearm and steel. Taking your shotgun out into the woods, or to the gun club, exposes it to changes in temperature and humidity. Sunlight warms it and the AC in your car cools it. Rain, snow, fog and dew all conspire to get your shotgun wet. Shooting your shotgun deposits plastic and lead in the bore, powder residue in the chamber and action, and more sweat and skin oils on the wood and steel.
Do not skimp on a cleaning rod. You can get by with a rifle rod and an adapter, but a shotgun rod is better for use in shotguns.
It is false economy to be sparing in your use of cleaning solvents and oil. Get the best and use them as needed. These small bottles represent a multi-year supply of solvent and oil even when used excessively.
All of these things can be cleaned off at no harm to your shotgun. But if neglected, shotguns will rust. Rust can be cleaned off your shotgun, but at a cost. The three levels of rust are: spotting, cleaned off with little or no evidence of its existence: flaking, which can be cleaned off but leaves bare spots where the bluing has been removed; and pitting, which when removed leaves as its evidence steel that is destroyed.
Regular inspection and cleaning of your shotgun will prevent rust. If for some reason your shotgun does rust, the rust can be removed. Rust works the same way on all shotguns, as a chemical reaction between water and the steel, creating oxidized steel. How to clean your shotgun depends on what type it is.
Rust is the enemy, and your hands can cause it. The salt and oils in your skin can strip bluing off, as they have on this shotgun.
Shotguns come in a variety of action types. The most common ones are single-shot, doubles, pumps and semi-autos. For a while there was a number of inexpensive bolt-action shotguns made, but they are rarely seen today. One was even a modified bolt-action rifle. After The War to End All Wars (before we got into the habit of numbering them), Germany was left in a shambles. They had to pay reparations to the Allied powers, their civilian economy was non-existent after four years of war. The only things they had in excess were rifles. Too bad, because so did everyone else. However, by modifying the bolt-action Mauser and fitting a shotgun barrel to it, they could sell their surplus rifles as two-shot shotguns. The market for such guns was always small, and disappeared in the early 1960s. If you see a bolt-action shotgun today, it is almost certainly to be a slug gun, designed to be a “shotgun” for deer hunting. With a rifled barrel it can shoot as accurately as some rifles. The only thing it has in common with the inexpensive bolt actions of an earlier age is the handle on the side.
This Belgian shotgun uses a rod through the center extension as a locking method.
Older bolt-action shotguns were made to be inexpensive, but can be re-built beyond their earlier expectations.
Safety Measures And Handling
The purpose of a shotgun is to launch a payload of shot. At close range, the destructive power of a shotgun is most impressive. The shot can blast through many building materials, and make a terrifying mess on the other side.
The first thing you always do is make sure the shotgun is unloaded. The second thing is to make sure there are no loaded shells anywhere near. The third thing is to continually check to make sure the shotgun hasn't gotten loaded since you last checked. Even if that last check was a couple of minutes ago. Your best example in this habit would be a group of practical shooters. They are used to handling, loading and unloading firearms on a regular basis. If one is showing a shotgun to his buddies, each of them will check to make sure it isn't loaded, even after seeing all the others in the group do so. Your worst example would be some of the customers any gunshop gets. Bringing a shotgun in for sale, appraisal or repair, customers will always tell the clerk “It isn't loaded.” When I was working at a commercial shop, we could hardly go a month without working the action and throwing a loaded round out onto the counter or floor.
The modern bolt-action shotgun, with a rifled barrel, is an accurate slug-shooting machine.
When you go to check the chamber on pumps, open the action using the slide stop. Usually located on the front or rear of the triggerguard, it unlocks the action without dry-firing it Run the slide all the way back. On autos, grasp the operating handle and rack the bolt back until it locks. Look into the chamber, and press a fingertip against the magazine follower. Once you are satisfied it is unloaded, then proceed. Even after you have checked, maintain the habit of keeping the muzzle pointed in a safe direction for disassembly and maintenance
For cleaning you can divide a shotgun into its three basic components: The barrel or barrels, the action, and the stock and forearm. Each will require its own tools and cleaning compounds. If your shotgun has a barrel that does not detach from the receiver you will need to treat it like a rifle. Two examples of such a shotgun are the Mossberg 512, and the Browning A-Bolt Stalker. Get a rifle cleaning cradle, it will make your life much easier.
You will need a cleaning rod, brushes and patches for the bore. Also, you wilt need cleaning solvents to dissolve the powder residue, plastic and lead that coat your bore. The selection of a cleaning rod for your shotgun is not as critical as it is for a rifle. The rod for a shotgun is not nearly large enough to touch the bore, let alone rub it hard enough to cause significant wear. I use the jointed aluminum rods because they are cheap. So cheap that when I was working commercially I didn't switch brushes or swabs. We bought and sold many used shotguns, and it seemed like every other one we bought had either extra shells or a cleaning kit with it. I simply set up a shelf with rods assembled for each gauge, one rod with a brush and one with a swab. You needn't go that far. One rod will do. For a cleaning solvent, Shooter's Choice or Birch-wood Casey powder or nitro solvents work nicely. As a lubricant and after cleaning, use Break Free or FP-10. The hinge pin of a single or double-barreled shotgun works hard, and I use a high pressure grease to lubricate it.
Always check to be sure a shotgun is unloaded before you work on it.
Make sure it isn't loaded! This electrical box took a hit from a 16 gauge ⅞ oz load at two feel. Startling? You bet!
To disassemble the action you will need either drift punches that fit the pins holding your shotgun together, or correctly-fitting screwdrivers. Shotguns, especially imported doubles, have some of the narrowest screw head slots you will ever see. Within a week of starting out as a gunsmith, I had ground a set a screwdrivers to use when working on Browning A-5s. The slots were so narrow that none of the ones I had on hand would even come close to fitting. Once I ground them, I placed them in the Browning A-5 parts drawer, so they wouldn't get used for any other shotgun.
On pumps and autos, you will need a large screwdriver or socket wrench set to take the buttstock off. In order to feed the shells out of the magazine tube, pumps and autos have “shell stops” that feed one round at a time. (At least that's the plan.) On Remingtons these stops are staked into their slot in the receiver. To tighten existing stops or replace broken one you will have to re-stake. While you can build your own tool, it is inexpensive enough to simply buy one. In the sections concerning pumps and autos I'll show you how to check your shell stops. If you need them tightened, order the staking tool from Brownells.
A hidden shell can be very dangerous. If this shotgun had been brought in because the shell stops weren't working properly, a live round might still be in the magazine tube.
Cleaning the receiver takes brushes, solvent and lubricating oil. A parts cleaning tank is useful but not an absolute must. You can do as well in the laundry room sink with Brownells d'Solve, brushes and a heat gun or hair dryer to remove moisture.
You should have a dedicated bench on which to work, partly for comfort and partly for security. Cleaning your shotgun at the kitchen table may be a wonderful memory of your childhood, but is not likely to fly today. Besides being a mess, the solvents and lubricants you will use could harm the finish of cabinets and tables. Besides, they taste terrible. And a kitchen table is designed for comfortable eating, not comfortable working. Yes, the countertop is designed for comfortable working, but is even more likely to get you into domestic trouble than using the table will.
Do not trust that a shotgun is unloaded until you have checked personally. Stick a finger or thumb into both the chamber and magazine tube just to be sure. If you don't feel the follower on the magazine tube, it and a shell may be stuck farther up. Remember that electrical box I shot!
Your bench should be large enough to work on with the disassembled shotgun on the bench. It should have a vise large enough to clamp the shotgun in place. You must have padding for your vise. The jaws are designed to hold flat pieces of steel immobile. If you squeeze the receiver of a shotgun, you can bend or dent it enough to keep it from working. You'll need light to work by. A fluorescent fixture over the bench gives you a lot of light. As an addition, a desktop light with a flexible arm allows you to put a spot of light into the inner recesses of a receiver. For security, a bench with drawers or doors that can be locked will keep prying hands and mouths from your solvents and lubricants. You want to store your cleaning supplies separately from the shotguns themselves.
A common cleaning procedure is scrubbing spots of rust off a gun. Rust in and of itself is not an indication of neglect. I once spent a Sunday shooting in a match that featured 4 inches of rain. By the time I got home there was rust forming, even with an oiling after the day's shooting.
Hose some oil onto the rusted area.
Don't be bashful, the oil provides protection for the steel from the particles of rust when you start scrubbing.
Use 0000 steel wool to scrub the rust. The lifted rust will float in the oil and not scratch the surface.
Once scrubbed, wipe with a paper towel.
The surface is now clean. Repeat over all affected areas.
This doable not only has a knarfed screw, but someone tried to remove the sideplate by prying its edge. The screw can be repaired, but the mar on the frame is forever.
If you are going to properly clean your shotgun, at home or at the range, you need a cleaning cradle.
A good sturdy bench with a cleaning that helps in keeping the parts collected.
Whether your shotgun is a century old, or was made yesterday, the cleaning methods remain the same.
Cleaning the shotgun bore, and maintaining the stocks are the same regardless of what type of action you have. Whether you are cleaning the bore of your Purdey after shooting some sporting clays, your Remington 1100 after an afternoon of bowling pin shooting, or your nephew's singleshot after saving the world from squirrels, the tools and methods are the same. Wood on a shotgun gets treated according to the finish it has, not the action it is attached to. First, I will cover bore cleaning, then the various action types, then wood maintenance.
Cleaning The Bore
Cleaning the bore is the easiest part of cleaning, it is the same for all shotguns, regardless of their action type. At first glance down many shotgun bores, you would think they were clean. After all, the bore is shiny, right? Too bad plastic and newly-burnished lead are shiny too. Bore cleaning involves the bore being in one of two conditions: either the bore was clean and you are simply cleaning as a precaution, or it has been fired. An example of the first case would be taking your clean shotgun out for hunting, and not firing a shot. Yes, the bore was clean, but while you had it out, moisture could condense in the bore, dust, leaves, twigs and insects could have landed there and lint from the gun case probably collected near the muzzle. To clean those out all you need is your cleaning rod and a swab or patches. Run a dry patch down the bore, followed by a patch damp with synthetic lubricant. Check the rest of the shotgun over to make sure you haven't dented or nicked it, wipe the steel with an oily cloth, the wood with a dry cloth, and put your shotgun away. Then, try to figure out why you didn't get any shots, and make corrections for your future hunting trips.
To clean or degrease, nothing is faster than the aerosol cleaners.
You need solvents and lubricants to clean. Always buy a bigger bottle than you think you'll need, there is no point in being cheap with cleaning solvents.
A sign of hard use and heavy loads, the gap between the barrels and standing breech of this shotgun are an indication its time has passed.
A fired shotgun is different. The bore will have plastic in it from the shot cup. Some lead-pellet loads with cheap wads will have lead streaks where the shot flowed between the petals of the cup and contacted the bore. You had better hope your steel-shot shells don't feature cheap wads, because steel shot flowing between petals of the cup will score your bore. The plastic build-up will be heaviest at the forcing cone and choke, where the stresses on the wad are greatest. Your action may have powder residue and unburned powder in it, but action cleaning will be covered later with each type of shotgun.
Check to make sure the shotgun isn't loaded. Remove the barrel or barrels from the receiver. (Skip ahead to find your action type, or consult the owner's manual.) Clamp the barrel in your padded vise. With your cleaning rod, run a dry patch down the bore to wipe out the loose gunk. With a brush on your rod, brush the bore, and then swab with the dry patch again. Take a clean patch and place some cleaning solvent on it, and swab the patch through your bore several times. Clean the bore brush. Brush the bore and swab it with a dry patch. Repeal this process until the dry patches come out clean.
This is the traditional process, and it works. But it is a bit time-consuming. For some reason I have always been drawn to the high-volume shooting sports. While a skeet or trap shooter may go through 25 shells in 20 minutes shooting clay pigeons, a bowling pin shooter or practical shooting competitor could go through that many in five minutes. And then do it again 10 minutes later. My practice routine for bowling pin shooting takes 96 rounds and just under half an hour. With that kind of shooting, bores get packed with lead and plastic. No one wants to spend more time cleaning than shooting, so I worked out a few tricks to speed things up.
A plain old copper scrubby such as this one is perfect for cleaning your bore.
First, get a bore swab. The kind that looks like a fuzzy caterpillar on a stick. Go to the grocery store and buy a copper scouring pad for cleaning pots and pans. The pad should be one of the copper mesh type. Cut the pad apart so you have strips of copper mesh that are at least six inches long and as wide as your swab is long. Wrap a strip around your swab. To clean, forget the first dry patch and run a patch damp with cleaning solvent down the bore. Take your copper-wrapped swab and use it as a bore brush. You may have to compress the swab and wrap the mesh tightly in order to get it to fit into the bore. Stan the swab from the chamber end. Scrub back and forth, paying particular attention to the forcing cone and the bore a couple of inches in front of the forcing cone. Plastic builds up in the forcing cone as the wad first slams into the bore, exiting the shell. As for the ring in front of the forcing cone, I can only figure that it is the location in the bore where the heat, friction and pressure are at their maximum. Either that, or it is the location where some sort of rebound of the wad happens after its first compression by the forcing cone.
Pull the swab out and swab your bore with a dry patch. The patch will come out a disgusting black mess. That's a good sign. The swab will probably have strips of plastic and chunks of lead in it. Unwrap the mess. Clean the swab and mesh. Re-wrap the swab, wet-patch the bore again and then re-scrub with the mesh/swab. Two or three applications of this method and your bore will be clean. If you want to, you can do it to a bore you think is already clean, and see how much stuff you pull out. To clean the choke, take the cleaning rod without the last segment and handle on it. Install your swab/mesh cleaner and start the handle end of the rod through the chamber. Pull the rod through the bore until the scrubber reaches the choke. If you try to swab the scrubber back and forth it will expand as it passes out of the muzzle. You won't be able to force it back in. Instead, rotate the rod. If you have screw-in chokes, turn the rod in the direction that will tighten the choke. Once you have turned the scrubber three or four rotations, pull it out and run your dry patch through. Inspect the choke and if there is any more lead or plastic left, scrub again.
The copper mesh is softer than the steel of your barrel, so you can't harm the bore with it. As a bonus, it also works on rifled shotgun barrels, cleaning lead and plastic out of the grooves of the rifling.
For the chamber, choke up on the cleaning rod and hold it 6 or 8 inches from the swab. Insert from the chamber end, and press the swab against the sides of the chamber as you scrub back and forth. If you try to clean a chamber this way with a regular brush you'll destroy the brush in short order. The swab doesn't care, and you will quickly scrub the plastic and powder residue out of your chamber.
With the rod, brushes and patches handy, you can scrub a bore sparkling clean in a few minutes.
Single-Shots
The single-shot is an easy shotgun to maintain. While some will have exposed hammers and others internal ones, they will all have a lever or something to open the action. Single-shots open by pressing the lever and allowing the action to pivot open on its hinge. The single-shot exists for safety and economy. A single-shot shotgun that is broken open cannot fire. It can easily be unloaded. Those with an external hammer cannot be fired until after the hammer is cocked. With a single barrel to fit, the shotgun does not require the elaborate regulating that a double does. By slightly bending the barrel, the manufacturer (or gunsmith) can move the pattern center up or down, left or right. The low cost to manufacture a single makes it attractive to shooters and hunters wanting a starter gun for a new shooter or hunter.
Open the shotgun to make sure it isn't loaded. Close the action and remove the forearm. On some inexpensive singles, the forearm is held in place by a screw that attaches to the stud under the barrel. On others, the forearm has to be pried down from the barrel. Look for a single screw, If present, remove it. If there is no screw, or two, pry the forearm down with your fingertips. Expensive singles may have a small lever inlet into the forearm that unlatches it from the barrel.
Here is a typical example of a single-shot shotgun.
A single-shot shotgun has only one barrel, and usually hinges open to expose the chamber.
On singles and double, the forearm protects you from the mechanism and vice versa. The dismounting method is not always apparent.
With the forearm off, open the action and the barrel will hinge down far enough that you can lift it out of the receiver. Scrub the bore. A basic cleaning of the receiver does not require removal of the buttstock. Scrub the breechface, water table (the flat or curved area of the receiver where the chamber rests) and the hingepin. If you use a water-based cleaning solvent, use a heat gun or blow dryer to evaporate the water. One advantage to the single- and double-barreled shotgun is that the receiver is well-sealed against the elements. Unless you are out in the rain, or take a spill into the water, there will be no need to get inside the receiver. If you have, the easiest way to clean singles is to remove the receiver from the stock and dunk it in solvent. Most inexpensive singles (which is most singles) have their buttstock attached to the receiver by a throughbolt. Remove the buttplate. In a hole bored through the stock you will see a bolt. The bolt is either a slot-head or hex-head. If it is a slot, use a long screwdriver with a heavy shaft to loosen and remove it. If it is a hex-head, you'll need an extension rod for your wrench.
With the stock off, immerse the receiver in cleaning solvent and let it soak for an hour. Again, scrub and blow dry. Wipe the exterior with an oily cloth. Spray lubricant into the receiver and let it drip out onto a paper towel. Use a high-pressure grease on the hinge pin. Reassemble.
The fastest way to reload a firearm is to grab another loaded one. Faster still is to have another loaded one attached to the first one. When every shotgun was a single-shot shotgun, the fastest way to get a second shot was to have a second barrel. Popular today, the double is deceptively difficult to manufacture, even as it is so easy to use.
Double-Barrels
The double shotgun follows the same pattern as the single, with a lever to open and a hinge pin that lets it pivot open. For most of this century, doubles have had internal hammers. Necessary when shotguns were flintlocks or percussion muzzleloaders, and popular as a safety device when shotguns were cartridge breechloaders, the external hammer faded from use when the double shotgun was passed over as a fighting tool. When internal hammers and their safeties become completely reliable, the external hammer had no advantage. However, with the increase in popularity of Cowboy Action shooting, external-hammer doubles have made a comeback.
The standing breech is the face where the firing pin holes are. The water table is the flat section in front of the breech.
Press the lever and open the shotgun. Make sure it isn't loaded. Close it. Look underneath the forearm. You'll find an inlet bar on the centerline. If the bar has a little lever in it, then press the lever and remove the forearm. If the bar does not, it is the anchor for the spring lock. If you see screw heads but no lever, leave them alone. Work your fingertips between the tip of the forearm and the barrel, and pry the forearm down off the barrel. Open the action and hinge the barrels forward off the action. Scrub the bores.
The top lever opens singles and doubles. (And the much rarer drilling, the triple.)
The action should be brushed clean, the breechface and walertables wiped with an oily cloth, and the hinge pin greased. Like singles, the double is well-sealed. Unlike singles, quite a few doubles have a complicated disassembly routine. In the most complex, the receiver is a sandwich of breechblock and upper tang, with the safety button on the upper tang. The lower tang is a plate that contains the triggers. Some doubles will have fake sidelocks, plates on the sides that look like they are the locks, but are only cosmetic. Unless you know the sequence of screws to remove, you could be loosening something that is supposed to stay tight. And getting it back together with the safety linkage properly engaging the button and bearing against the triggers, can be a frustrating struggle.
I'm not saying you shouldn't take it apart, but you should do so only with written instructions. If your shotgun doesn't have an owners manual, take it to a gunsmith who can properly disassemble it. Explain right up front that you are not looking for a “strip and clean,” but instructions. He will probably charge you as much or a little more to teach as he would to simply clean. Pay attention and take notes.
Hammer guns stayed around so long at the end of the 19th century because you could easily see if it was loaded or cocked. Even if it was loaded, if the hammers weren't cocked, the barrels couldn't be fired.
The shotguns that will be a bear to take apart will be the imported doubles from Spain and England. Because of the difficulty in disassembly of the “sandwich” design, manufacturers have made doubles that have the stock held on with a single throughbolt.
The most common double that uses a stock bolt is the Savage 311. In many parts of the country, when you say “double” everyone will take that to mean “311.” While somewhat heavy and not particularly sleek, the 311 has the advantage of being tougher than a two-dollar steak, I have never seen a 311 broken except through utter neglect, or deliberate abuse or experimentation. All doubles that use a stock bolt must be disassembled by first removing the bolt and stock. To find out if yours is such a double, remove the recoil pad or buttplate and look. If there is a large diameter hole and a bolt or screw head at the bottom, there is your answer.
This is a double, showing one method of locking reinforcement, the center extension.
This view shows the disassembly latch on a Weatherby forearm.
Lift the latch with a fingertip…
…and lift the lever and pivot the forearm away from the barrels.
The forward lump on the bottom barrel secures the forearm.
This is a photo of a Weatherby Orion, showing the over/under design and the Merkel locking lugs on either side of the upper barrel.
A solidly-made shotgun that is given good maintenance will outlast the best of us.
It is easy to see how to remove the firing pins in this gun. All you have to do is grind a special screwdriver to span the pin and engage the nut.
Oil the cocking rod (the dark bar) and put high-pressure grease on the barrel pivot, the hooked knob on the side.
The Ruger, with its lower locking lugs.
One suggestion about scrubbing these receivers; there may be delicate parts or small springs in there. When you first pull the stock off, look carefully at the location of the springs and parts. It is a good idea to make a drawing of the proper orientation of the parts. One early trick I learned was that if a shotgun had been disassembled, or parts had fallen off, the easiest way to determine where the parts went was to compare the one I was working on with an operating example. (This also the reason gunsmiths end up with a couple of hundred guns as a “personal” battery.) You don't have the luxury of owning two of each of your shotguns just to have a working sample with which to compare. Make drawings that are clear to you.
Once you have scrubbed the insides clean and dried them, you have to lubricate them. It may be years until you open that particular shotgun again, and all of the surfaces have to be protected. Oil or other lubricants only protect where they coat. Give the internals a complete coating of all parts, and let the receiver drip out onto a paper towel for a few hours or overnight. The gunsmith who taught me, Dan McDonald, said “Oil is cheap and rust is expensive. Coat the surfaces and let it drip,” Once the excess has dripped off, then reinstall the stock.
As with the single-shot, use a high-pressure grease to coat the hingepin. Ail side-by-side doubles, and some over-unders use a pin that passes through the receiver from side to side. Some over-unders (the Browning Superposed is an early example) use a pair of trunnions on the sides of the interior of the front of the receiver. Circular hollows on the sides of the barrel assembly ride over these trunnions. Grease both sides.
Pumps
The first pump shotgun to be seen in any quantities was the Spencer. It established the pattern for pump shotguns to come, being a hammerless model with a tubular magazine under the barrel and a front slide to work the action. The design was complicated and required intricate machining, making it more expensive than contemporary doubles. Economic difficulties put Spencer out of business and the remaining parts were marketed by Bannerman. An odd design, but one that enabled the shooter to clean the bore from the chamber, was the Burgess. Built just about when the Winchester design by Browning was coming onto the market, the Burgess differed from other pumps (and the 1897) in two ways: The pump to operate the mechanism was not up front, and it didn't come apart into two pieces. Taking a pump apart for storage and transport was considered an important part of its marketing. Shooters and hunters a century ago traveled to the range or the hunting grounds by horse, buggy, streetcar or bicycle. Even in the 1930s my father, who lived in the city, could take a streetcar to the edge of town to practice or hunt. The contemporary doubles came apart into a compact package. A pump that did not was at a disadvantage in the sales arena.
Early pump shotguns came apart right at the front of the receiver.
The operating handle of the Burgess was a sliding part of the pistol grip. It and the trigger moved back and forward to cycle the action. It seems odd now, but back then there was no established “right” way to work the action, and the grip hand was just as good as the front hand. The Burgess opened for cleaning and storage by a latch. Opening the latch hinged the barrel and magazine tube down, but they stayed attached. One very interesting feature of the Burgess was that it could be folded for storage while the magazine was loaded. By snapping it shut and working the slide, the shotgun was ready for action. The competing Winchester could not be stored loaded. As a ready weapon for bank guards, messengers and railroad guards, the Burgess had much going for it.
The Burgess company had a serious competitor in Winchester. By 1897, Winchester had the now-famous Model '97 on sale, and a take-down model was soon to come. His health failing, Andrew Burgess sold the patents and machinery to Winchester.
The takedown shotgun a century ago came apart in two pieces, the receiver and stock, and the barrel and magazine. It was strong, but expensive. To have a two-barrel set for your shotgun involved the cost of a magazine assembly, and fitting the extra assembly to the original receiver.
The front half was a package that required each replacement barrel have its own magazine tube. The result was expensive and heavy.
Not all shotguns back then came apart this way, but the story of the Browning A-5 is for later in the book.
The first pump shotgun that came apart by removing only the barrel was the Remington Model 17, designed by (drum roll, please) John Browning. The barrel used interrupted threads, and a knurled nut on the end of the magazine tube locked the barrel extension in place. Making replacement barrels for the Model 17 was easier and cheaper than the Winchester method, and replacement barrels did not require fitting. A shooter could have different barrels for competition, hunting and defense. If you ever run into a Remington Model 17, it will look oddly familiar. By 1933 Remington had dropped the M-17, as they had newer designs to sell. The Browning patents were soon to run out, so Ithaca stepped in. At the time Ithaca was a maker of double guns. But Ithaca redesigned the Model 17 action slightly, enlarged it to 12-gauge (the Remington M-17 had been a 20-gauge only) and have since then endeared themselves to left-handed shooters.
The economic advantages to barrel-only removal made the design the dominant one in the market. While not as compact when disassembled, the cost savings are worth the size difference.
The general instructions for disassembly are simple. Make sure it isn't loaded. Open the action and leave it open. To take your pump shotgun apart you will have to turn a nut on the end of the magazine tube. If it has been on for a long time, or was tightened down by a strong person, you may need assistance. Do not seek that assistance in the form of pliers. You will scar the magazine nut. Open your Brownells catalog and order their padded and curved shotgun disassembly pliers. With these you can take your shotgun apart for the rest of your life without marring it. With the nut loosened or removed, slide the barrel off.
On pumps using crosspins, press the pins out and slide the trigger assembly out of the bottom. On pumps using screws, you'll need properly fitting screwdrivers. With the barrel off and trigger assembly out, slide the forend forward. Depress the shell stops to slide the forearm and bolt out of the receiver. Specific instructions to follow.
To clean, scrub the interior of the receiver, bolt, trigger assembly and forearm rails. Dry and lubricate them. Reassemble.
The Remington 870
The 870 has been around since 1950. Unlike the earlier Remington Model 31, the barrel retainer is not a lug, but a ring that surrounds the magazine tube. The ring has made the 870 popular with law enforcement agencies, because by replacing the magazine nut with a tube, you can increase the capacity of the shotgun.
To strip and clean the Remington, make sure it is unloaded, the hammer is cocked, and the action is open. Unscrew the magazine nut. Slide the barrel forward off the magazine. With the drift punch, press the two trigger pins out of the receiver. Pivot the trigger assembly down out of the receiver. On the Remington 870 the shell lifter is attached to and spring-powered by the trigger assembly. Inside the receiver you will see two flat pieces of spring steel on the sides. These are the shell stops. When you gently ease the slide forward, the stops will keep the slide from coming out. If you try to force the slide, the operating rods may loosen the shell stops. Loose shells stops usually mean an 870 that will not feed properly. With your fingertips press one and then the other down to let the slide pass. Once out of the receiver, the bolt and its carrier plate will fall off the operating rods.
The Remington 870 bolt locks into an extension of the barrel. The idea was not new to Remington in 1950, but rather came from John Browning and the A-5 in 1898.
Scrub the powder residue off the bolt, carrier, the inside of the receiver and the parts of the trigger assembly. Lubricate everything. Cleaning the magazine tube requires removing the spring retainer. On older 870s the magazine spring is kept in place by a spring steel cap that is press-fit into the magazine. With a screwdriver, pry the cap upwards until it is free. Pull the spring and follower out and clean them. To replace the cap, press the spring into the magazine with one hand while compressing the cap into it. Tap it flush with a mallet or screwdriver handle. Newer 870s use two detents in the tube, and a plastic retainer. The retainer has two sets of grooves in it. One set passes completely along the sides, while the other stops. To remove the retainer, use a screwdriver that fits in the slot on top of the retainer. Press the retainer down and turn it one-quarter turn. Ease the retainer forward and it will slide out of the magazine. To replace it, line the full grooves up with the detents and press the retainer in. Give it a quarter turn and ease it forward.
For the first step of reassembly you will need to juggle four parts, the bolt, carrier plate, forearm and receiver. The easiest way is as follows: Place the carrier flat on your bench within arm's reach, with the bolt in place on top of it. Stand the receiver upright on the bench or in your lap with the bottom to your left. With your right hand, start the slide over the magazine tube. Hold the slide in place, and keep the receiver upright, with your right hand. Pick the bolt and carrier up with your left and place them on the cutouts in the operating rods. Slide the forearm down until it starts into the receiver. Let go with your left hand and depress the shells stops in turn to let the rods go into the receiver. Once in place, put the barrel on and install the magazine cap. Installing the barrel right away is a precaution against running the slide forward and loosening the shell stops.
To replace the trigger assembly, tilt the trigger assembly slightly towards its angled lever. This is the slide lock lever. Ease the slide lock lever into the receiver, and then press the trigger assembly into place. Line the holes up and press the trigger pins through the receiver.
The Mossberg Model 500
The Mossberg has many design characteristics similar to the old High Standard pumps. High Standard went out of business in the early 1970s but many of their shotgun still serve faithfully.
The big advantage that Mossberg had over High Standard was its removable barrel (yes, High Standard was making shotguns thal did not have a removable barrel, even into the 1960s!).
A broken safety on the Mossberg 500. On top, it can get in the way of obstacles and become cracked or broken. Replacement is easy.
While desirable, the removable barrel is not the remarkable thing about the Mossberg design. It has four things that make it an exemplary shotgun; the safety, the shell stops, the receiver itself and the shell lifter. The safely is a button on the top center rear of the receiver. For decades the Mossberg was unique in this. While other shotguns had a button in the triggerguard that had to be replaced for left-handed shooters, the Mossberg didn't. The shell stops in the Mossberg design are not staked into the receiver. Staking the shell stops would be a spectacularly bad idea because the receiver is aluminum. Instead of being made from a steel forging, the Moss-berg's aluminum receiver is easier to machine, lighter and rust-free. The shell lifter rests tight against the bottom of the bolt carrier. It only drops down into the path of a shell from the magazine when it is needed. On other shotguns, you can “double feed” a shell. If, when you press the shell into the magazine, you do not press it far enough for the shell stops to catch it, the shell can pop back into the receiver. Trapped between the carrier and the lifter, the shell wedges the action tight. In a Mossberg, if you do not press the shell in far enough for the stops to catch it, it will drop back out on the ground. Yes, it is an annoyance to pick it up, but nothing like the headache of correcting a double feed.
The Mossberg lifter stays tight to the bolt when closed, and you cannot double-feed a Mossberg. If the shell is not caught by the shell stops, it gets flung to the ground.
When inserting a shell, push your finger or thumb into the tube. This ensures the shell is caught by the shell stops.
To disassemble the Mossberg, make sure it is unloaded. Open the action. Turn the knurled nut on the front of the barrel extension. The nut will stay on when the barrel it is removed. Once the nut is unscrewed, pull the barrel off. On the receiver there appear to be two pins. There is only one, and it is the smaller one farther back from the ejection port. Drift this pin out. The trigger mechanism is held in place at the front by two shelves that fit into recesses in the receiver. Pivot the rear of the trigger assembly down and out of the receiver. The shell stops will fall out on their own. Slide the forearm back until the rectangular plate under the bolt lines up with the wide slot cut through the bottomof the receiver. Lift the connector plate out, and push the bolt forward out of the receiver. The shell lifter is a tuning fork-like piece of spring steel. Unlike the 870 it is not attached to the trigger assembly, and is powered by the bolt. It pivots on two circular bosses that can be seen above the trigger assembly retaining pin, this is what appears to be another crosspin, but isn't. To remove the lifter, use a small screwdriver to pry the rear of the lifter out of the circular holes that have been drilled through the receiver. Scrub the parts. With all of its advantages, you have to figure the Mossberg has some drawback. One small one is the magazine tube. Because the barrel retaining nut screws into the end of the magazine tube, you can't remove the spring and follower that way. Instead you must unscrew the magazine tube. Clamp your receiver in a padded vise. If you are strong you can unscrew it by hand. Otherwise, use a strap wrench or a padded pair of curved pliers to unscrew the tube. To reassemble almost requires three hands. The follower stop shoulder is machined into the receiver, and as you attempt to screw the tube in the follower and spring will push back. Use your right hand (for right-handed 'smiths) to turn the tube, while with your left hand you press the follower back into the tube. Once you have the tube turned all the way into the receiver you can let go of the follower, and give the tube its final tightening turn. You needn't tighten it more than hand tight. Once the barrel is in place the magazine tube isn't going anywhere.
The simplicity and durability of the Mossberg 500 is obvious. No small, easily bent or broken parts, and nothing to keep you from seeing (or feeling) if there is a shell in the magazine.
What looks like a disassembly pin on the right side is the pivot rod for the right-hand shell stop.
To reassemble the receiver, turn the lifter until the hooked end is towards the safety, and the points of the hooks are towards the bottom of the receiver. Squeeze the rear of the lifter enough to slide it into the receiver. Press it down until the two circular bosses snap into their holes. Push the bolt into the receiver, and push the forearm back until the bolt and action bars are positioned in the rectangular slot. Place the slide plate down on the bolt, and engaging the action bars. If you do not have it in place, the forearm won't go forward, or won't take the plate and bolt with it. Replace the barrel. Run the slide forward. Turn the receiver upside down on your bench or in a padded vise. Place the shell stops in their slots, with the tabs in the space between the operating rods and the receiver. Each stop is designed to fit only in its appropriate slot. Take the trigger assembly and catch the shelf on its front into the slots in the receiver. Pivot the rear into the receiver and press the crosspin through.
The Mossberg shell stop are not staked in place, and do not have to be timed if replaced.
When the bolt is back, the rear legs of the lifter cam against the bolt slide and the front is forced down.
The action rails are simple steel bars.
When the bolt goes forward, the lifter is cammed up, raising a shell into the bolt's path, and clearing the magazine tube for further loading
The bolt slide rests in the action bars.
The Mossberg features dual extractors, ensuring a firm grip on the fired hull.
The bolt rests on the bolt slide.
The Ithaca barrel is secured with a barrel extension that engages the magazine cap.
The Ithaca barrel is slotted for the extractors, and you must have the action open the remove the barrel.
When the action is opened, you can see the lifter legs.
With the magazine cap screwed down until it clears the barrel…
…you can pivot the barrel (with the action Open!) and remove the barrel…
Ithaca Model 37
Derived from the Browning-designed Remington M-17, the Ithaca has been a favorite of left-handed shooters for decades. It is also one of the fastest and smoothest-pumping shotguns around. It has in this modern age, a peculiar trait: It does not have a disconnector. If you take a loaded Ithaca, fire the round, and then hold the trigger back, it will fire each time you slam it shut. You can empty an Ithaca in an amazingly short time doing this. Whether you can actually hit anything except the ground or empty sky is another matter. Many pumps did not have disconnectors in the old days, and shooters learned to get their finger off the trigger while pumping.
…then unscrew the magazine cap.
Remove the buttstock before starting in on the action screws.
Today's shooter, pumping a shotgun with a disconnector, does not learn to get his finger off the trigger while pumping, and will often fire his second shot with an Ithaca before he is on the second bird or clay pigeon. I'm really fast with a pump, but I can't use an Ithaca at speed. I learned on a Mossberg 500, then went to a Remington 870. Every time I tried to speed up with an Ithaca, I ended up throwing shots between targets.
Unique among shotguns, when the Ithaca action is closed, the lifter rests above the bolt.
The Ithaca is light, tough and fast. The barrel is held in place by the magazine cap. Check to make sure the shotgun isn't loaded. Leave the action open. The Ithaca extractor rests in a slot in the rear of the barrel. If you try to remove the barrel with the bolt forward instead of back, you will be foiled by the extractor resting in its slot. You may damage the extractor, barrel or both. Turn the magazine nut towards the receiver, screwing it away from the barrel extension. The magazine nut has two small bumps on its side. These are the heads of the disassembly bar. If the nut is difficult to turn, press on a bump and you can push the bar out to the side. The added leverage of the bar, allows you to easily rotate the magazine cap. When the stud on top of the cap clears the barrel, turn the barrel a quarter-turn and lift it off the shotgun. The easy part has ended, and you will need screwdrivers to take the action apart. Before you can remove the trigger assembly you must take the buttstock off. At the rear of the receiver you will see two sets of screws. The upper ones, with their lock screws, are the pivot pins for the lifter. The lower one holds the trigger assembly in the receiver.
On the rear of the stock, remove the buttplate or recoil pad. With a large screwdriver, loosen and remove the stock bolt. Slide the stock off. You need to remove the buttstock first because while the stock bears against the receiver, it pulls tight to the receiver while attached to the trigger assembly. If you try to remove the trigger assembly screw without easing the pressure from the stock, you will gouge the screw slot and maybe even strip the threads.
The Ithaca magazine spring is shorter than expected, but it works just fine.
With the stock off, unscrew the trigger assembly screw and remove it. Pull the trigger assembly out of the receiver. Hold the receiver upside down on your bench. In the bolt carrier you will see a small spring-loaded pin that is visible through a window. With a small screwdriver, press this pin away from the operating rod. Run the slide forward and out of the receiver. (If you have not removed the magazine cap the slide will stay on the shotgun.) Unscrew the lifter pivot pin locking screws, then the pivot screws, and pull the lifter out of the receiver. Slide the bolt and its carrier rearwards out of the receiver. If they have not already fallen out, pull the shell slops out of their slots in the receiver.
Cleaning the magazine tube on the Ithaca is the easiest of all pumps. Rotate the magazine cap to unscrew it. The spring and follower can then be pulled out. A curious note: The Ithaca spring seems too short, but isn't. When you pull the magazine spring out of other shotguns you may find it 4 or 5 inches longer than the magazine. Ithaca springs are an inch or 2 longer, and yet the Ithaca never fails to feed. Use a stronger or longer spring if it makes you feel good, but don't go and replace the spring, thinking it has gotten weak and short.
Scrub the gunk off the parts and receiver interior. To reassemble, place the bolt onto the carrier, and slide them into the receiver from the rear. Replace the shell stops. Put the lifter in place, and make sure you get the curved are of the lifter towards the top of the receiver. Screw the pivot screws back in, and line up the notches with the locking screws. Tighten the locking screws in place. Push the bolt to the front. Place the trigger assembly in the receiver and tighten its retaining screw. Slide the forearm back so the operating rod goes into the receiver. Use your small screwdriver to press the catch pin aside, and slide the operating rod back until it catches the pin.
Tighten the stock back on, and replace the buttplate. Replace the barrel.
Winchester Model 1897
The '97 starts out easy, but gets difficult on the take-down models. On the non-take-down models, it is simply a bit of work. To remove the barrel and break the shotgun down for basic cleaning, look to the end of the magazine tube. On the upper left next to the barrel of the take-down models is the disassembly pin. Non-takedown models lack this pin. Press the pin down, and when it sticks out of the other end of the tube, pull it until it stops. Using the pin as a lever, rotate the tube a quarter-turn. Slide the tube forward out of the receiver, and then slide the forearm forward until it stops. Grasp the magazine tube and barrel right in front of the receiver and turn it a quarter-turn. Pull the barrel and magazine tube assembly off of the receiver. Leave the hammer cocked.
You will need screwdrivers for the rest of the disassembly. On the upper rear of the receiver, near the hammer, you will find the carrier pin stop screw. Unscrew it. Press the carrier pin out of the receiver. On the lower right side of the receiver, above the trigger guard, you will find the shell guide stop screw. Remove it. Press the action release button and hold it down. Use a screwdriver to pry the carrier down from the bolt until it has moved enough that you can pull it down and out of the bottom of the receiver.
To remove the bolt, use a screwdriver to loosen and remove the screw that holds the action slide hook. Remove the hook, and then slide the bolt backwards out of the receiver. To remove the trigger assembly you will have to remove the buttstock. That, and how to disassemble the solid-frame model, will be covered in Chapter Twelve.
Scrub, lubricate and reassemble. Slide the bolt into the receiver and run it forward. Place the action hook on the bolt and lighten its screw. Push the carrier assembly up through the bottom opening, and press the action lock for clearance as the carrier comes to the rear. Press the carrier pin through the receiver. Be sure to get the notched end on the side with the carrier screw. Press the carrier up against the bolt. Replace the shell guide stop screw. Take the barrel assembly and with it turned a quarter-turn clockwise, slide it into the front of the receiver. Turn it until the magazine tube lines up with the clearance hole. Press the magazine tube and slide back into the receiver. Turn the front pin, and the magazine tube itself, a quarter-turn counter-clockwise, and then press the pin through the tube until it is resting alongside the left side of the barrel.
The Winchester Model 12
The Model 1912 was an advance over the 1897 in many respects. The hammer is internal and the receiver has smoother lines. On the '97 the carrier (lifter) is a large and machined chunk of steel. On the Model 12, Winchester trimmed it down considerably, until it was a flat tongue. Still made of forged and machined steel, it is much lighter than the carrier of the '97. The lighter weight is one of the reasons the Model 12 is such a fast-pumping shotgun.
Check to make sure it is unloaded. To disassemble the Model 12 you start with the exact same method as you do on a take-down Model 97, by removing the barrel and magazine tube assembly. With the front half off, turn the shotgun over. Behind the trigger guard is a single screw. The trigger guard is held in place by this screw and a shoulder at its front that hooks into the receiver directly behind the opening for the cartridge lifter. Turn the screw out and remove it. The trigger guard can then be removed by lifting the rear of it out of the receiver, and then pulling towards the buttstock. With the trigger assembly out, you need to remove the ejector and shell stop. With a small screwdriver, gently pry the ejector out of its hole in the receiver. Then remove the shell stop. The bolt will be locked into the receiver. The lock is on the side of the bolt away from the ejection port. To unlock the bolt, reach in with the screwdriver and press the rear of the lock lever into the bolt. With the bolt unlocked, pull it to the rear and upwards to remove it from the receiver.
Scrub and lubricate the parts. Insert the bolt into the receiver and press the front of the bolt lock lever to lock it in place. Slide the ejector into its slot in the bolt and press it forward until it pops into its hole in the side of the receiver. Slide the shell stop into the receiver and into its slot between bolt and receiver. Press the front of the trigger assembly into the receiver and pivot it down until it is flush with the receiver, and replace the trigger guard screw.
The barrel and magazine tube assembly go back into the Model 12 in the exact manner as on the 1897. (Despite their being operationally identical, the barrel and magazine assemblies of the 1897 and the Model 12 are not interchangeable.)
Browning A-5
The Browning shotgun was the first dependable self-loading shotgun. While he had many competitors in the automatic pistol field (not that their numbers helped, Browning still prevailed), John Browning was alone in conceiving and designing a self-loading shotgun. As he held the patents, he could and did license its manufacture to several firms at once. You may run into Brownings, Remingtons. Savages and many others that all work the same. They are all Browning A-5's in operation even if their parts are not interchangeable.
The disadvantage of being first is the legacy of old concepts. Unlike newer designs (starting with the Remington redesign of their shotgun lines right after World War II), the A-5 can be a hassle to take apart. Modern shotguns come apart with a couple of drift pins, and leave you with a few large assemblies. When you are done stripping your A-5, you'll have at least 10 screws on the bench along with the receiver and its internals as individual parts. The screw slots on Brownings are narrower than any other screws you are likely to run in to, and you should specially grind screwdriver blades to fit them.
The Browning action is called the “long-recoil” action. At lockup, the bolt is locked to the barrel. Upon firing the barrel and bolt recoil to the rear of the receiver while they are still locked together. At the rear, the bolt unlocks, and the barrel goes forward. As it runs forward, the barrel ejects the empty. The next shell has been traveling with the bolt, pressing on the bolt-mounted shell stop. Without that shell, the action would lock open. With the second shell now under the bolt, the bolt follows the barrel forward. Running forward, the bolt chambers the round. The bolt and barrel each have their own recoil spring. The bolt spring is in the buttstock, while the barrel spring is around the magazine tube, hidden by the handguard.
Lock the bolt back and press the barrel back into the receiver.
To disassemble the A-5 make sure it is not loaded. Lock the bolt to the rear. Place the butt of the shotgun on your bench with the barrel vertical and grasp the barrel. Press the barrel against its spring back into the receiver an inch or 2. Let go with one hand and unscrew the magazine cap. Remove the cap and slide the forearm off the magazine tube. While the forearm is supported on the shotgun, it is relatively strong. Off the shotgun the forearm is a hollow shell that you can easily damage if you are not careful. Place the forearm someplace where it cannot fall or have anything heavy set down on it. Ease the barrel forward and remove it from the magazine tube. Remove the recoil spring and friction rings.
Grasp the operating handle of the bolt and hold it to the rear. On the side of the receiver just under the ejection port is a button. It is the bolt release button. Press the button and ease the bolt forward. If you do not restrain the bolt, it will slam forward and stop when the handle strikes the front of the ejection port. If you look closely at enough used Brownings you will see the ding this creates.
Unscrew the magazine cap…
…and remove the barrel and forearm.
Now get out your screwdrivers. There are many screws on the Browning, and they are all fitted to the receiver. In order to get them back correctly I lay the screws out in the pattern they are in when in the receiver.
Press the bolt latch and ease the bolt forward.
Turn the receiver over and look at the lower tang behind the trigger guard. You will see three screws. The closest one to the trigger guard locks the hammer spring in place. Leave it atone for now. It comes out much later. It is not uncommon to see this screw slot chewed up from attempts to remove it too early in the process. The hammer spring tension must be relieved or its tension will be too great for the screw to be removed.
Turn your attention to the rear pair. The smaller one is a lock screw. Remove this small screw, then unscrew the larger one. The large one holds the stock on, passing through it to the upper tang.
With the screws out, place a disassembly pad or folded towel at the edge of your bench. Hold the stock in one hand and the receiver in the other, and tap the rear of the receiver against the pad. The stock will slide off. Set it aside.
If you let the bolt slam forward when the barrel is off, you'll kick up an unsightly burr.
Turn the receiver onto its right side. On the left side of the receiver just above the trigger guard are the trigger assembly screws. As with the tang screw, the smaller-headed screws are lock screws. Remove the lock screws and then the trigger assembly screws. The trigger assembly is tightly-fitted and may require some forceful pulling to extricate it. With the trigger assembly out, turn the receiver upside down. On the inside of the receiver on the side away from the ejection port is a leaf spring. This spring activates the lifter. At its front end it is hooked under a stud on the lifter. Press the tip down and then to the side to free the spring. With the tension relieved, slide the spring off of its pivot post. (Some Brownings have the spring attached to the trigger assembly housing.) Turn the receiver onto either side. The large-headed screws are the lifter pivot pins. The smaller screws are their lock screws. Remove the lock screws and then the lifter pivot screws. Pull the lifter (one or two-piece) out of the receiver.
The tang screw has a locking screw.
At the rear of the receiver extension you will see a small wooden or plastic cap. The cap holds the bolt spring in place. The crosspin just forward of the extension tip holds the cap in place. Carefully clamp the receiver in a padded vise. With the thumb of one hand press the cap into the tube slightly, and with a drift punch press the pin through and out of the tube. Ease the cap and spring out of the tube. There should be a cap on the forward end of the spring, which engages the bolt link. If it doesn't come out on its own you may have to push it out after you have removed the bolt.
Loosen the tang screw…
…then lift it out.
To remove the buttstock (once the tang screws have been removed) tap the rear of the receiver against a pad on your workbench.
You cannot remove the bolt until you have taken off the locking block latch. Look on the lower edge of the ejection port. You will see a semi-circular cut. On the other side of the receiver is a hole, in line with this cut. The bolt lock latch is held in place by a pin through the bolt block. Slide the bolt backwards or forwards until the pin in the bolt lines up with the hole and notch. Use a ⅛-inch drift punch to press the pin out of the receiver. Insert the punch on the far side, and push the pin out of the bolt out through the ejection port. Lift the bolt lock latch and its spring out of the bolt.
With the stock off, remove the locking screws and then the trigger assembly screws, rear…
…and front.
On the Remington 11, the front “screw” is a pin, held on by its locking screw.
The Browning A-5 trigger assembly is one of many technical leaps John Browning assembled into his brilliant shotgun.
The lifter (in this shotgun a two-piece lifter) is powered by a spring on the left side.
Push down on the front leg, and pry it away from the receiver wall.
With the spring free, you can now slide it off of its rear pivot post.
The lifter pivot screws have locking screws also.
With the locking screws out, remove the lifter pivot screws.
This is a photo of the two-piece lifter, with one pivot screw and its locking screw.
Here you see the tang extension, the spring retainer and its cross pin.
On Browning shotguns, the lower edge of the ejection port has a grove in it for the disassembly of the bolt. Remington 11's do not. The shell stop pin is right underneath the operating handle.
With the bolt retracted to line the pin up with its clearance hole, press the pin out of the receiver
Here the shell stop pin is sticking out of the side of the receiver. Yes, it will have a collection of gunk with it.
The bolt-mounted shell stop and its activating spring are shown in this photo. The hole is oval so the stop can move out of the way when you are loading the magazine, but the spring pushes it back into line.
Swing the link out of the way of the operating handle and slide the handle to the rear out of the bolt. The bolt is now free to slide out of the front of the receiver. Slide the operating handle forward and out of the ejection port.
Scrub and lubricate everything. Use a bore brush to clean out the upper tang extension. It spends all its time in the stock and is prone to rusting. Give it a good swab with a patch of Break Free before reassembling it. Reassembly is the proverbial “reverse the disassembly procedure” but there are a few tricks to know. Fish the operating handle in through the ejection port and slide the bolt into the receiver. Marry the two up. To insert the pin for the bolt lock latch, first line its bolt hole up with the notch. Press the pin into the bolt just far enough to hold the pin in place. With the receiver upside down, place the bolt lock latch spring and bolt lock latch into the bolt. Press the latch down against the spring with one hand while pressing the pin with another. When the pin moves, you have captured the latch. You can now use a drift punch to press the pin the rest of the way home. Slide the bolt forward and leave it there.
To remove the operating handle you have to pivot the link down out of the way.
Pinch the pin between your fingertips and pull it out of the receiver.
For the bolt spring, start the spring and its link cap into the tube, and then press the link down into line with the tube. When the link cap pokes through into the receiver it will catch on and retain the end of the link. Grasp the tube with your left hand, thumb to the end of the tube. Press the spring in place with your right hand. Clamp your thumb over the tube to retain it and then press the retaining pin through the cap. Place the lifter into the receiver and loosely screw the pivot screws in place. Once both are in place, tighten them and then back them off just enough to line up with the locking screws.
Inside the receiver, this is the relationship between the bolt and shell stop, with the muzzle being to the right in this photo.
Hook the lifter spring over the pivot pin, and then press the forward end down and under its retaining stud. The lifter spring will press against the trigger assembly. To hold the trigger assembly in place, put your right hand on the receiver at its rear, fingers over the top. Press the trigger assembly into place with your left hand and hook your right thumb through the trigger guard. Move the assembly back and forth until the holes line up. Hold the trigger assembly in place with your right hand while you press the screws through with your left. Tighten the trigger assembly screws and their locking screws.
Slide the receiver tangs into the buttstock until they stop. Gently tap the butt of the stock against your benchtop to seat the stock firmly, and insert the tang screw.
The shell stop is just a humble part, but one I have never seen broken or worn out. The shell stop on the bolt feeds shells from the magazine and travels with the bolt.
On reassembly, line up the bolt with the clearance hole and press the pin part of the way back into the receiver. Press it just enough to catch the bolt, but not enough to prevent installation of the shell stop.
To install the barrel, lube the outside of the magazine tube. Slide the recoil spring and friction rings over the tube in the appropriate order. Lock the bolt back. Stand the A-5 upright on your bench and slide the barrel over the magazine tube and into the receiver. Grasp the barrel and pull it against the recoil spring. Hold it there and slide the forearm in place. Tighten the magazine cap. Be sure the lip of the forearm slips into the retaining cut in the receiver. To check for proper assembly, slide the barrel into the receiver as far as you can, and tighten the magazine cap hand-tight. There should not be any slack between the magazine cap and forearm. I have seen quite a few shooters who “loosened the cap a couple of clicks” (for reasons they could not explain except that “I always do it”) and they are almost always the ones with cracked forearms on their A-5s. Keep it tight and the forearm won't crack.
Magazine tubes that are dirty, rusty or have congealed oil on them can be cleaned with a Scotchbrite pad.
Remington 11–48
This Remington is a blend of old and new. While it is a long-recoil action right out of the Browning mold, it comes apart with two drift pins and no screws. Just like its ancestor, the 11–48 is durable to a fault, and you may see an 11–48 from time to time until we don't own self-loading guns any more. The only trick you need to know is when you try to put it back together.
The shell stop is not staked in place, and is held in by the trigger assembly and the assembly pin. If you try to simply place the shell stop in the receiver and jam the trigger assembly in place, the stop will lean out and block you. Take a feeler gauge of .008″ or .010″ thickness and use it like a tongue depressor. Hold the shell stop to the side and slide the trigger assembly down the gauge until it is in place. Press the assembly pins through and pull the feeler gauge out. Vôila.
Remington 1100 and 11–87
The friction rings of the Browning are shown here. The steel ring sits under the bronze ring.
Here is the heart of the Browning A-5 long-recoil action. The recoil spring is longer than the space for it, and is under considerable tension when the forearm is in place.
Disassembly of the Model 1100 and the Model 11–87 is easy, and intentionally so. I will use “1100″ to describe the aspects of both the 1100 and 11–87 that are identical. Where the 11–87 is different I will use “11–87.” Make sure the shotgun is not loaded. Lock the bolt back. Unscrew the magazine cap and pull the forearm and then the barrel off. On the 11–87 barrel hanger there is a spring-steel clip that fits around the outside. The clip is the gas vent valve. A light load will not have enough gas pressure to move the spring, and ail the gas will be used to operate the mechanism. A heavy load will flex the spring, venting excess gas. Be sure you keep track of the clip, and get it back in place during reassembly. On a particularly dirty 1100 the gas rings may stay lodged inside the barrel hanger. Reach in with a fingertip and work them out. Grasp the operating handle and with your other hand press the release button in the middle of the lifter. Ease the bolt forward. Use a drift punch to press the two trigger assembly pins out of the receiver. Pull the trigger assembly out and set it aside. Grab the operating handle and pull it out of the bolt directly to the side. Hold the slide weight and pull it forward until it stops. The shell stops are preventing the bolt and slide assembly from coming out of the receiver. You will have to manually activate them to release the bolt. With a fingertip depress the shell stops.
This Browning is set up for heavy loads.
The bolt rides on but is not fastened to the slide, so pick it off the slide as soon as it clears the receiver. The last thing left in the receiver that you need to remove for cleaning is the action fork. It looks like a tuning fork with a T-handle. The rear tips have knobs on them to keep them locked to the recoil spring front guide. Use a pair of needle-nose pliers to compress the rears of the legs, and pull the fork towards the muzzle. Lift the legs up, and turn the fork a quarter turn to free it from the guide slots. The receiver is now open for scrubbing and hosing.
Scrub and lubricate everything. Pay particular attention to the outside of the magazine tube. Crusted and hardened powder residue on the tube can bind the gas system and lead to a single-shot shotgun.
The 11–87 magazine tube is made of stainless steel, and not likely to be rusted. However, the gas rings on both 1100 and 11–87 may have hard-baked carbon on them that will require vigorous scrubbing to get clean. Also, the rubber O-ring is prone to wear from firing and tears from heavy-handed disassembly. The older rings are black rubber. Newer rings are a metallized silver color, slightly thicker and stiffer than the old ones. It is worth the dollar or two to replace the old O-rings every other year with new ones. I have had many requests for a cheaper, industrial O-ring through the years. I have not found one, and even if I had I would not be very optimistic about an O-ring designed to hold water in a valve standing up to the heat and pressure of a shotgun shell.
Browning ring stacking order is so important that there was a chart pasted into the forearm. After many years of use, most charts can't be read. If you don't stack them correctly, you can crack your forearm, creating the need for an expensive repair or replacement.
To reassemble, put the action fork back in place. Turn it slightly to gain clearance, and place it in the guide slot. The upward curve of the fork goes towards the top of the receiver. Grasp the tips with the needle-nose pliers and compress them enough to insert them into the recoil spring front guide. Place the bolt on the slide and insert into the receiver. Press the shell stops to clear the slide. Once in the receiver, install the operating handle. Slide the gas rings over the magazine tube (in the correct order, see Chapter 16.) Place the barrel over the tube and then stand it upright. With one hand, retract the bolt and with the other press the barrel into place. Slide the forearm on and tighten the magazine cap.
If you do not keep your forearm tight, it will crack. With enough cracking, the shotgun can become hazardous to use. This forearm was laminated with fiberglass cloth like a boat hull to prevent future cracking.
Self-loading shotguns now commonly use the combustion gases to work the mechanism. Not all do, but most. (photo courtesy O.F. Mossberg & Sons.)
To insert the trigger assembly you will have to tilt it slightly towards the large lever, the slide lock. The lock has a dog-leg in it, and it must fit into a recess in the side of the receiver. Once the lock has slid in, press the assembly flush to the receiver and line the holes up. Press the assembly pins through.
This very grubby 1100 has the loading gate latch pin replaced with a solid pin with a large head. It also needs to be scrubbed.
If your 1100, 11–87 or 870 has a USA speed loader, you need a screwdriver to disassemble it, not just a pin pusher.
Stocks and forearms don't need much for general maintenance. The finish on your wood is one of three types, oil, plastic or everything else. If your wood has an oil finish, then you need the same or a compatible oil finish to touch-up the old finish as it wears thin. The plastic finishes, all variants of polyurethane, are wonderfully hard, smooth and shiny. If your stock gets scratched you can use rubbing compound If you have wood with a lacquer, varnish or shellac finish (anything that isn't oil or plastic) then Birchwood Casey Stock Sheen can remove light scratches and clean up a stock. It has one “drawback” and that is that it tends to increase the shine of a stock. A dull stock is only an oil finish, as any of the lacquer or, varnish or shellac finishes will have some shine to them. The Stock Sheen is an extremely fine rubbing compound and wax combination. The rubbing compound cleans crud and old stock finish off the surface, while the wax leaves a sheen behind. My friend John Simon used Birchwood Casey Stock Sheen and Conditioner first on an HK SL-7 of his. By the time he was done he couldn't leave it in the rack at the gun shop because every other hunter who came in wanted to buy it. If you want your stock to stay dull, then you must find out from the manufacturer what kind of oil finish it is, and use only that oil or oil mix to refresh the finish of your stock.
On 1100's with rusted action weights, a barrel hone will clean the rust out and get the gun working again.
This 1100 had the right-hand shell stop staked so many times the slot was worn out. By drilling and tapping it, the owner was able to get the shell stop to stay in place. However, the ugly factory has been raised greatly. The spring steel of the shell stop is so tough it took a carbide drill and four taps to get a threaded hole through the shell stop.
Plastic finishes require a bit more work. To clean up small scratches, use an extra-fine rubbing compound to blend the scratch. You are using up some of the thickness of the finish to do the blending, so do only as little as possible to make the scratch fade away. Then, an application of an automotive paste wax will finish hiding the scratch. The polyurethane on your stock is the same type used in many other paints, yours just happens to be clear and with no pigment. If you use your shotgun hard, it certainly would be worth the effort to experiment with a couple of different waxes to see which works best, lasts longest, and works with your particular formula of finish.
Wood doesn't need much, provided you haven't used your shotgun as an oar. The best investment for a working gun is spare wood, for replacement or practice at refinishing.