Читать книгу Gunsmithing: Shotguns - Patrick Sweeney - Страница 13
На сайте Литреса книга снята с продажи.
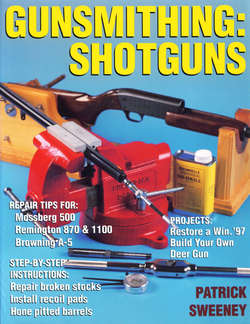
ОглавлениеCHAPTER 5 Stocks and Woodworking
Traditionally, shotguns do not have rear sights. This one is set up with an aperture rear for shooting slugs.
Unlike rifles and handguns, shotguns do not have a rear sight. Well, traditionally they don't. Shotguns intended for use with slugs for deer hunting, or for use as turkey guns or for self-defense shotguns quite often have rear sights. But traditionally, shotguns have only a bead front sight. The location of your aiming eye in relation to the rest of the shotgun is supposed to be enough of a rear sight. For an experienced shooter using a gun that fits him or that he is accustomed to, the practical result is good enough. If the shooter is new, or the shotgun just doesn't fit, the results can be frustrating. Many pages have been written waxing rhapsodic about the fit of this gun or that, and the fussy and ancient gunsmith who fits them. Some guns seem to seek out the targets themselves, and are already “on” the moment the butt touches your shoulder. A little secret…the British shooters who shoot so well, and who seem to bring down everything that flies or runs by, have lots of money. Enough money to afford custom-made shotguns, and enough money to hire professional instruction in how to use those shotguns.
You may not have as much money, but you can still benefit from their expenditures. If your eye rests in the same location over the stock each time you mount the shotgun, you can eventually learn (some learn quickly) where it hits in relation to the bead. If you're lucky, it will even hit right at the bead. If your eye does not rest in the same location, you cannot learn the “trick” because there isn't one. Many shooters assume that if they get a fitted shotgun their aiming problems will be over. Not true. The problem is not just the length of the stock, or its drop, cast-off and cheekpiece, but how you mount it. If each time you throw the shotgun to your shoulder you do so in a different position, fitting won't help. Consistently mounting the shotgun in the same place is as important as good fit.
We have a dilemma. For many shooters, they can't shoot well enough to have any fun, and if they aren't having fun they won't continue. If they don't continue until they have an established routine, they can't get a shotgun fitted properly. So, buying a fitted shotgun isn't a shortcut, and now they've spent even more money on a frustrating experience.…
Early stock designs left much to be desired. While attractive in a showy way, this stock cannot be at all comfortable to shoot.
One solution is your gun club. Ask to try other members' shotgun (while they watch, of course) to see if there is any model that is more comfortable than your present one and lets you hit more targets. You could even organize a short league, where everyone uses borrowed shotguns (with factory ammo, of course, I'm not loaning my shotgun to be used with someone elses' reloads…) and uses a different one each week. In short order everyone will have learned a great deal, and you may find the shotgun you need is soon to be the ex-shotgun of someone who also found a better hitter.
You must be consistent in your gun mount, or a fitted stock will be wasted time, effort and money. If one time you lift your head off the stock.…
If that shotgun is not for sale, you can buy one of the same model or you can modify your gun. By carefully noting the exact dimensions of the shotgun you were hitting so well with, you can duplicate it in your shotguns stock.
…and the next get a solid “cheekweld,” your point of aim will be different with each shot.
The ornate stocks on these wheel-lock pistols were high-tech for their age. Stock design follows the needs and style of the times.
One approach to fitting a shotgun is the “ugly stick” method. Once you have an idea of what stock dimensions you need, you modify a stock to those dimensions. You definitely want to start on a stock that is the plainest of wood. You can use your current stock or you can get a replacement and start working on that. Sand or rasp your stock down, or build it up with epoxy and plastic wood. Practice with it and keep track of your scores. Once you have a stock that fits you, send it off to Fred Wenig. He can duplicate your Frankenstein stock in a very attractive piece of wood, so you won't have to hide your practicegun under a tarp.
You can determine length of pull with a tape measure, but measuring drop is not so easy. To be accurate you need a gauge like this one from Brownells.
What are the critical dimensions of a stock?
Before you go modifying your stock, you have to have an understanding of what each part does. Yes, we all know “put the butt to your shoulder, keep both eyes open and follow through” but sometimes that isn't enough. There are five critical dimensions that matter for fit. They are:
Measure length of pull from the face of the trigger to the center of the buttplate or recoil pad.
(1) Length of pull; the distance from the trigger to the end of the stock at its center.
(2) Drop; the distance down from the axis of the bore, measured to the heel of the stock from the bore or rib.
(3) Comb height; the distance down from the bore where your cheek rests, also measured down from the top surface of the barrel or rib.
(4) Grip pitch; the curve of the grip right behind the trigger guard.
(5) Grip diameter; the thickness of the grip where your trigger finger hand grasps the stock.
Drop is the distance down from the rib or center-line of the bore.
The traditional method of measuring stock length is to compare it to the distance inside your forearm. As a basic method, it is not too bad.
Each critical dimension has one or more less-critical dimensions that can have a bad effect on your shooting if they are too far from “normal.”
Length of pull The length of the stock by itself does not determine where your aiming eye rests, but a stock that is too long for you also probably has too much drop. The excessive drop puts your aiming eye too low. A stock that is too long can also make gunhandling awkward even with correct technique. How long is long enough? The traditional measure is the “elbow” distance. If you can rest the butt of the stock in the crook of your elbow and comfortably grasp the grip, the stock is the correct length. What the elbow test does not tell you is how the gun fits when you are bundled up for the cold.
These two shotguns are lined up with their bores parallel. You can see that the nearer one has more drop. Given the same gun weight and cartridge, the nearer will kick harder.
Cast A minor dimension of length is cast. A stock with cast-off has the butt of the stock out from the centerline. A stock with cast-on has the butt inside from the centerline. Cast on or off depends on which side you shoot from. A stock cast-off for a right-handed shooter is obviously cast-on for a left-handed shooter. For most shooters, cast is not needed, but for some, like very muscular men or curvaceous women, it can be important. Cast in the stock brings the line of the bore to the line of your eye without you having to engage in contortions.
Drop This measurement matters because it effects your shooting style. If you shoot upright with your head erect, you need more drop. If you shoot leaned forward, with your head craned forward to the stock, you need less drop. If you square off to the target, you need less, and “bladed” you need more. A shooter who shoots a shotgun as if he was shooting a rifle at the target range will need a lot more drop in his stock compared to a shooter who faces the target as if it were a boxing opponent.
The Brownells gauge gives you a convenient hole to locate the trigger face against the gauge.
Pitch A minor dimension that goes along with drop is pitch. Pitch is the angle of the buttplate to the axis of the stock and bore. A stock with more pitch will slide up your shoulder under recoil, and strike your face harder than a stock with less pitch. Decrease pitch too much, and the shotgun could slide off your shoulder downwards under recoil, making follow-up shots difficult. A very muscular man has a problem. If he alters the stock to clear his chest (putting more pitch on the buttplate so the toe of the stock does not dig in) he will increase the jump of the stock into his face. The solution is cast-off to move the stock out to his shoulder, and off his chest.
Comb height The height of the comb determines the location of your aiming eye. The stock style known as Monte Carlo is an attempt to keep the eye up while getting enough drop in the stock for comfortable shooting. British stocks do not have Monte Carlo combs because the shooting style is to square off to the target as in boxing. A minor dimension of comb height is comb thickness. A comb that is too thick pushes your face away from the centerline, while a comb that is too thin encourages you to shoot with your head leaning over the stock. Shooting a shotgun with a thin comb hurts, because with your head over the stock, as the stock pivots up it has to push your head out of the way. Instead of sliding out of the way, your cheekbone gets whacked by the comb.
Grip angle The angle of the grip determines the angle your wrist takes upon grasping the shotgun. As the grip angle or curve becomes tighter, your wrist and shooting hand pivot the thumb back towards your face. The pivoting of your wrist changes the angle of the attached elbow. As your elbow moves lower, the “pocket” in your shoulder joint where the stock rests becomes less pronounced. If your elbow drops too much, the butt of the shotgun can move outwards under recoil, and you lose control of follow-up shots. A stock that has a tight curve that starts too close behind the trigger guard hurts your firing hand on recoil. The trigger guard can come back and whack your knuckle during recoil.
Grip thickness A grip that is too thick is difficult to grasp firmly, and can slide under recoil or during mounting of the gun. A stock that is at the maximum for your bare hand can become too large when you wear gloves.
All these dimensions change slightly according to how you are dressed. The poor duck or goose hunter, bundled up against typically goose-like weather, finds that he (or she) is not shooting the same shotgun used for practice. At least that's how it feels. And the gun certainly doesn't feel like the same shotgun that fit so well at the gun club or gun shop. What to do?
Checking for fit
Before you go cutting on a perfectly good stock you should determine if it fits or not. And if it does not fit, determine where it needs to be changed and by how much. The trial-and-error gun club method can work quite well, but you need an experienced observer to spot your shot cloud. Unless the observer can see your misses and where they are in relation to the clay pigeon, you won't know which direction you are missing in. I once spent a very frustrating afternoon trying to get a shotgun and load dialed on. My observer was having a heck of a time. The range was snow-covered, and there was a heavy and low overcast. He couldn't spot any of my shots, and I finally had to use trial and error to determine how much lead I needed for that load.
To check fit you need a stationary target. Otherwise the number of variables becomes too great to handle. The fitting check is called the Churchill method, after the British gunsmith who developed it. On a target stand or pattern board, mark your aiming spot with a dot of a couple of inches in diameter. Stand exactly 16 yards from the target. The distance is important, as it determines the correction you will make on your stock. Use a tape measure if you have to, but get it exactly 16 yards.
Face your target in your shooting position, but with the gun in low ready. When you feel ready, raise the shotgun and shoot without aiming. Don't rush the shot, but don't take your time and aim. You will have a hit somewhere near (we hope) the dot. Lower your shotgun and assume the ready position. On your second shot, forget where the first hit was. You do not want to “correct” your hit on the second shot, you want the shotgun to come up and fire the moment you are comfortable. If you slow down and aim, you defeat the intent of the exercise.
When I was first exposed to the Churchill method, it was explained to the as “a method of checking gun fit.” It is also a method of checking the consistency of your presentation. If you fire five times and the patterns are all in the same spot, you are either aiming or consistent. If your five patterns are all over the place, your presentation is not consistent, and altering the stock will not make any difference in your shooting.
Trap guns and slug guns can come from the factory with a raised comb. The higher comb gets your eye higher to raise the trap pattern, or place your eye in line with the scope of a slug gun.
You can add drop to your stock if it is a Mossberg. These spacers go between the stock and receiver.
To measure pitch, place the butt flat against the ground and the top edge of the receiver against a vertical surface such as a wall or door jamb.
With the spacers in place, the angle between the stock and receiver changes. More drop makes it more comfortable for some shooters, less for others.
A rubber cheekpiece not only softens the impact to your face, but raises the pattern against the bead.
Grip curve has an effect on how you hold your elbow. The Remington stock, above, will force your firing hand elbow lower than the Browning stock, below.
The grip diameter can be good or bad for your shooting. If too large, it is awkward and tiring. If too small, there is no place to comfortably place your hand, and trigger control suffers.
If, for one shot, the shooter mounts the stock out on the shoulder…
… and the next time mounts it in the shoulder pocket, his pattern will be delivered to a different place. Consistency matters.
In the Churchill method, start with the gun down, a measured 16 yards from the target.
Assuming you have a consistent presentation, then we can work to alter the stock. Plot the centers of each of the five patterns, and come up with an average of their centers.
The Churchill method gives you a change to work with. For each inch the common center is from the dot, you need to correct the stock by 1/16 of an inch. In fitting a stock to strike the dot, the two important dimensions are comb height and width. Changing these two will move the pattern. Changing other dimensions alter comfort in shooting, but have little effect on the location of the impact of the shot relative to the dot.
Length of pull
Length is the easiest dimension of a stock to measure, and probably the one that matters the least. Changes in stock length do not correspond to the Churchill 1:1/16 ratio. So long as you can get the stock up without snagging your clothes, it is short enough. If it keeps your thumb from bumping your nose, it is long enough. Somewhere in the middle there is a length right for you, but that “right” length can span more than an inch of different stock lengths. Shotgun stocks are too long for many shooters. A longer stock feels good at the gun shop, and the proportions look right. Get out in the duck blind with layers of wool and wind-proof synthetic on, and that stock will be at least an inch longer than it was in the gun shop. A stock that is too long makes it harder to reach the trigger and forearm, makes mounting it to your shoulder clumsier, and moves your eye farther down the stock. Not only is the shotgun harder to use, but with your eye farther back, the gun will now deliver its pattern to a different spot than it did when you tested in shirtsleeves. When you practiced at the range, you wore a shirt, or a lightly-padded shooting jacket. With all the winter clothes on, you aren't hitting where you were then. It may not make much of a difference, but all the small changes add up. Test it as you will use it. If you are going to use your shotgun bundled up like and Eskimo, then that is how you should fit-test it.
Bring the gun up and fire without aiming. You want the gun to feel good, but not spend time guiding the bead.
To shorten a too-long stock requires the right equipment. You have to cut the stock the amount you want without chipping the wood, and re-fit either the old pad or a new one. At the very least you need a belt sander or a disk sander secured to a bench. A radial or table saw with a carbide-tipped blade is a big help. If you don't have either, or access to them, then shortening a stock will be an ordeal. (Sorry, but there is no way to sugar-coat it.) Shortening your stock may be something you want to take to a professional gunsmith. Shortening a synthetic stock is sometimes not possible at all. Many synthetic stocks are hollow, with the recoil pad screws fastened to threaded metal inserts in the plastic. If you cut the plastic, you cut off the inserts, and now have no place to attach the recoil pad to. The Remington 1100 is another troublesome stock. The recoil spring tube and its nut are close to the end of the stock. You can't shorten the wood so much that the tube sticks out. For those who wish to forge on with their wood stocks, and those curious as to how it is done, here goes:
A stock that has been shortened can be made long again by attaching new wood to it. If you can, save the old, cut-off piece, as the grain will match better than this.
Remove the pad or buttplate. If you are going to shorten your stock but retain the same thickness pad, you mark the stock for the amount you will shorten it. If you are going to shorten your stock while at the same time adding a thicker pad, you have to mark the stock a distance equal to the amount you want the stock shorter, plus the difference between the two pads. As an example, if you want to shorten a stock by an inch but retain the same ¼-inch-thick pad, mark the stock one inch shorter. If you want the stock to be an inch shorter after you have added a 1-inch pad, mark the stock an 1-¾ inches shorter. (One inch shorter, plus the ¾-inch difference between the old pad and new.) Stand the shotgun on the floor or bench with the top of the receiver touching the wall. If you want to keep the same pitch in your stock, then you will mark the stock parallel to the floor or bench. Place a strip of masking tape along the stock parallel to the floor, along the amount you want to remove. With a ruler, measure the distance you want cut and mark the tape at the heel and toe. While you have the shotgun standing up, measure the distance of the muzzle from the wall. Save the measurement, as it is your pitch check.
Youth model shotguns like the lower 870 commonly have shorter stocks than standard shotguns.
Take the stock off the receiver and with a straightedge draw a line between the two marks. Draw first with pencil, and then with a felt-tip marker. A moment here for pad dimensions. Your pad should follow the contours of the stock. The farther back it goes, the larger the pad must get. To determine the dimensions of a pad can be very easy. If you are shortening a stock by 1 inch to install a 1-inch pad, then the new pad must be slightly larger (butt to heel dimension) than the wood you are removing. If you are shortening a stock more than the pad thickness (taking 2 inches of wood off and placing a 1-inch pad on, for example) then measure the stock at the line where the new pad will be, and use that as your pad dimension.
In any case, you don't want a pad smaller than the stock. However, if you order a pad too large, you may have other troubles. If the pad is solid, you'll be forever (and knee-deep in rubber grindings) trimming the pad down. Pachmayr Decelerator pads are hollow inside. If you start with one that is too large, by the time you grind it down the hollow may be so large that the side walls of pad offer no support. Every time you fire it, the walls quickly collapse and offer little in the way of padding. Properly fitted, the Decelerator is one of the softest pads around. Improperly fitted, any pad can bring tears to your eyes when you shoot. When you order your pad from Brownells, order one just larger than the width and height of your stock.
With the recoil pads flat and the receivers touching the wall, you can see the difference in pitch between these two guns.
Most of the time, when you shorten a stock, the old pad becomes useless. Rarely will you be able to re-install the old pad, unless you are shortening a stock only ¼ inch or so. As the stock gets shorter, the bottom edge (the toe) gets closer to the top (the heel), yet the screw spacing on the old pad does not change. If you shorten the stock an inch or more, the old screw hole ends up too close to the toe. A screw hole too close to the toe is an invitation for the wood to chip if it is set down too hard. Also, when you drill the hole deeper for the screw to be re-inserted, you may drill out through the belly of the stock. You cannot relocate the screw in the pad.
To cut the wood you need one of the following: a fine-tooth saw and a miter box wide enough to accommodate the stock; a radial-arm saw with a carbide-tipped blade; or a table saw with the same kind of blade. You do not want to be using a regular carpenter's saw. The carpenter's saw will probably chip the edges of the stock, making your job more difficult.
With the miter box, adjust the stop so the line falls right under the blade. Check the fit of the stock in the box. You want to he able to clamp the stock in place on each side, and cut right on the line. Clamp the stock in the box, and saw with just enough force to cut the wood, but not so much you splinter the edges of the cut. Once you have cut through the side of the stock top to bottom, turn the stock over and start cutting from the other side. Wood is less likely to splinter if you cut down into it than down out of it. Splintered edges are very difficult to repair, and you are better off spending time avoiding them than spending time fixing them.
The power saws make the job much easier. With a high rpm and slow feed, the carbide tipped blade will cut cleanly enough that you won't have to sand, and they will not chip the wood.
After cutting, reinstall the stock on the receiver and check pitch. If the pitch has changed, you will have to re-cut the stock to get the pitch right.
Remove the stock from the receiver and clamp it in a padded vise. Use a straightedge to draw a pencil line down the centerline of the butt. On the back of the Pachmayr pad container you'll see the hole spacing and pad dimensions. Take the distance from the top of the pad to the top screw hole, subtract .150″ and draw a line across your centerline. Measure down the distance between the screws and mark another crossline. By subtracting .150″ you ensure that the pad will be higher than the heel and give you pad to remove and blend with the stock. Starting with these rough measurements, we will establish the exact centerline of the stock. Measure the width of the stock along each screw location line. Divide the measurement by two, and measure and mark your centered screw location.
Sometimes you can use the old heel screw location to secure your new pad. Rarely can you use the old toe location. For both screws, check the newly measured location to the old screw hole. When you drill your new screw holes, the wood that remains between the holes must be greater than the hole diameter. If there is not enough wood you must plug the old holes before you can drill the new ones. Drill the old hole out with a ¼-inch drill bit. Mix up some Brownells Acra 20, and smear it on the hole and plug. The plug can be a dowel from the hardware store, or a cut-down duck plug from a Mossberg 500. In the gunshop, we used to sell a large number of Mossberg shotguns for defense use. The last thing someone buying an eight-shot shotgun needs or wants is a duck plug. I ended up with a drawer full of them, and used them for plugging stock holes under pads. Press the dowel into place and tap it home with a hammer. Leave the stock clamped vertically until the epoxy has set.
Once set, cut the dowel as flush as you can and sand the stock smooth. If you haven't already, remove the masking tape. Use a compatible stock finish to seal the end of the wood. If you don't seal the stock, the edges of your stock will gradually warp from the moisture that enters from the bare surface.
Drill your new pad holes. To cut the pad for the screws, press a drift punch into the screw hole from the back side, and use a razor blade to slit the pad. Place a drop of synthetic lubricant on the slit and press the screw through. Rub the threads of the screw with bar soap. Wipe a little of the same synthetic lubricant on your screwdriver blade and turn the screws tight into the stock. You've finished the clean part.
Place three layers of masking tape on the stock flush with the pad. Use a felt-tip marker to draw a zig-zag pattern on the top layer of tape. To grind the pad flush you'll need a belt or disk sander. For your own protection you'll need glasses or goggles, a breathing mask, hearing protection and a bright light. The rest of the room would benefit from a Shop-Vac and drop cloths. Spread the cloths over your bench, gun rack, shelves and anything else that would be a hassle to vacuum. If you can, attach the Shop-Vac to the sander. Stand the light over the grinder or sander so you will have a good view of the work.
Pad grinding is noisy, messy, smelly work that you must do perfectly. You do not want to be interrupted while grinding. If you approach the task with a heavy hand you can “kiss” the stock with the sanding belt, and spend a couple of hours touching up the wood you marked. Even if you are installing a pad in an unfinished stock, hitting the stock with the belt can create marks that you'll spend extra time sanding out. Be patient. Stand to the side of the belt sander, with the light on the other side. Hold the stock by the pistol grip and near the pad. While holding the near surface of the stock parallel to the running belt, press the pad against the belt. To prevent flat spots, roll the pad against the belt, following the curve of the side of the stock. You do not want to press too hard, as you will heat the pad and the belt might slip. Gradually grind down the pad, following the curve of the stock, until you are scuffing the top layer of masking tape. Once the top layer is evenly scuffed, remove it. Mark the second layer with the felt tip pen and sand until it is scuffed. Repeat on the third layer.
With the sides sanded down, place a strip of tape over each of the heel and toe and blend them into the curve of the sides.
Turn off the belt sander. Clean up the shop. Sweep and vacuum the floors, take the drop cloths out and shake them off, brush off your clothes and maybe even take a shower. When doing pads commercially, I preferred to do them one day a week, and wait until after lunch. I would prep all the pad jobs ahead of time, and then spend an afternoon grinding. That way I had to put up with rubber dust one afternoon a week, instead of several days a week during the busy season.
The last part of fitting the pad is to remove the belt sander marks from the pad. Even with a light touch and steady movement, you'll have flat spots. Sit down in a comfortable chair with a large second cut file. Hold the stock in your lap (you'll definitely want an apron on for this) with your left hand. Place your thumb against the stock at the edge of the pad. Place the safe edge of the file against your thumb, and using your thumb as a stop, file the pad smooth. Once smooth and blended all around, a fingertip's worth of linseed oil will darken and even the appearance of the pad edge. If you are using a Kick Eeze sorbothane pad and want the bright synthetic look, then don't apply the linseed oil.
If you scratch your stock, or want to refinish it, you may need stock stains. With them you can make the scratch color match the rest. If refinishing, you can make the stock look the way you want it to.
Reinstall the stock on the receiver. If you have to remove the pad to reinstall the stock, shift the pad around until it is flush all around when you tighten it. The screw holes in the pad have enough room in them that the pad might shift a little bit when tightening, and you want it perfect.
The location of the cheekpiece determines where the pattern hits. Rarely will you be faced with the problem of the cheekpiece being too high. I ran into it a few times, and in all cases the shooter had a large, round face. The size and shape of their face positioned the stock too far away from and down from their eye, and they could not squeeze in tight enough to see the bead properly. The patterns would strike high of the mark. Sometimes too high even for a trap gun.
Even if you do not mar your stock installing a recoil pad, keeping it looking good when you use it may take some effort. The only other choice is to not use the gun. What good is that?
Drop is the distance between the top of the stock and the line of the rib or bore. The rib is easier to measure, but you can calculate the bore-drop by measuring from the rib to the chamber center.
To tell if you see the bead properly, we have to define “proper.” Proper is a repeatable view of the bead, where the bead gives you a predictable location for the pattern. Proper view depends on pattern impact, and to pattern your shotgun you'll have to go to Chapter Six. Take the empty shotgun and place the buttplate to your shoulder in your shooting position. Look down the rib or barrel. Do you see just the bead, sitting on top of the visual image of the receiver? Good. Is the bead straight down the center of the rib or barrel? Also good. If you see large amounts of the rib or barrel, or your view to the bead is not down the centerline, your cheek-piece may be too high or thick. Since we are not interested in surgically altering your face, we have to change the stock.
We can see here that this stock has 1-¾ inches of drop, a straight stock by many standards. Half a century ago, many stocks would have had more than 2-½ inches of drop.
Trap is more of un aiming game than other shotgun games are. However, given a comb that is too high (or a face that is too round) we would also see the patterns striking the pattern board too high on the Churchill method.
Before you go altering your handsome stock, practice on another. I have worked on a large number of Mossberg shotguns through the years. Partly because they are quite popular in Michigan, and could be obtained cheaply. Also, spare parts are easy to obtain, so if I screwed up a part I could quickly replace it. To alter your stock you'll need cabinet makers pattern rasps from Brownells, sandpaper and stock finish that matches the current finish and a china pencil. Place the shotgun to your shoulder and hold it there with your left hand. With your right hand reach up with the china pencil and mark the comb just in front of and behind your cheek. With the rasp start removing wood from the comb between the china pencil marks. Periodically check your progress by looking at the bead. Stop when you can comfortably get your face to the centerline of the bore. Your stock will have a dished section in the comb. Blend the top of the comb over into a smooth curve. If you leave a sharp edge, it will come up during recoil and gouge your cheekbone. Rasp forward from the dished section to blend the contours of the stock. Again, if you leave the forward part of the dished section in place, it can strike your cheekbone during recoil. Sand the rasped area smooth and refinish.
Many shooters will have the opposite problem, that is the stock is too low, and they cannot get support for their face. A low comb is a particular problem when putting a rifled barrel on a shotgun for slug shooting. The iron sights are always higher than the bead, and a scope is higher yet. If you try to aim with your cheek off the stock, you make the job harder, and you let the stock get a running start before it hits your face.
The easiest way to build up a comb is to add a pad. While temporary, even a “temporary” fix can work for years. Brownells carries two different rubber cheekpiece pads, called “Cheekeeze” and “Cheek-Eez.” Available in different thicknesses, it is a simple matter to peel the backing off and apply a pad to your stock. But how thick? The Churchill method will give you a starting point. Once on, the pad is messy to remove. If you guess wrong on the thickness, you may be in for a lot of work. Instead of using the difficult-to-remove rubber pad, use the widest masking tape you can find. At the range, apply layers of masking tape to the thickness the Churchill method indicates. To determine the proper number of layers of tape, use your dial calipers to measure the thickness of a card. Apply the tape to the card until it reaches the proper thickness you need. Count the layers of tape, and apply that many to your stock. Pattern test it. Then shoot your shotgun on clay pigeons and see if you notice an improvement. You should, as the stock is better-dimensioned for you. Since the pad will compress when your face is pressed against it where the tape did not, you should get the next thicker rubber pad to put on your shotgun.
Strip the tape off your stock and clean the cheek and comb with rubbing alcohol to get the old adhesive and general dirt and oil off the stock. Press the new pad against the stock and smooth it out.
The Sorbothane recoil pad and rubber cheek-piece on this 12-gauge help to tame the recoil and make shooting more fun.
Checkering is a pattern of grooves cut into the wood to give a surer gripping surface. By crossing another pattern of grooves over the first, you create diamonds or pyramids in the wood. Well-done checkering enhances the appearance and utility of a stock. Over time, the wood can become worn, reducing the grip of the checkering, or the grooves can be filled with dirt and old stock finish. The dirt can be scrubbed out, but worn checkering, or grooves filled with stock finish have to be re-checkered.
Checkering tools come in two types, guided and unguided. The guided tools use the groove next to the one you are filing as the guide, keeping your lines parallel. Unguided tools do not use an adjacent groove, and are used to cut into corners and borders, and to start that first groove.
One type of unguided checkering tool is the Jointer. You use it on a new job to re-straighten a line that has started to wander because of the grain of the wood, a change in humidity, or the price of e-stocks in Singapore. You also use it to establish your lines across a stock repair that went through a checkered section. Another unguided tool is a bent needle file. The curved file lets you focus your efforts on a short section of your diamonds.