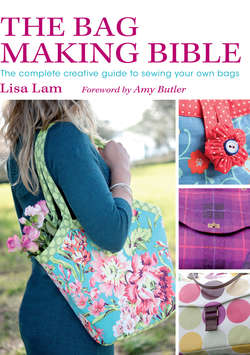
Читать книгу The Bag Making Bible - Lisa Lam - Страница 8
На сайте Литреса книга снята с продажи.
ОглавлениеAnatomy of a Bag
All bag designs vary in size, shape and purpose, but the bag part names are always the same, and the techniques used to create the various parts will be similar across different bag designs too. Bags can be as simple or as feature-packed as you want them to be. Have fun working through the techniques and projects in this book and you’ll soon gain the confidence to design and make your own gorgeous arm-candy.
First impressions
• Closure – when it comes to closures there are so many options that there is a whole chapter of this book devoted to them – see Closures. Your bag can be closed with several different types of zip insertions, a magnetic or invisible magnetic snap or a twist lock. A flap such as this one may also secure the bag closed, or be additional to a zip or snap closure. Mix and match closures for maximum versatility and functionality.
• Gusset – the design of the gusset often determines the capacity of your bag, as well as its silhouette. Gussets can be straight, have pleats or bellows, or even be adjustable using snaps or ties (see Gussets).
• Strap/handle – there are so many ways to carry your bag off in style that there is a whole chapter covering straps and handles – see Handles and Straps. Choose handles that match the look and usability of your bag. Make your own or use convenient ready-made handles (see Ready-Made Handles).
• Strap attachment – consider how the strap or handle is attached to your bag. There are numerous options, from stitching the strap directly onto the bag, to using fabric handle loops with metal rings (see Open-End Straps and Closed-End Straps), essential if making an adjustable sliding strap. Some straps can be attached permanently or others can be made with trigger hooks to allow them to be detached, either to transform the bag into a clutch, or to swap the handle for a different one to give a new look.
Just around the corner
• Bag bottom – most bags beyond the simplest book bag will have some kind of bottom. Some will have a soft unstructured bottom, while others need a rigid, structured kind. If it’s the latter, you may also want to add protective bag feet (see The Multi-Tasking Tote, step 13). The right bottom can make all the difference to how a bag will sit on a surface and how it looks when full.
• Bag back – remember to give the back of your bag consideration too; if it’s rubbing against your body as you carry it, then it needs to be streamlined and free of anything such as hardware or trimmings that will catch on your clothes or be damaged themselves. However it can also the perfect place for a secret, secure and easy-access slimline pocket, maybe flush and zippered (see Flush Zip Pocket).
What’s inside counts
• The inside of the bag – this is equally important as the outside and needs to be given just as much care and attention. The lining is a chance to add lots of design features, from fabric choice (see Choosing Fabrics) to the use of pockets and dividers for more organization (see Flush Zip Pocket and Zip Partition Pocket). Joining the bag exterior to the lining is a fundamental part of the bag construction process, and there are two different methods to try, depending on the design of your bag (see Inserting Linings: Drop-In Method and Inserting Linings: Pull Through and Turn Out Method).